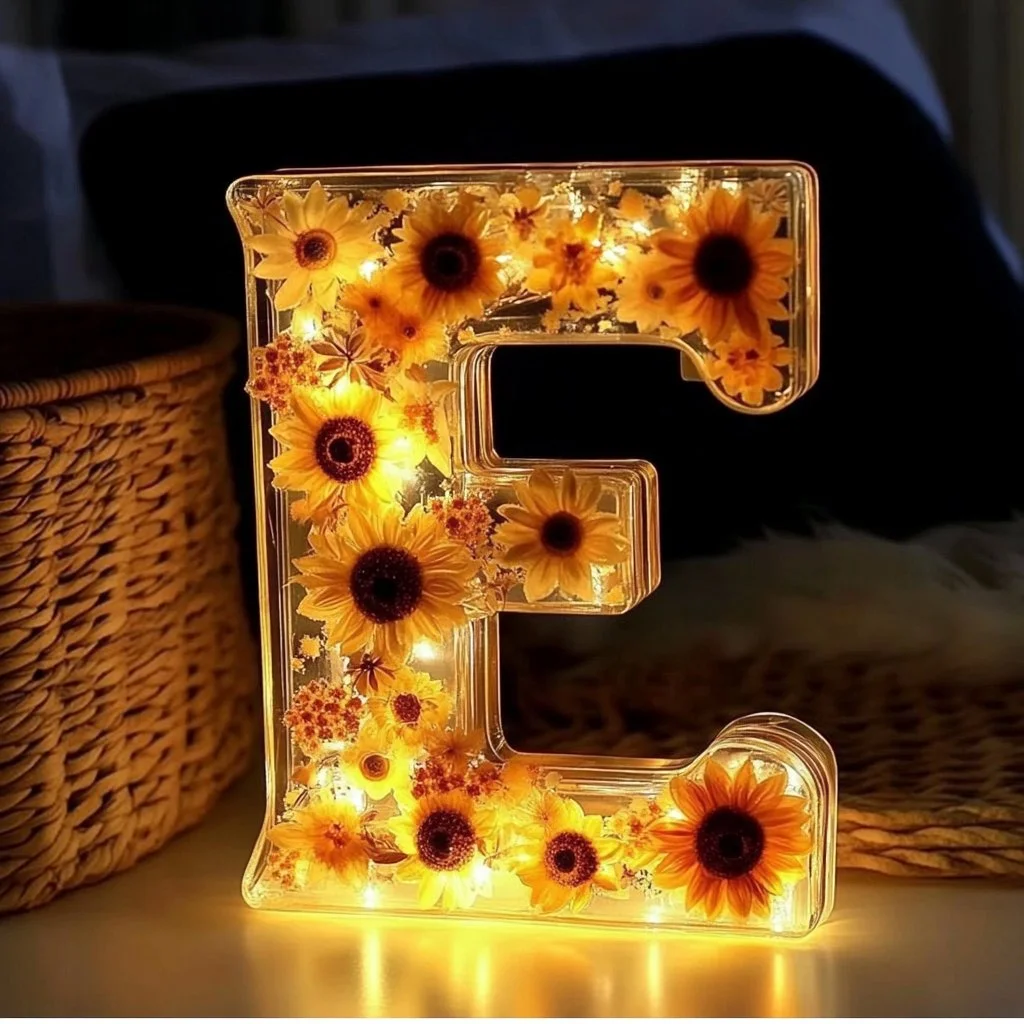
Creating your own floral resin night light is a rewarding and creative project that adds a touch of elegance and warmth to any space. This unique craft combines the beauty of dried flowers with the modern aesthetic of resin art, resulting in a beautiful, functional piece that can illuminate your room. Ditch the ordinary night lights and embrace this personalized approach, which allows you to express your style and creativity. Whether you’re looking to brighten up your own space or create a thoughtful gift for someone special, this endeavor will certainly delight your senses. Let’s dive into why you’ll love making your very own floral resin night light!
Why You’ll Love This Floral Resin Night Light:
- Unique Charm: Each night light is one-of-a-kind, showcasing different floral arrangements.
- Customizable: Personalize with your favorite flowers or colors for a tailored look.
- Functional Art: Combines beauty and practicality, providing gentle lighting.
- Simple Process: Suitable for beginners, with accessible materials and instructions.
- Perfect Gift: A thoughtful handmade present for friends or loved ones.
Materials:
- Clear epoxy resin
- Hardener
- Silicone mold (for night light shape)
- Dried flowers (your choice)
- Mixing cups
- Wooden stir sticks
- Gloves
- Safety mask (for ventilation)
- LED tea light candle
Full Step-by-Step:
1. Prepare Your Workspace
- Choose a well-ventilated area and lay down a protective covering to catch any spills.
2. Mix the Resin
- In a mixing cup, combine the epoxy resin and hardener according to package instructions.
- Stir slowly with a wooden stick to avoid bubbles.
3. Arrange the Dried Flowers
- Place the dried flowers in the silicone mold; arrange them creatively for an attractive design.
4. Pour the Resin
- Carefully pour the mixed resin over the flowers in the mold, ensuring they are fully submerged.
- Take time to avoid bubbles by gently tapping the side of the mold.
5. Let It Cure
- Allow the resin to cure as per the manufacturer’s instructions, typically 24–48 hours.
6. Demold the Night Light
- Once cured, gently peel the silicone mold away from the resin.
7. Insert the LED Tea Light
- Place an LED tea light candle in the center of your floral resin piece, and enjoy the gentle glow!
Tips & Variations:
- Floral Combinations: Experiment with various combinations of dried flowers or use colored resin for added effects.
- Seasonal Themes: Change the flowers based on the seasons for a fresh look year-round.
- Add Glitter: Sprinkle in some biodegradable glitter for a magical touch.
- Different Molds: Try using different shapes or sizes for various lighting effects.
Frequently Asked Questions:
Q1: Can I use fresh flowers instead of dried flowers?
A1: Fresh flowers contain moisture, which can cause problems with curing resin. It’s best to stick with dried flowers.
Q2: How do I prevent bubbles in the resin?
A2: Stir the resin slowly, and pour from a distance to minimize bubbles. Using a heat gun or torch can also pop surface bubbles.
Q3: What if my resin doesn’t cure properly?
A3: Ensure you followed the mixing ratios correctly and allow adequate curing time. If it remains sticky, it might need more time to harden.
Q4: How do I clean my tools after use?
A4: Wipe tools with a paper towel while the resin is still wet. Use rubbing alcohol for any residue left afterward.
Suggestions:
- Pair your floral resin night light with homemade bath bombs for a lovely self-care gift set.
- Create a matching set of coasters using similar floral resin techniques.
- Consider making night lights featuring seasonal blooms for holiday decor.
Final Thoughts
This floral resin night light is not just a craft, but an expression of creativity and thoughtfulness. We hope you enjoy making this project as much as we do! Don’t forget to share your creations or any variations you tried in the comments below. We’d love to see your versions!
Print
Floral Resin Night Light
- Total Time: 3615 minutes
- Yield: 1 night light
- Diet: N/A
Description
Create a beautiful and functional floral resin night light that showcases your creativity while providing gentle illumination.
Ingredients
- Clear epoxy resin
- Hardener
- Silicone mold (for night light shape)
- Dried flowers (your choice)
- Mixing cups
- Wooden stir sticks
- Gloves
- Safety mask (for ventilation)
- LED tea light candle
Instructions
- Prepare Your Workspace: Choose a well-ventilated area and lay down a protective covering to catch any spills.
- Mix the Resin: In a mixing cup, combine the epoxy resin and hardener according to package instructions and stir slowly.
- Arrange the Dried Flowers: Place the dried flowers in the silicone mold, arranging them creatively.
- Pour the Resin: Carefully pour the mixed resin over the flowers, ensuring they are fully submerged and avoiding bubbles.
- Let It Cure: Allow the resin to cure as per the manufacturer’s instructions, typically 24–48 hours.
- Demold the Night Light: Once cured, gently peel the silicone mold away from the resin.
- Insert the LED Tea Light: Place an LED tea light candle in the center of your floral resin piece and enjoy the gentle glow.
Notes
Experiment with various flower combinations and consider adding glitter for a magical touch.
- Prep Time: 15 minutes
- Cook Time: 3600 minutes
- Category: Craft
- Method: Crafting
- Cuisine: DIY
Nutrition
- Serving Size: 1 project
- Calories: N/A
- Sugar: N/A
- Sodium: N/A
- Fat: N/A
- Saturated Fat: N/A
- Unsaturated Fat: N/A
- Trans Fat: N/A
- Carbohydrates: N/A
- Fiber: N/A
- Protein: N/A
- Cholesterol: N/A

