- Introduction
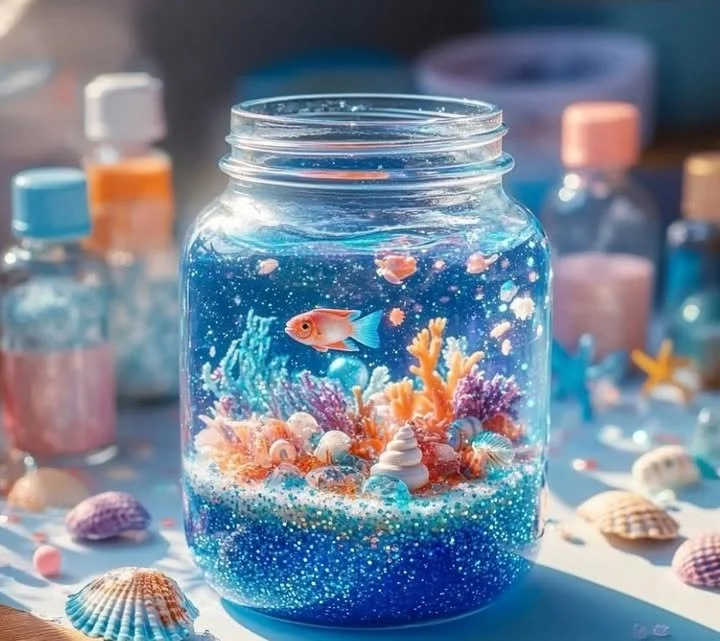
Creating a DIY Under the Sea Snow Globe is a fun, imaginative project that brings the magic of the ocean into your home. Perfect for kids and adults alike, this charming craft encapsulates a slice of underwater beauty, complete with shimmering fins and gentle waves. Not only does it serve as a delightful decorative piece, but it also offers an engaging way to spend quality time with friends or family. Plus, you can customize it to reflect your unique style or personal experiences. With a few simple materials and easy-to-follow instructions, you’ll be able to craft a mesmerizing snow globe that captures the spirit of marine life. So gather your supplies, unleash your creativity, and dive into this enchanting DIY adventure!
- Why You’ll Love This DIY Under the Sea Snow Globe
- Creativity Unleashed: Personalize your snow globe with your favorite sea creatures and colors.
- Captivating Decoration: A beautiful piece that can brighten up any room or be a perfect gift.
- Engaging Activity: Enjoy a fun hands-on project that’s great for family bonding or kids’ crafts.
- Easy to Make: With simple materials and instructions, this project is suitable for all skill levels.
- Educational Opportunity: Teach children about marine life while crafting something special.
- Materials
- Clear glass jar with a lid (e.g., mason jar)
- Glycerin (available at pharmacies)
- Distilled water
- Glitter or fake snow
- Small plastic sea creatures (e.g., fish, starfish)
- Waterproof glue
- Decorative elements (e.g., sand, shells, colored stones)
- Optional: food coloring
- Step-by-Step Instructions
Prepare the Jar
- Start by cleaning your glass jar thoroughly to ensure clarity.
- Dry it completely before moving on to the next step.
Glue the Decorative Elements
- Choose your favorite sea creatures and decorative elements.
- Use waterproof glue to securely attach them to the inside of the jar lid. Allow the glue to dry completely.
Mix the Solution
- In a bowl, combine approximately 1 cup of distilled water with 2 tablespoons of glycerin.
- Stir the mixture until combined. This will help your “snow” fall slowly.
Add the Glitter
- Sprinkle glitter or fake snow into the same jar.
- The more you add, the snowier your globe will look! Just make sure not to overfill.
Assemble the Snow Globe
- Carefully pour the glycerin and water mixture into the jar over the glitter and decorations.
- Seal the jar tightly with the lid, ensuring no leaks.
Test and Admire
- Flip your globe upside down and shake gently. Watch the glitter dance and settle!
- Make any adjustments if needed, and enjoy your underwater creation!
- Tips & Variations
- Custom Creatures: Swap out plastic sea creatures for colorful beads or even small toys that represent sea life to match your theme.
- Colorful Water: Add a drop or two of food coloring to the water for a fun, tinted effect.
- Different Sizes: Use smaller jars for mini snow globes or larger jars for grand displays.
- Seasonal Themes: Change the glitter or decorations according to the seasons or holidays.
- Frequently Asked Questions
Q1: Can I use tap water instead of distilled water?
A1: Distilled water is recommended to prevent cloudiness, but if you don’t have it, tap water can work in a pinch.
Q2: How do I prevent leaks?
A2: Make sure the lid is tightly sealed and consider adding a layer of waterproof glue around the rim before sealing to minimize leaks.
Q3: How long will my snow globe last?
A3: When sealed properly, your snow globe can last indefinitely. Just keep it away from direct sunlight to prevent fading.
Q4: What can I use instead of glycerin?
A4: Corn syrup can be used as an alternative, but it may result in a different ‘snow’ effect.
- Serving Suggestions or Pairings
- Perfect Pairing: Enjoy a cozy crafting day with a cup of warm tea or hot cocoa.
- Display with Style: Place your snow globe alongside a themed ocean-inspired centerpiece or other DIY crafts to create a complete under-the-sea display.
- Final Thoughts
Crafting your DIY Under the Sea Snow Globe is not only a rewarding experience but also a beautiful way to capture the essence of the ocean right in your home. Once you’ve made your own, I’d love to see your versions, so feel free to leave a comment or share your creations! Dive into your creative side and let the soothing beauty of the sea inspire you. Happy crafting!
Print
DIY Under the Sea Snow Globe
- Total Time: 15 minutes
- Yield: 1 snow globe
Description
Create a charming DIY Under the Sea Snow Globe that captures the magic of the ocean with customizable sea creatures and glitter.
Ingredients
- Clear glass jar with a lid (e.g., mason jar)
- Glycerin
- Distilled water
- Glitter or fake snow
- Small plastic sea creatures (e.g., fish, starfish)
- Waterproof glue
- Decorative elements (e.g., sand, shells, colored stones)
- Optional: food coloring
Instructions
- Start by cleaning your glass jar thoroughly to ensure clarity. Dry it completely before moving on to the next step.
- Choose your favorite sea creatures and decorative elements. Use waterproof glue to securely attach them to the inside of the jar lid. Allow the glue to dry completely.
- In a bowl, combine approximately 1 cup of distilled water with 2 tablespoons of glycerin. Stir the mixture until combined. This will help your “snow” fall slowly.
- Sprinkle glitter or fake snow into the same jar. The more you add, the snowier your globe will look! Just make sure not to overfill.
- Carefully pour the glycerin and water mixture into the jar over the glitter and decorations. Seal the jar tightly with the lid, ensuring no leaks.
- Flip your globe upside down and shake gently. Watch the glitter dance and settle! Make any adjustments if needed, and enjoy your underwater creation!
Notes
Custom creatures can be added to represent your theme, and food coloring can be used for a fun effect. Ensure the lid is tightly sealed to prevent leaks.
- Prep Time: 15 minutes
- Category: Crafts
- Method: DIY
Nutrition
- Serving Size: 1 globe

