

This post contains Amazon affiliate links. As an Amazon Associate I earn from qualifying purchases.
Late afternoon light rests across the yarn basket while the hook makes its small, steady pull through each loop. As the DIY Twine Pumpkin 🎃 🎈 grows, it gathers a little weight in your hands, the kind of weight that settles nicely against your palm during a quiet evening on the couch. This soft, stuffed pumpkin uses simple rounds, gentle shaping, and a few calm pauses along the way. You can make one while coffee cools beside you or while rain taps at the windows, letting the repeated stitches give your hands somewhere peaceful to go.
Why DIY Twine Pumpkin 🎃 🎈 Is So Soothing to Crochet
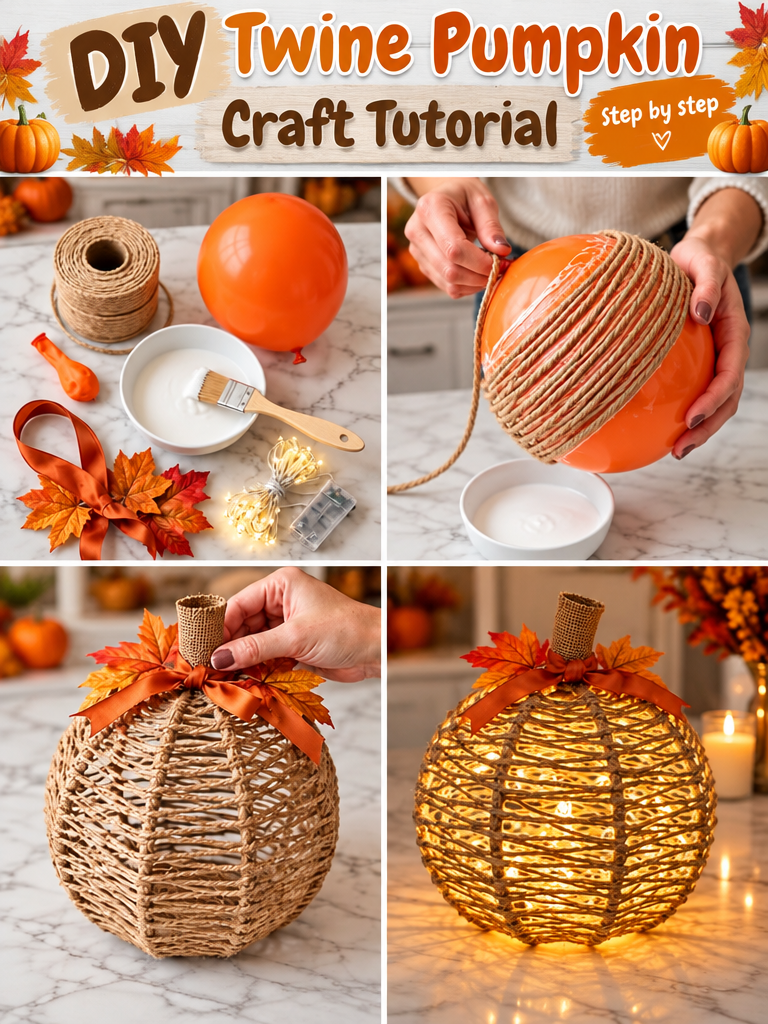
This pumpkin has a small, friendly rhythm. You work in rounds, watch the fabric curl into a shallow cup, then add increases until the shape opens and becomes softly round. After that, decreases bring the sides inward again. The project gives you a clear path without asking you to hurry.
I like the way the first rows feel a little springy between my fingers. They curl until the fabric grows heavy enough to settle, and then the pumpkin begins to feel less like a strip of crochet and more like a real object. That change usually happens during an ordinary moment, perhaps with a mug on the table and the yarn basket tucked beside the armchair.
The texture also makes this a good project for a rainy evening or a cool fall afternoon. The stitches are easy to see, but they still create enough surface interest to keep your attention gently nearby. Many people find crocheting calming because the hands repeat a familiar movement while the mind has room to quiet down.
You will shape the pumpkin with straightforward increases and decreases rather than complicated colorwork. That makes it a comfortable seasonal project for your own home, a porch basket, or a small handmade gift. The finished piece feels useful without needing to be perfect.
How DIY Twine Pumpkin 🎃 🎈 Comes Together
The pumpkin begins as a flat circle worked in rounds of half double crochet. A half double crochet, or hdc, starts like a double crochet but pulls through all three loops at once, giving you a stitch that is taller than single crochet and a little denser than double crochet. That balance suits a stuffed decoration because the fabric grows steadily without leaving large openings.
You will begin with a magic ring, also called a magic circle. It is an adjustable loop that lets you close the center neatly. If that loop feels fiddly, you can chain 3 and join with a slip stitch, or sl st, to make a small ring instead.
This pattern uses US crochet terms. UK readers often find these posts too, and the same word can mean a different stitch there, so keep that note nearby while you work. In this pattern, a chain is ch, a slip stitch is sl st, and a half double crochet is hdc.
The pumpkin uses a stitch multiple of 2 for its repeat after the first round. You will work increases in the early rounds, plain half double crochet rounds through the middle, and decreases near the top. Allow about two to three evenings, or roughly three to five hours of relaxed making, depending on your pace and how often you pause.
Pattern at a Glance
Here are the main details to keep beside your yarn bowl.
- Skill level: Confident beginner
- Finished size: about 6 inches tall by 7 inches wide (15 cm tall by 18 cm wide)
- Gauge: 14 half double crochet and 10 rounds measure 4 inches (10 cm)
- Yarn: worsted weight (weight 4, medium), about 220 total yards from two 100 g skeins
- Hook size: H-8 (5.0 mm)
- Other supplies: polyester fiberfill, yarn needle, scissors, stitch marker, and tape measure
- Stitch multiple: 2 stitches
- Estimated time: three to five hours, spread across two to three evenings
Gathering Your Materials
- Worsted weight (weight 4, medium) acrylic yarn, about 220 total yards from two 100 g skeins, or about 7.8 ounces (220 g) altogether. A 100 g skein often gives about 170 yards. Choose a soft, smooth yarn in pumpkin orange, cream, muted green, or any color that suits your room. An easy-to-find acrylic option is Red Heart, though any similar yarn works.
- H-8 (5.0 mm) crochet hook. A half size up or down is fine depending on your tension, though changing the hook can change the finished size and the density of the stuffing cover.
- Polyester fiberfill, about 3 to 4 ounces (85 to 115 g), or enough to make a firm but springy pumpkin.
- Yarn needle with a blunt tip, for sewing the top closed, shaping the ribs, and weaving in the ends.
- Scissors, with comfortable handles if your hands tire easily.
- Stitch marker, optional, for marking the first stitch of each round.
- Tape measure, for checking gauge and the finished size.
- A short length of matching yarn for shaping the ribs, about 36 inches (91 cm), cut from the same yarn or a strong coordinating shade.
- A small cinnamon stick, fabric leaf, or wooden stem, optional and only for decoration. A crocheted stem also works.
Gauge is worth the twenty minutes here. Make a small swatch with 14 half double crochet and 10 rounds, then measure the center rather than the edge. If your swatch comes out larger than 4 inches (10 cm), try a smaller hook; if it comes out smaller, try a larger hook. The gauge affects the pumpkin’s final size and how much stuffing shows through.
You can safely substitute another worsted weight yarn with a similar yardage and fiber. Cotton will make a firmer, less stretchy pumpkin, while wool may create a softer fabric that changes after blocking. Acrylic keeps this decoration affordable and easy to wash, but acrylic can melt under a hot iron, so use cold blocking or steam from a distance only. Check the label and keep the leftover band with your yarn so you know the dye lot later.
Step by Step
- Difficulty and repeat: This is a confident beginner pattern with a 2-stitch multiple. You will use US terms, including chain, slip stitch, half double crochet, increase, decrease, right side, and wrong side. The right side, or RS, faces outward; the wrong side, or WS, faces inward.
- Make a magic ring, also called a magic circle. Chain 1, then work 8 half double crochet, or hdc, into the ring. Pull the yarn tail gently to close the center, then join to the first hdc with a slip stitch. You have 8 stitches.
- Round 2: Chain 1, which does not count as a stitch. Work 2 hdc in each stitch around. This is an increase because you place two stitches into one stitch. Join with a slip stitch to the first hdc for 16 stitches.
- Round 3: Chain 1. Work 1 hdc in the first stitch, then 2 hdc in the next stitch. Repeat around, joining with a slip stitch. You now have 24 stitches. The circle may cup slightly, which is exactly what you want at this stage.
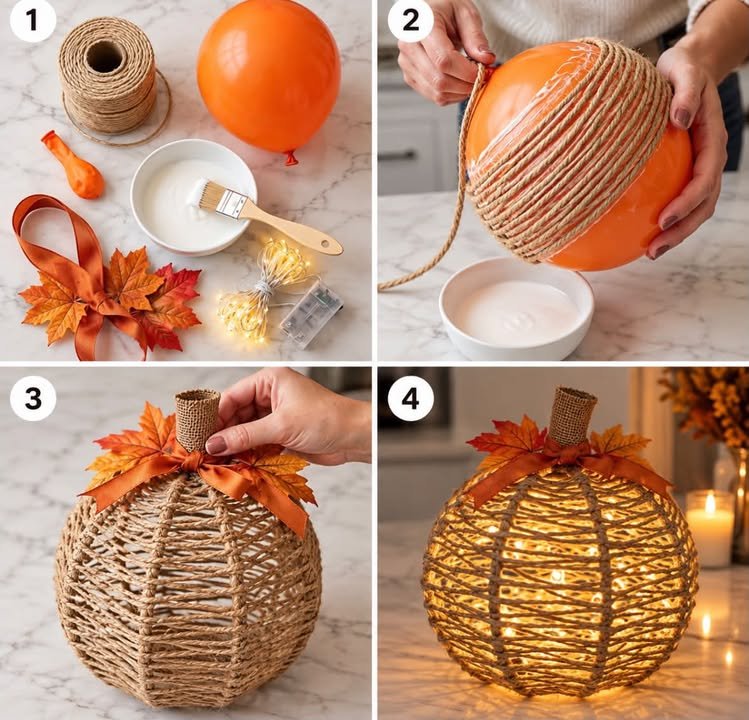
- Round 4: Chain 1. Work 1 hdc in each of the next 2 stitches, then 2 hdc in the next stitch. Repeat this sequence around and join with a slip stitch. Your count is 32 stitches.
- Round 5: Chain 1. Work 1 hdc in each stitch around, placing the hook under both loops at the top of each stitch. Join with a slip stitch for 32 stitches. The yarn should slide through your fingers without a hard tug.
- Rounds 6 through 9: Repeat Round 5 four times. Each round has 32 hdc, so the count remains 32 stitches at the end of every round. Place a stitch marker in the first stitch if you lose track of where a round begins.
- Round 10: Chain 1. Work 1 hdc in each of the next 2 stitches, then make one decrease over the next 2 stitches. To decrease, yarn over, insert the hook into the next stitch and pull up a loop, then insert the hook into the following stitch and pull up another loop. Yarn over and pull through all four loops. Repeat around. Join with a slip stitch for 24 stitches.
- Round 11: Chain 1. Work 1 hdc in the first stitch, then decrease over the next 2 stitches. Repeat around and join with a slip stitch for 16 stitches. The opening will begin to narrow, so check the inside for even tension before adding stuffing.
- Pause for stuffing. Add small handfuls of polyester fiberfill through the opening, working it into the sides first. Fill until the pumpkin feels rounded and springy, not hard. Overstuffing can stretch the stitches and make the shape look more like a ball than a pumpkin.
- Round 12: Chain 1. Decrease over the next 2 stitches around, joining with a slip stitch at the end for 8 stitches. Add a little more stuffing if the center still looks hollow. Keep the top gently rounded rather than packed tight.
- Finish the top by cutting the yarn and leaving a tail about 12 inches (30 cm) long. Thread the tail onto your yarn needle and weave it through the front loops only, or FLO, of the remaining 8 stitches. Pull the opening closed, then secure the yarn on the inside. FLO means you use only the loop closest to you at the top of each stitch.
- For simple rib shaping, thread the second length of yarn onto your needle. Insert it from the bottom center to the top center, then wrap it around the outside of the pumpkin and return through the bottom. Pull gently until the pumpkin forms a soft groove. Repeat three or four times around the pumpkin, spacing the ribs evenly. Do not pull sharply, or the yarn may cut into the fabric.
- Weave in the ends by passing the needle through several inside stitches in different directions. Trim the excess yarn close to the fabric. If your acrylic pumpkin needs a little settling, shape it with your hands and block cold by arranging it in place while it dries. Do not press acrylic with a hot iron.
When you check your work, count the stitches at the end of every changing round: 8, 16, 24, 32, 32, 32, 32, 32, 24, 16, and 8. If a mistake shows up several rows later, set the pumpkin down and look for the first place where the edge stops lining up. Pull back one round at a time by gently removing the hook and unraveling the stitches. A missed stitch often creates a small dip at the edge, while an extra stitch can make the round ruffle. Both are fixable.
Where This Piece Works Best
The finished DIY Twine Pumpkin 🎃 🎈 fits comfortably in a shallow bowl, a woven basket, or the corner of a living room shelf. It adds a small seasonal note without taking over the room. I like one beside the armchair with a book and a half-finished project nearby, where the soft shape feels connected to the making that created it.
You can also set several pumpkins together in different shades. Cream, rust, olive, and warm brown make a quiet fall group, while pale peach and dusty rose keep the display softer. A short crocheted stem or a real cinnamon stick gives each pumpkin a little character without making the project fiddly.
For gifting, tuck one into a small basket with tea, a candle, or a handmade dishcloth. It makes a thoughtful hostess gift for a fall dinner or a small addition to a holiday parcel. If you give it to a home with young children, secure every decorative part firmly and skip loose buttons or long tails. Small parts and long loose stitches are unsafe for children under three.
Washing, Drying, Storing
This version uses worsted weight acrylic, so you can spot clean it with a damp cloth or wash it on a gentle cycle with cold water. Place it in a mesh bag if you machine wash it, then reshape the pumpkin and dry it flat. Never hang it wet because the stuffing can pull the crochet out of shape.
For a deeper clean, use a small amount of mild detergent and rinse thoroughly. Press the pumpkin between clean towels to remove extra water, then let it dry flat with the ribs arranged evenly. Acrylic usually holds its shape well, but do not use a hot iron because acrylic fibers can melt. If you need to relax a stubborn area, use steam from a distance and keep the iron away from the yarn.
Store the pumpkin in a breathable basket or box rather than a sealed plastic bag. Keep it folded only if the shape allows, though this small stuffed piece usually stores best sitting upright with other decorations. Avoid direct sun for long periods, since bright light can fade the yarn over time.
If you make another pumpkin with wool, remember that untreated wool can felt in warm water and agitation, while superwash wool tolerates a washing machine more easily. Wool also benefits from gentle blocking, but acrylic should be blocked cold. Keep leftover yarn with its label so you have the dye lot if you need a matching repair later.
Small Ways to Make It Your Own
You can make the pumpkin larger by using a thicker yarn and a larger hook, such as an I-9 (5.5 mm) or J-10 (6.0 mm). The fabric will grow more quickly, but the stitches may become looser and the stuffing may peek through, so check the fabric as you work. A thinner yarn creates a smaller, more delicate pumpkin with a firmer drape.
Try two colors if you enjoy a quiet color change. Work the first four rounds in a warm orange, switch to cream for the middle rounds, and return to orange for the decreases. Change colors at the slip stitch join and carry the unused yarn neatly inside, or cut it and weave in the ends later.
You could replace the half double crochet with single crochet, or sc, if you want a denser fabric. Single crochet is shorter and creates smaller openings, so the pumpkin may feel firmer and take a little longer. Double crochet, or dc, would make the fabric taller and more open, giving you a softer drape but requiring careful stuffing.
Resize the pumpkin by keeping the increase pattern in the same rhythm and stopping at a different stitch count. For a smaller piece, stop after 24 stitches and work fewer plain rounds. For a wider one, continue the increase rounds by 8 stitches at a time, keeping the stitch multiple even. Adjust the stuffing to match the new size.
A simple border is another gentle option. After the final round, work single crochet evenly around the opening before closing it, or add a short chain stem in brown yarn. You can also make a set for a gift, with one large pumpkin and two smaller companions in related colors. Keep any added pieces snug and secure, especially if the pumpkins will sit where children or pets can reach them.
Frequently Asked Questions About DIY Twine Pumpkin 🎃 🎈
Can I use a different hook size for this pumpkin?
Yes, you can use a different hook size, but it will change the finished size and fabric density. Use H-8 (5.0 mm) for the stated gauge of 14 half double crochet and 10 rounds in 4 inches (10 cm). Go down half a size if your stitches are loose, or up half a size if your fabric feels stiff and tight.
What yarn can I substitute for the worsted weight acrylic?
You can substitute another worsted weight, weight 4, medium yarn with a similar yardage. Cotton creates a firmer pumpkin, while wool gives a softer hand and may change after washing. Check your gauge before committing. Avoid a very loosely spun yarn because its fibers can catch on the hook and make the stuffed shape look uneven.
What should I do if I find a mistake several rows later?
Pull back calmly to the first round where the stitch count changes. Remove the hook, unravel one round, and place the hook back into the live loop. Compare the edge with the written count, then continue. If the mistake only changes the shape slightly and the pumpkin will be heavily textured, you may choose to leave it, but correct missing stitches before the decrease rounds.
Is this pumpkin suitable for a beginner?
Yes, this project suits a confident beginner who knows how to make a chain, half double crochet, slip stitch, increase, and decrease. The magic ring and final rib shaping may feel fiddly at first, but neither step needs speed. If the magic ring frustrates you, make a small chain ring instead and work into that opening.
How long does this crochet pumpkin take to make?
Plan on about three to five hours, spread across two to three evenings. Your time will depend on your tension, how often you pause, and whether you add rib shaping. The first few rounds may take longer while you find the rhythm. My hands usually warm up after the first ten minutes, and the later rounds move more easily.
Does this pattern use US or UK crochet terms?
This pattern uses US crochet terms. In this version, hdc means half double crochet, sc means single crochet, dc means double crochet, ch means chain, and sl st means slip stitch. UK patterns use some of these words differently, so check the terminology before substituting instructions from another source.
Take the Time You Need
Let the pumpkin take the time it takes. A stitch can be loosened, a round can be pulled back, and a slightly uneven rib can still look wonderfully handmade once the piece rests in your palm. Keep your hook moving at a pace that leaves room for the quiet parts of the day, and let this small shape become what it needs to be.
Print
DIY Twine Pumpkin
- Total Time: 300 minutes
Description
Create a charming stuffed pumpkin using simple crochet techniques that provide a soothing crafting experience.
Materials
- Worsted weight (weight 4, medium) acrylic yarn, about 220 total yards from two 100 g skeins
- H-8 (5.0 mm) crochet hook
- Polyester fiberfill, about 3 to 4 ounces (85 to 115 g)
- Yarn needle with a blunt tip
- Scissors
- Stitch marker, optional
- Tape measure
- Short length of matching yarn for shaping the ribs, about 36 inches (91 cm)
- Small cinnamon stick, fabric leaf, or wooden stem, optional for decoration
Instructions
- Make a magic ring, chain 1, then work 8 half double crochet (hdc) into the ring. Pull the yarn tail gently to close the center, then join to the first hdc with a slip stitch. You have 8 stitches.
- Round 2: Chain 1, work 2 hdc in each stitch around. Join with a slip stitch for 16 stitches.
- Round 3: Chain 1, work 1 hdc in the first stitch, then 2 hdc in the next stitch. Repeat around. Join with a slip stitch. You now have 24 stitches.
- Round 4: Chain 1, work 1 hdc in each of the next 2 stitches, then 2 hdc in the next stitch. Repeat this sequence around and join with a slip stitch. Your count is 32 stitches.
- Round 5: Chain 1, work 1 hdc in each stitch around. Join with a slip stitch for 32 stitches.
- Rounds 6 through 9: Repeat Round 5 four times. Each round has 32 hdc.
- Round 10: Chain 1, work 1 hdc in each of the next 2 stitches, then decrease over the next 2 stitches. Join with a slip stitch for 24 stitches.
- Round 11: Chain 1, work 1 hdc in the first stitch, then decrease over the next 2 stitches. Join with a slip stitch for 16 stitches.
- Pause for stuffing. Add small handfuls of polyester fiberfill through the opening until the pumpkin feels rounded and springy.
- Round 12: Chain 1, decrease over the next 2 stitches around, joining with a slip stitch at the end for 8 stitches.
- Finish the top by cutting the yarn and leaving a tail about 12 inches (30 cm) long. Thread the tail onto your yarn needle and weave it through the front loops only (FLO) of the remaining 8 stitches. Pull the opening closed, then secure the yarn on the inside.
- For rib shaping, thread the second length of yarn onto your needle. Insert from the bottom center to the top center, wrap around the outside of the pumpkin, and return through the bottom. Repeat around the pumpkin to form ribs evenly.
Notes
For gifting, ensure any decorative parts are securely attached and avoid loose components if the pumpkin will be around young children.