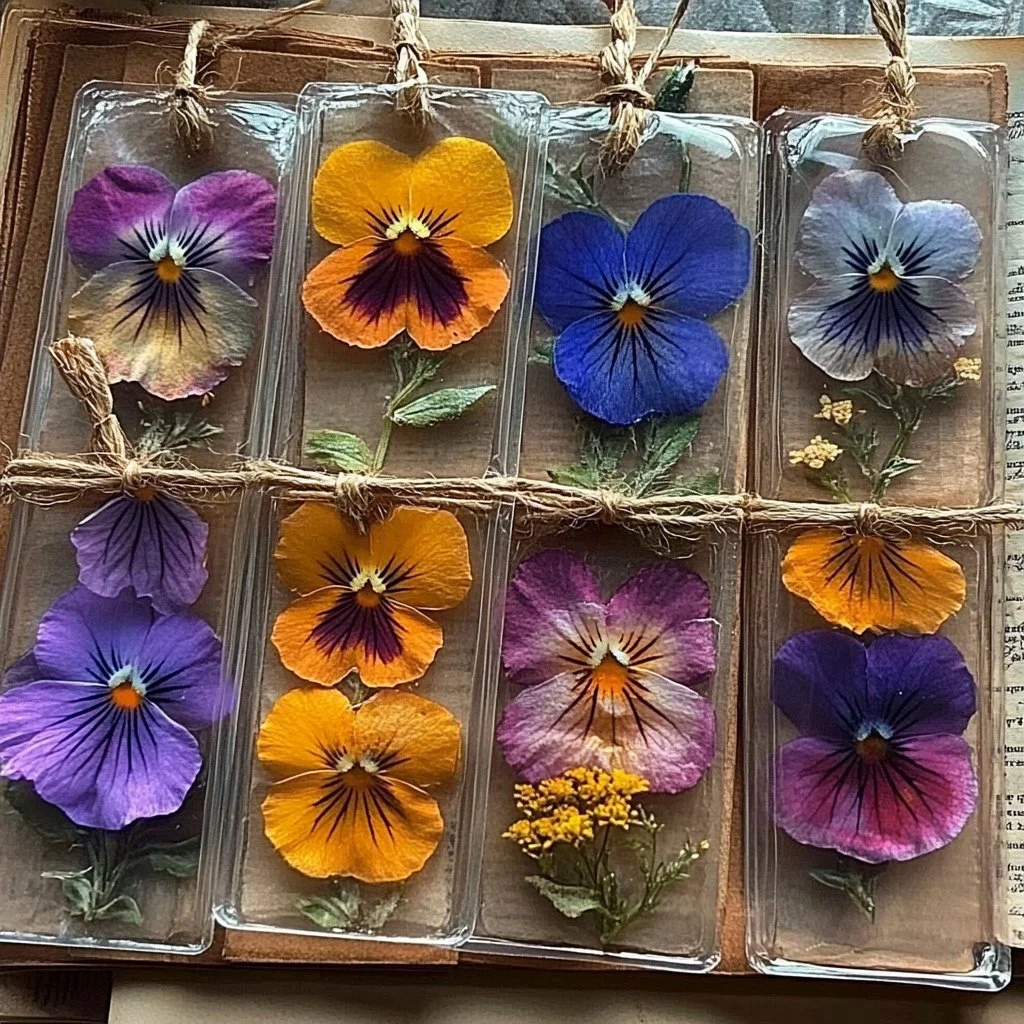
Creating your own pressed flower bookmarks is a delightful and creative way to preserve the beauty of nature while crafting something unique and functional. These exquisite bookmarks can capture the essence of your favorite blooms, allowing you to carry a piece of the outdoors with you as you read. Not only do they serve a practical purpose, but they also make fantastic gifts for friends and family or a charming addition to your own book collection. Each bookmark reflects your personal style and the seasonal flowers you adore, making them a truly special keepsake. With just a few simple steps, you can transform fresh flowers into stunning bookmarks that will brighten each reading session.
Why You’ll Love This DIY Pressed Flower Bookmarks
- Personal Touch: Each bookmark is uniquely handcrafted, allowing you to express your personality and style.
- Eco-Friendly: Use blooms from your garden or gathered in nature, promoting sustainability.
- Great Gift Idea: Ideal for book lovers, these bookmarks make heartfelt gifts for any occasion.
- Creative Outlet: Engaging in this DIY project allows for relaxation and creativity.
- Multi-Purpose: Beyond bookmarks, they can be used in crafts, cards, or even as home décor.
Materials
- Fresh flowers (small, flat varieties like violets, daisies, or lavender)
- Heavy books or a flower press
- Parchment paper or absorbent paper
- Cardstock or thick paper for the bookmark base
- Scissors
- Clear-drying glue
- Ribbon or twine (optional)
- Mod Podge or clear sealant (optional)
Step-by-Step Instructions
1. Prepare the Flowers
- Select Flowers: Choose a variety of colorful flowers that are flat and small.
- Trim Stems: Cut off excess stems, leaving only the bloom.
- Dry Flowers: Place the flowers between parchment paper and put them in a heavy book or flower press. Leave them for about 1-2 weeks.
2. Create the Bookmark Base
- Cut Cardstock: Once flowers are dry, cut your cardstock into the desired bookmark size (typically 2 inches by 6 inches).
- Design Layout: Arrange your pressed flowers on the cardstock before gluing.
3. Glue the Flowers
- Apply Glue: Use clear-drying glue to adhere the pressed flowers to your cardstock.
- Press Down: Make sure to gently press the flowers to avoid air bubbles.
4. Seal the Bookmark (Optional)
- Use Mod Podge: If desired, apply a thin layer of Mod Podge over the bookmark to protect and seal it.
- Allow to Dry: Let the bookmark dry thoroughly.
5. Add Finishing Touches
- Optional Ribbon: Tie a piece of ribbon or twine at the top for added decoration.
- Show Off Your Creation: Your beautiful pressed flower bookmark is now ready to be used or given as a gift!
Tips & Variations
- Flowers to Use: Experiment with various flowers such as pansies, ferns, or herbs like rosemary for fragrance.
- Size Matters: Adjust the size of your bookmarks based on the flowers you choose.
- Decorative Paper: You can use colored or patterned cardstock for a more vibrant background.
- Personal Messages: Consider writing a quote or poem on the bookmark for a personalized touch.
Frequently Asked Questions
1. Can I use thicker flowers for pressing?
Yes, but thicker flowers may require a longer drying time. It’s best to select flatter varieties for easy pressing.
2. How long will the bookmarks last?
When properly pressed and sealed, these bookmarks can last for years, though they should be kept away from direct sunlight to prevent fading.
3. What if the flowers lose their color?
Some flowers naturally fade over time. To minimize this, use flowers that retain color well and seal with Mod Podge.
4. Can I use artificial flowers?
While real flowers provide a more authentic look, you can certainly use high-quality artificial flowers for durable, long-lasting bookmarks.
Serving Suggestions or Pairings
To enhance your reading experience, pair your pressed flower bookmarks with a soothing cup of herbal tea, a cozy blanket for added comfort, or a refreshing fruit-infused water to keep you hydrated while you delve into your next adventure.
Final Thoughts
These DIY pressed flower bookmarks not only add beauty to your reading materials but also allow you to express your creativity in a fun and rewarding way. We hope you enjoy making them as much as you’ll love using them. We’d love to hear your experiences and see your unique designs! Feel free to share your creations or drop a comment below!
Print
DIY Pressed Flower Bookmarks
- Total Time: 10 minutes
- Yield: 1 bookmark
- Diet: N/A
Description
Create beautiful and personal bookmarks using pressed flowers, perfect for gifts or keeping your place while reading.
Ingredients
- Fresh flowers (small, flat varieties like violets, daisies, or lavender)
- Heavy books or a flower press
- Parchment paper or absorbent paper
- Cardstock or thick paper for the bookmark base
- Scissors
- Clear-drying glue
- Ribbon or twine (optional)
- Mod Podge or clear sealant (optional)
Instructions
- Select flowers that are small and flat.
- Trim stems, leaving only the bloom.
- Place flowers between parchment paper and place them in a heavy book or flower press for 1-2 weeks to dry.
- Cut cardstock into the desired bookmark size (typically 2 inches by 6 inches).
- Arrange dried flowers on cardstock before gluing.
- Use clear-drying glue to adhere pressed flowers to cardstock and press down gently.
- Optionally, apply a thin layer of Mod Podge to protect and seal the bookmark.
- Allow the bookmark to dry thoroughly.
- Optionally, tie a ribbon or twine at the top for decoration.
- Your beautiful pressed flower bookmark is now ready to use or give as a gift!
Notes
Keep bookmarks away from direct sunlight to prevent fading, and consider using flowers that maintain their color well.
- Prep Time: 10 minutes
- Cook Time: 1 minute
- Category: Craft
- Method: Crafting
- Cuisine: N/A
Nutrition
- Serving Size: 1 bookmark
- Calories: 0
- Sugar: 0g
- Sodium: 0mg
- Fat: 0g
- Saturated Fat: 0g
- Unsaturated Fat: 0g
- Trans Fat: 0g
- Carbohydrates: 0g
- Fiber: 0g
- Protein: 0g
- Cholesterol: 0mg

