- Introduction
Creating your own paper bag lanterns is not only an enjoyable craft but also a fantastic way to add ambiance to any space. These DIY lanterns are an exquisite blend of simplicity and elegance, allowing you to customize them to match any occasion, whether it’s a festive celebration, a cozy evening, or a backyard gathering. With the gentle glow of candlelight seeping through the paper bags, you’ll instantly transform any environment into a warm, inviting space. Plus, this project is easy enough for crafters of all skill levels, meaning everyone can join in on the fun. So gather your materials, let your creativity flow, and light up your world with these stunning paper bag lanterns!
- Why You’ll Love This DIY Paper Bag Lanterns
- Cost-Effective: Use inexpensive materials you might already have at home.
- Customizable: Personalize them with colors, patterns, or designs that reflect your style.
- Easy to Make: Simple instructions make it a great project for all ages.
- Eco-Friendly: Repurpose materials and reduce waste while making beautiful decor.
- Versatile: Perfect for any occasion, from parties to everyday home decoration.
- Materials
- Brown paper bags (small to medium size)
- Battery-operated tea lights or candles
- Scissors
- Stencils or cut-out designs (optional)
- Decorative items (e.g., ribbon, paint, or markers)
- Tape or glue (optional)
- Step-by-Step Instructions
Prepare the Bags
- Flatten each paper bag and cut them to your desired height if necessary.
- For an artistic touch, you can fold the top edge of the bag down slightly.
Create Designs
- Use scissors to cut shapes or patterns into the sides of the bags.
- Alternatively, place stencils on the bags and trace around them with a pencil before cutting.
Add Decorative Touches
- Embellish the bags with markers, paints, or ribbons to enhance aesthetics.
- Let any paint or glue dry completely before proceeding.
Insert the Lights
- Place the battery-operated tea lights or candles inside each bag.
- Ensure the light source is securely positioned to prevent tipping.
Arrange Your Lanterns
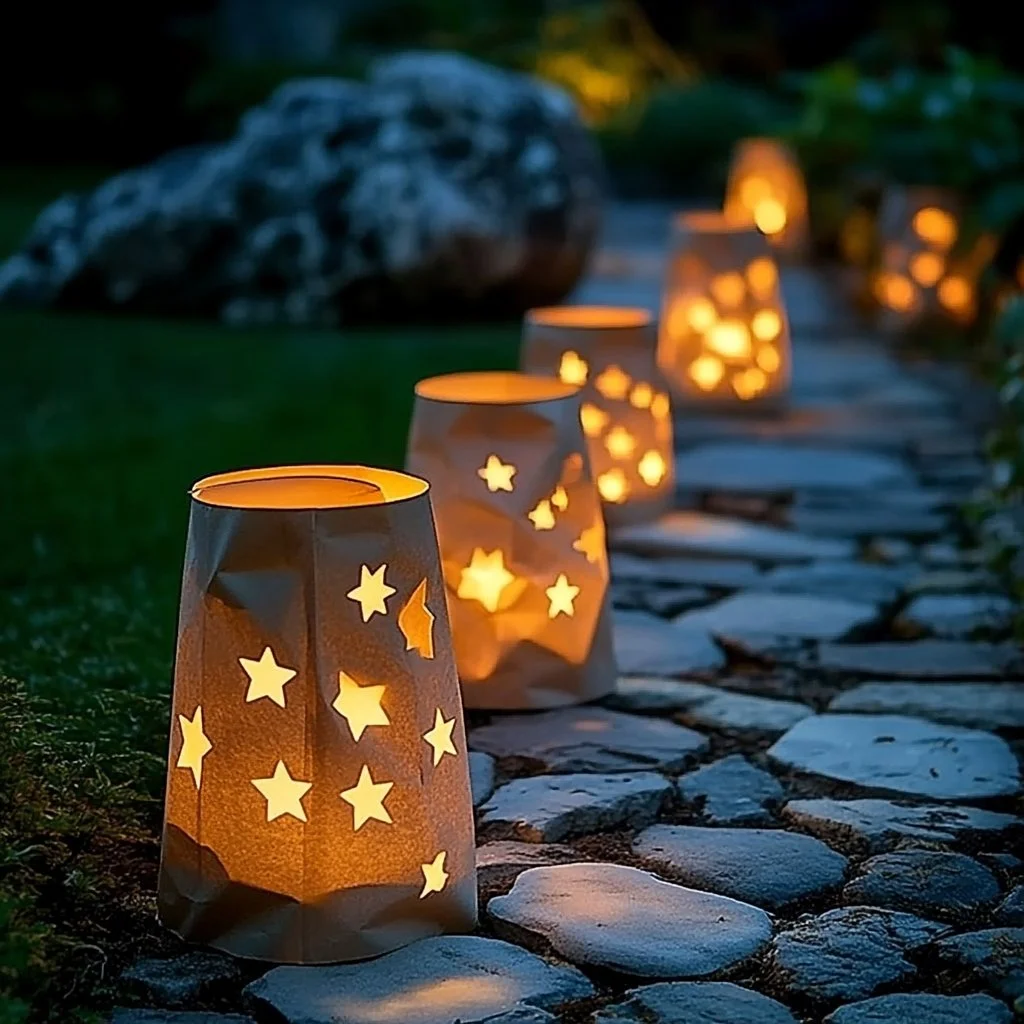
- Set the lanterns in your desired arrangement—along a pathway, on tables, or grouped in clusters for a stunning visual impact.
- Tips & Variations
- Color Choices: Use colored or patterned paper bags for a unique look.
- Event Themes: Adjust the designs to fit seasonal themes or special events like Halloween or Valentine’s Day.
- Scented Options: Add a few drops of essential oils to the inside of the bags for a delightful aroma when lit.
- Frequently Asked Questions
Q: Can I use real candles instead of battery-operated ones?
A: While you can use real candles, this is not recommended as the paper can easily catch fire.
Q: How long do these lanterns last?
A: The lanterns can be reused several times if handled gently and kept dry.
Q: Can I use other types of bags?
A: Yes, any sturdy paper bags can work, but thinner bags may not hold up as well.
Q: What if my designs go wrong?
A: Simply turn the bag around and start fresh or use tape to cover mistakes creatively!
-
Serving Suggestions or Pairings
Imagine sipping on a warm cup of cider, enjoying delicious appetizers, or pairing these lanterns with twinkling string lights for a magical setup. Consider serving a variety of finger foods including sliders or cheese platters that complement the mood these lanterns will create. -
Final Thoughts
Paper bag lanterns are a delightful way to enhance any setting while showcasing your creative skills. They offer an opportunity for fun and expression, making them a valuable addition to your crafting repertoire. We encourage you to share pictures of your finished lanterns or leave a comment with your experiences. Light up your space with your unique creations and enjoy the warm glow!

DIY Paper Bag Lanterns
- Total Time: 10 minutes
- Yield: Varies based on number of bags used
Description
Create stunning paper bag lanterns to enhance any setting with a warm glow.
Ingredients
- Brown paper bags (small to medium size)
- Battery-operated tea lights or candles
- Scissors
- Stencils or cut-out designs (optional)
- Decorative items (e.g., ribbon, paint, or markers)
- Tape or glue (optional)
Instructions
- Flatten each paper bag and cut them to your desired height if necessary. Fold the top edge down slightly for an artistic touch.
- Use scissors to cut shapes or patterns into the sides of the bags or place stencils on them and trace around them with a pencil before cutting.
- Embellish the bags with markers, paints, or ribbons to enhance aesthetics and let any paint or glue dry completely.
- Place the battery-operated tea lights or candles inside each bag, ensuring they are securely positioned.
- Arrange the lanterns in your desired setup—along pathways, on tables, or grouped in clusters for visual impact.
Notes
For a unique look, use colored or patterned paper bags and adjust designs for seasonal themes.
- Prep Time: 10 minutes
- Cook Time: 0 minutes
- Category: Crafts
- Method: Crafting
Nutrition
- Serving Size: Per lantern
- Calories: N/A
- Sugar: N/A
- Sodium: N/A
- Fat: N/A
- Saturated Fat: N/A
- Unsaturated Fat: N/A
- Trans Fat: N/A
- Carbohydrates: N/A
- Fiber: N/A
- Protein: N/A
- Cholesterol: N/A

