- Introduction
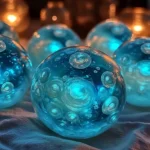
Creating glowing moon rocks is a fun and engaging DIY project that’s perfect for kids and adults alike. This activity not only sparks creativity but also introduces scientific concepts in a playful manner. Using simple materials, you can transform regular rock-like dough into glowing celestial wonders that shine brightly in the dark. Whether you’re looking for an entertaining activity for a rainy day, a unique party favor, or a decorative piece for your space-themed room, this DIY project is versatile and enjoyable. The magical glow and tactile experience of moon rocks will captivate anyone who tries them, making them a must-try!
- Why You’ll Love This DIY Glowing Moon Rocks
- Fun for All Ages: Engages kids and adults alike, making it a great family activity.
- Easy to Make: Simple ingredients and steps ensure a straightforward crafting experience.
- Creative Expression: Customize colors and sizes for unique creations.
- Educational: Provides insight into basic chemistry and sensory exploration.
- Versatile Uses: Perfect for decorations, gifts, or sensory play.
- Materials
- 2 cups baking soda
- 1 cup water
- 1 tablespoon vinegar
- 1 teaspoon glow-in-the-dark paint (or pigment)
- Food coloring (optional)
- Baking sheet
- Parchment paper
- Mixing bowl
- Spoon
- Step-by-Step Instructions
Prepare the Mixture
- In a mixing bowl, combine 2 cups of baking soda and 1 cup of water.
- Add 1 tablespoon of vinegar slowly, watching it fizz and foam as you mix.
Add Color and Glow
- Stir in the glow-in-the-dark paint until evenly distributed.
- For added color, mix in a few drops of food coloring to achieve your desired hue.
Shape Your Rocks
- Use your hands to scoop out small portions of the mixture.
- Form into irregular rock shapes, about the size of a golf ball.
- Place onto a baking sheet lined with parchment paper.
Dry and Cure
- Allow the moon rocks to dry for 24 to 48 hours, preferably in a well-ventilated area.
- Once dry, expose them to light to charge the glow-in-the-dark paint.
- Tips & Variations
- Color Customization: Experiment with different shades of food coloring to create a variety of moon rocks.
- Texture Exploration: Add a bit of sand to the mixture for a more textured feel.
- Glow Intensity: Adjust the amount of glow-in-the-dark paint for brighter or softer glows.
- Themed Decorations: Use cookie cutters to create themed shapes like stars or planets.
- Frequently Asked Questions
-
Can I use regular paint instead of glow-in-the-dark paint?
No, regular paint will not produce the glowing effect. Make sure to use glow-in-the-dark paint or pigment for best results. -
What if I don’t have baking soda?
You can substitute baking soda with cornstarch, but the texture and consistency may differ. -
How long do the moon rocks glow?
The brightness fades over time; however, they can be recharged by placing them under a light source. -
Can I make them smaller or larger?
Yes, feel free to adjust the size based on your preference, just keep in mind that larger pieces may take longer to dry.
- Serving Suggestions or Pairings
- Enjoy your glowing moon rocks with a refreshing lemonade or cosmic-themed snacks like star-shaped sandwiches.
- Pair them with glow sticks or LEDs for an enchanting nighttime display during parties.
- Final Thoughts
Creating glowing moon rocks is not only a delightful project but also a memorable experience. Whether displayed as glowing decor or used for imaginative play, they’re sure to impress! We’d love to see your versions of these moon rocks—share your creations in the comments below or let us know how you customized your glowing rocks! Happy crafting!

DIY Glowing Moon Rocks
- Total Time: 1440 minutes
- Yield: Varies based on size
- Diet: N/A
Description
Transform regular dough into glowing moon rocks with this fun and engaging DIY project, perfect for kids and adults alike.
Ingredients
- 2 cups baking soda
- 1 cup water
- 1 tablespoon vinegar
- 1 teaspoon glow-in-the-dark paint (or pigment)
- Food coloring (optional)
- Baking sheet
- Parchment paper
- Mixing bowl
- Spoon
Instructions
- In a mixing bowl, combine 2 cups of baking soda and 1 cup of water.
- Add 1 tablespoon of vinegar slowly, watching it fizz and foam as you mix.
- Stir in the glow-in-the-dark paint until evenly distributed.
- If desired, mix in a few drops of food coloring for added color.
- Scoop out small portions of the mixture and form into irregular rock shapes, about the size of a golf ball.
- Place the shaped rocks onto a baking sheet lined with parchment paper.
- Allow the moon rocks to dry for 24 to 48 hours, preferably in a well-ventilated area.
- Expose them to light to charge the glow-in-the-dark paint.
Notes
Experiment with different shades of food coloring, add sand for texture, and use cookie cutters for themed shapes.
- Prep Time: 15 minutes
- Cook Time: 0 minutes
- Category: Craft
- Method: Crafting
- Cuisine: N/A
Nutrition
- Serving Size: N/A
- Calories: 0
- Sugar: 0g
- Sodium: 0mg
- Fat: 0g
- Saturated Fat: 0g
- Unsaturated Fat: 0g
- Trans Fat: 0g
- Carbohydrates: 0g
- Fiber: 0g
- Protein: 0g
- Cholesterol: 0mg

