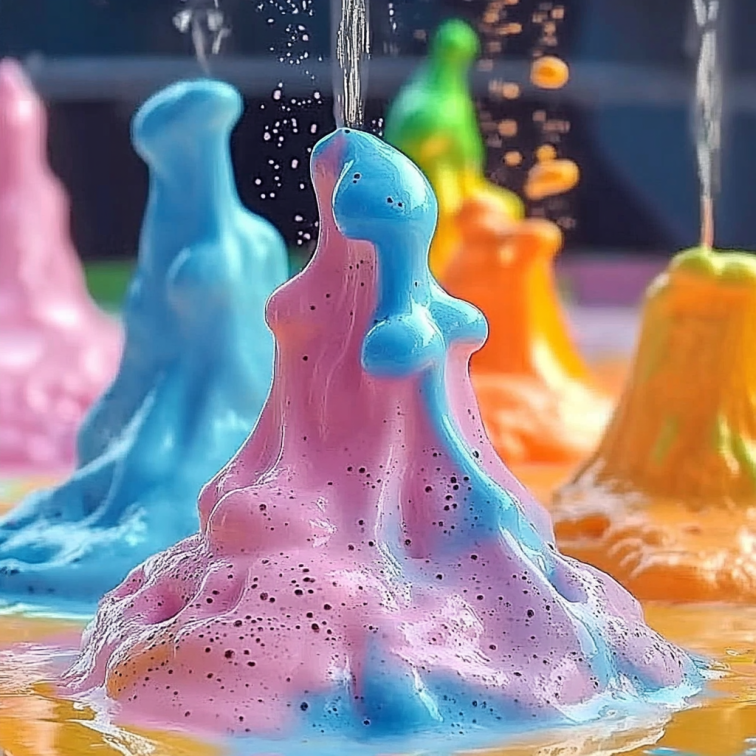
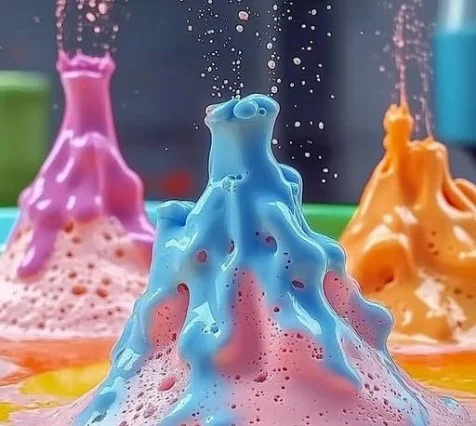
The DIY Baking Soda Volcano is a classic science experiment that combines fun and learning, making it a perfect project for families, classrooms, or anyone eager to unleash their inner mad scientist. As you watch the vibrant “lava” erupt from your volcano, you’ll not only enjoy the mesmerizing spectacle but also gain insights into chemical reactions and the power of simplicity.
This delightful project requires minimal materials and offers endless opportunities for creativity. You can experiment with different colors, shapes, and sizes, making each eruption a unique experience. Whether you’re looking to engage young minds with educational science experiments or just want an entertaining afternoon activity, the DIY Baking Soda Volcano is both entertaining and informative.

Why You’ll Love This DIY Baking Soda Volcano
- Fun for All Ages: Engaging and entertaining, making it perfect for kids and adults alike.
- Educational Value: Teaches fundamental scientific concepts, such as chemical reactions, in a hands-on way.
- Customizable: You can personalize your volcano with colors, shapes, and sizes to make it your own.
- Easy to Clean Up: Simple, non-toxic ingredients that won’t leave a mess lasting longer than the experiment.
- Inexpensive: Requires only a few common household items, making it budget-friendly.
Materials
- Baking soda
- Vinegar
- Food coloring (optional)
- Model clay or papier-mâché (to create the volcano structure)
- A small container or bottle (for the “lava”)
- A tray or large dish (to catch the overflow)
- Water (optional, to dilute the vinegar)
Step-by-Step Instructions
Step 1: Build Your Volcano
- Use model clay or papier-mâché to sculpt a volcano around your small container or bottle.
- Make sure the opening of the container is accessible at the top.
- Let your volcano structure dry completely if using papier-mâché.
Step 2: Prepare the Eruption Mixture
- In your container, add 2-3 tablespoons of baking soda.
- For added color, mix in a few drops of food coloring.
Step 3: Initiate the Eruption
- Pour 1 cup of vinegar into your container.
- Watch closely as the “lava” begins to bubble and overflow. Enjoy the vibrant colors!
Step 4: Clean Up
- Once the eruption subsides, you can easily wipe up any residue with warm water and a cloth.

Tips & Variations
- Colors: Use various food colorings to create rainbow eruptions!
- Add Texture: Throw in glitter or small plastic creatures to make your volcano scene even more dramatic.
- Different Containers: Experiment with different shapes and sizes of containers to change the eruption’s intensity.
- Vinegar Variations: Add a few drops of dish soap to the vinegar for a foamier eruption!
Frequently Asked Questions
Q1: Can I use other types of vinegar?
A1: Yes, while white vinegar is commonly used, you can experiment with apple cider vinegar or other types. However, the acidity level can affect the eruption.
Q2: Will this damage my surfaces?
A2: The ingredients are non-toxic, but it’s advisable to do this project on a surface that is easy to clean, like a tray or dish.
Q3: How can I make my volcano bigger?
A3: Use a larger container as your base and build a bigger structure around it. Just remember to increase the amounts of baking soda and vinegar proportionally.
Q4: Can I store leftover mixture?
A4: It’s best to use the mixture fresh for each eruption. Once the ingredients combine, they will create an immediate reaction.

Serving Suggestions or Pairings
To enhance your volcano experience, pair your project with a cool drink like lemonade or iced tea. Additionally, consider serving snacks like popcorn to munch on while you wait for the volcano to dry, or make it a family event by inviting friends to join in the fun!
Final Thoughts
Creating a DIY Baking Soda Volcano is not just a simple science experiment—it’s an opportunity to explore, learn, and unleash creativity. The excitement of watching your volcano erupt is something everyone can enjoy, making it an unforgettable memory. We would love to hear your stories! Please share your versions or leave a comment below to inspire others. Happy erupting!
Print
DIY Baking Soda Volcano
- Total Time: 11 minutes
- Yield: 1 volcano 1x
- Diet: N/A
Description
A classic science experiment that combines fun and learning with a vibrant ‘lava’ eruption.
Ingredients
- 2–3 tablespoons baking soda
- 1 cup vinegar
- Food coloring (optional)
- Model clay or papier-mâché (to create the volcano structure)
- A small container or bottle (for the ‘lava’)
- A tray or large dish (to catch the overflow)
- Water (optional, to dilute the vinegar)
Instructions
- Build your volcano using model clay or papier-mâché around your small container or bottle and let it dry completely if needed.
- In your container, add 2-3 tablespoons of baking soda and a few drops of food coloring for added color.
- Pour 1 cup of vinegar into your container and watch the ‘lava’ bubble and overflow.
- Once the eruption subsides, wipe up any residue with warm water and a cloth.
Notes
For added fun, use various food colorings, include glitter, or try different container shapes for varied eruptions.
- Prep Time: 10 minutes
- Cook Time: 1 minute
- Category: Science Experiment
- Method: Hands-on Experiment
- Cuisine: N/A
Nutrition
- Serving Size: 1 volcano
- Calories: 50
- Sugar: 0g
- Sodium: 0mg
- Fat: 0g
- Saturated Fat: 0g
- Unsaturated Fat: 0g
- Trans Fat: 0g
- Carbohydrates: 13g
- Fiber: 0g
- Protein: 0g
- Cholesterol: 0mg

