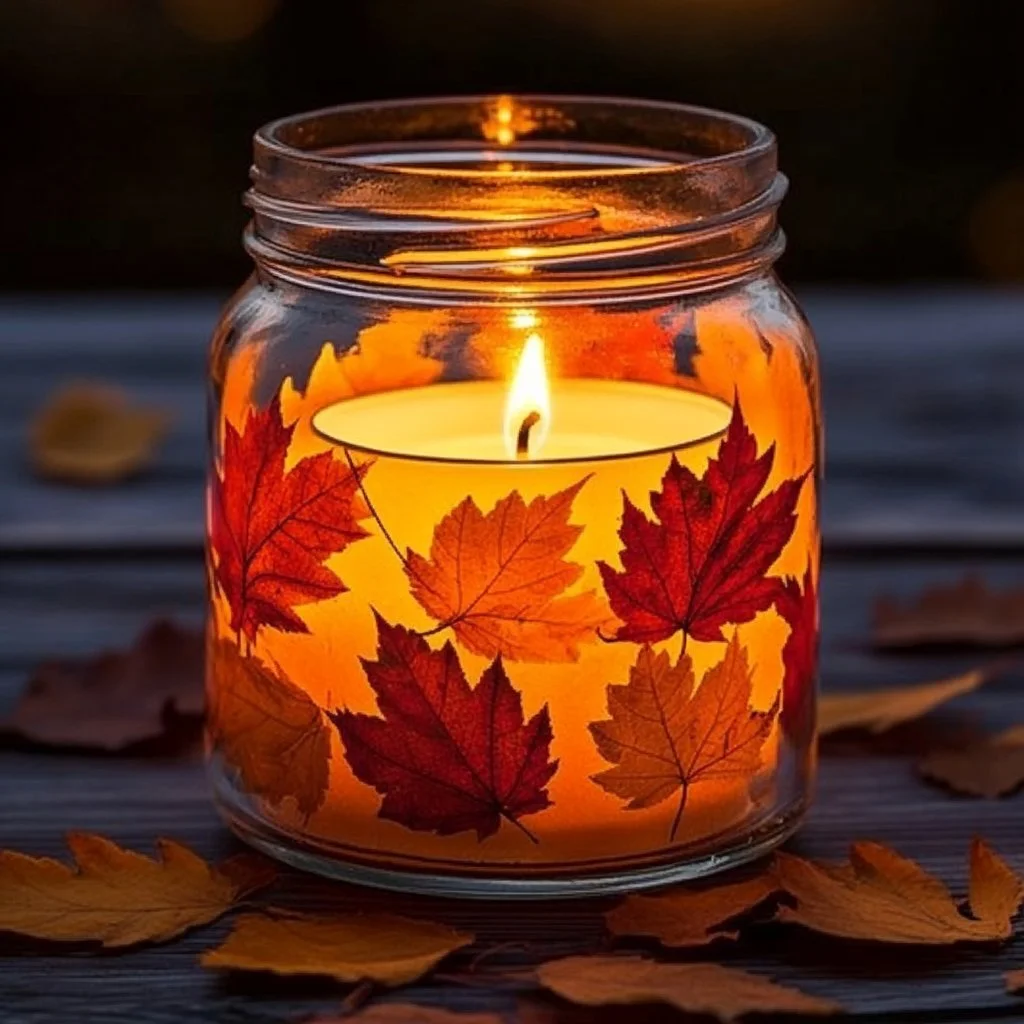
As the vibrant hues of autumn arise, there’s no better way to celebrate the season than with a cozy DIY project. Creating autumn leaf candle holders not only brightens your space but also infuses it with the essence of fall. These fashionable candle holders, adorned with real leaves, bring a touch of nature indoors while creating a warm and welcoming atmosphere. Whether for a festive gathering or a tranquil evening at home, these candle holders elevate any setting. The process is simple and rewarding, allowing you to enjoy the sights and scents of autumn— right from your living room. Gather your materials and experience the joy of crafting these delightful decorations that will light up your home and your spirits.
Why You’ll Love This DIY Autumn Leaf Candle Holders
- Seasonal Charm: Bring the beauty of autumn leaves inside to enhance your home decor.
- Cost-Effective: Use natural materials or items you already have to create stunning decor.
- Personal Touch: Customize each holder to reflect your style or the colors of your favorite fall leaves.
- Eco-Friendly: Use biodegradable materials and help reduce waste by repurposing items.
- Perfect Gift: Create unique handmade gifts for friends or family during the holiday season.
Materials
- Fresh or dried leaves (maple, oak, or birch work well)
- Clear glass or acrylic candle holders
- Mod Podge or PVA glue
- Paintbrush
- Paraffin or tealight candles
- Scissors
- Wax paper or a drop cloth
Step-by-Step Instructions
Step 1: Prepare Your Leaves
- Collect colorful leaves in various shapes and sizes.
- Ensure they are clean and dry if using fresh leaves.
Step 2: Arrange Your Leaves
- Lay the leaves flat against the outside of your candle holder to visualize the pattern.
- Choose a design that flows nicely and covers the surface without overwhelming it.
Step 3: Apply Glue
- Brush a layer of Mod Podge onto the candle holder where you’ll place the first leaf.
- Carefully press the leaf onto the adhesive, smoothing out any air bubbles.
Step 4: Seal the Leaves
- After placing all your leaves, brush another layer of Mod Podge over the entire surface to seal them.
- Allow it to dry completely, typically about 1-2 hours.
Step 5: Insert Your Candle
- Once dry, insert a paraffin or tealight candle into the holder.
- Place your finished candle holder on a safe, flat surface.
Tips & Variations
- Leaf Selection: Experiment with different types of leaves for varied textures and colors.
- Color Enhancement: Consider painting the leaves with metallic paints for a shimmering effect.
- Candle Alternatives: Use LED candles for a safe alternative that can be reused year after year.
- Size Variability: Try using different sizes of glasses, such as mason jars, for varied aesthetics.
Frequently Asked Questions
Q1: Can I use artificial leaves instead of real ones?
Yes, artificial leaves can work well and can be used repeatedly for decorating purposes.
Q2: How do I preserve fresh leaves for this project?
You can press them between heavy books or use a leaf press to dry them out.
Q3: Will the glue or Mod Podge affect the candle’s flame?
If using wax candles, ensure that the project is allowed to dry fully. Consider LED candles for safety.
Q4: How can I clean the candle holders after use?
Gently wipe them with a damp cloth; avoid soaking to protect the leaves and glue.
Serving Suggestions or Pairings
Pair your autumn leaf candle holders with a warm cup of apple cider or spiced pumpkin latte for the perfect fall ambiance. These holders also look lovely on a dinner table set with roasted seasonal vegetables and hearty dishes, creating a welcoming environment for friends and family.
Final Thoughts
DIY autumn leaf candle holders are not just a fun craft project but also a delightful way to embody the spirit of fall. These holders add warmth, a personal touch, and a magnificent visual to your home. We encourage you to share your creations and any variations you try. Leave a comment below—or tag us on social media to showcase your beautiful autumn decor! Happy crafting!
Print
DIY Autumn Leaf Candle Holders
- Total Time: 135 minutes
- Yield: 1 candle holder
- Diet: N/A
Description
Create stunning candle holders using autumn leaves for a cozy and warm atmosphere in your home.
Ingredients
- Fresh or dried leaves (maple, oak, or birch)
- Clear glass or acrylic candle holders
- Mod Podge or PVA glue
- Paintbrush
- Paraffin or tealight candles
- Scissors
- Wax paper or drop cloth
Instructions
- Prepare Your Leaves: Collect colorful leaves and ensure they are clean and dry.
- Arrange Your Leaves: Lay the leaves on the candle holder to visualize the pattern.
- Apply Glue: Brush Mod Podge on the holder for the first leaf and press it down.
- Seal the Leaves: After all leaves are placed, brush a layer of Mod Podge over the surface and let it dry for 1-2 hours.
- Insert Your Candle: Once dry, place a candle inside the holder and enjoy.
Notes
Experiment with different types of leaves or use LED candles for safety.
- Prep Time: 15 minutes
- Cook Time: 120 minutes
- Category: Crafts
- Method: Crafting
- Cuisine: N/A
Nutrition
- Serving Size: 1 candle holder
- Calories: 0
- Sugar: 0g
- Sodium: 0mg
- Fat: 0g
- Saturated Fat: 0g
- Unsaturated Fat: 0g
- Trans Fat: 0g
- Carbohydrates: 0g
- Fiber: 0g
- Protein: 0g
- Cholesterol: 0mg

