This post contains Amazon affiliate links. As an Amazon Associate I earn from qualifying purchases.
The late afternoon sun filters softly through the trees, casting gentle golden light across your workspace. As you prepare to create your Crystal Fairy Lantern, you feel a sweet anticipation unfold within you. The magic lies not just in the delicate lamp you will craft, but in the soothing rhythm of the process. Each material—smooth glass, textured twine, shimmering crystals—invites you to explore and engage. Here, in this moment, you find a space where creativity flows like a gentle stream, leading you to a brighter, more peaceful corner of your home.
Why Make This Crystal Fairy Lantern
Creating a Crystal Fairy Lantern offers a delightful escape into a world of light and enchantment. This project invites you to slow down and focus on the simple beauty surrounding you. The act of making becomes a meditative journey. As you intertwine materials, you notice the soft whispers of textures and the quiet glimmer of light reflecting off various surfaces.
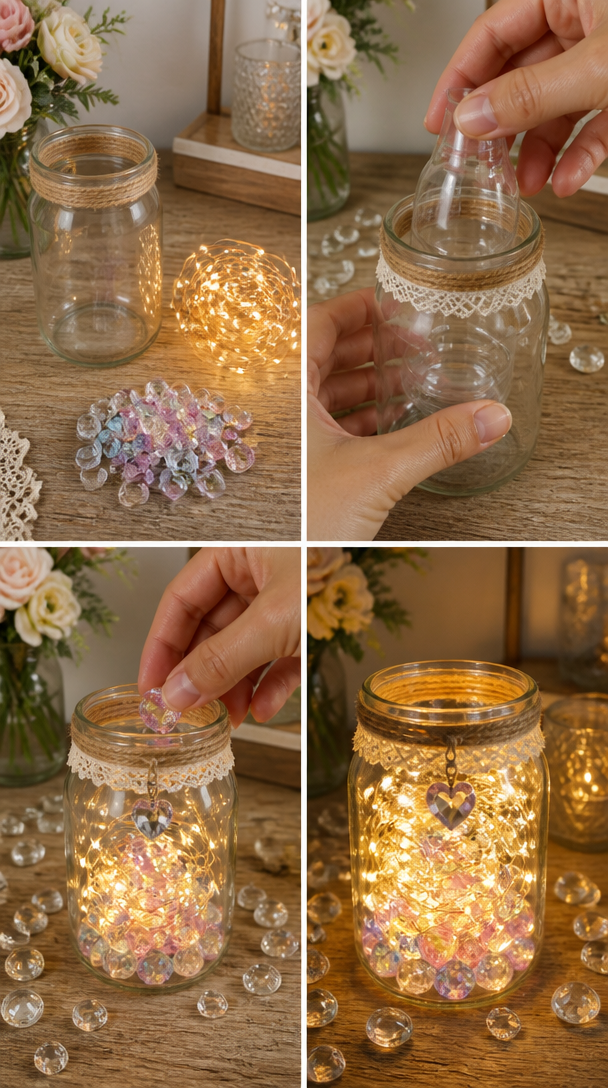
This lantern serves more than just an aesthetic purpose; it brings a sense of warmth and comfort into your space, much like the gentle glow of candlelight. It transforms rooms into cozy nooks, inviting both nostalgia and whimsy. When you engage in this crafting experience, you not only create a functional object but also nurture your spirit with the intention of mindful making. Each moment spent focusing on your hands and your surroundings helps ground you, allowing worries to fade into a soft background hum.
A Gentle Look at the Process
Making a Crystal Fairy Lantern unfolds in a soothing rhythm, where each step flows into the next, capturing your attention and engaging your senses. Begin by gathering your materials in a cozy space. Feel the smoothness of the glass jar, the coolness of the crystals, and the warmth of the twine. The textures invite exploration, sparking your creativity.
As you move through the process, listen for the faint sounds of materials touching and the gentle rustle of twine against your fingers. Each movement serves as a form of mindfulness—an opportunity to connect with the present moment as you layer colors, arrange crystals, and bond the pieces together. With each gentle step you take, you cultivate a calm and inviting atmosphere, transforming ordinary moments into something extraordinary.
Materials You’ll Need
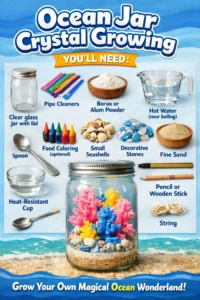
- A clean glass jar (any size works)
- Twine or string (natural fibers are great)
- Small crystals or decorative gems (look for a variety of shapes and colors)
- Battery-operated tea light or small candle (for safety)
- Hot glue gun and glue sticks (easy to work with)
- Optional: paint or glitter (to add personal touches)
Gather these supplies at your leisure, perhaps from a local craft store or your own stash. Many of these materials can be substituted based on what brings you joy or what you already have on hand. Each choice you make can reflect your unique style and vision.
Step-by-Step Directions
-
Prepare Your Jar: Start by cleaning your glass jar. Enjoy the cool glass as it feels fresh under your fingers. Ensure it is completely dry before moving to the next step.
-
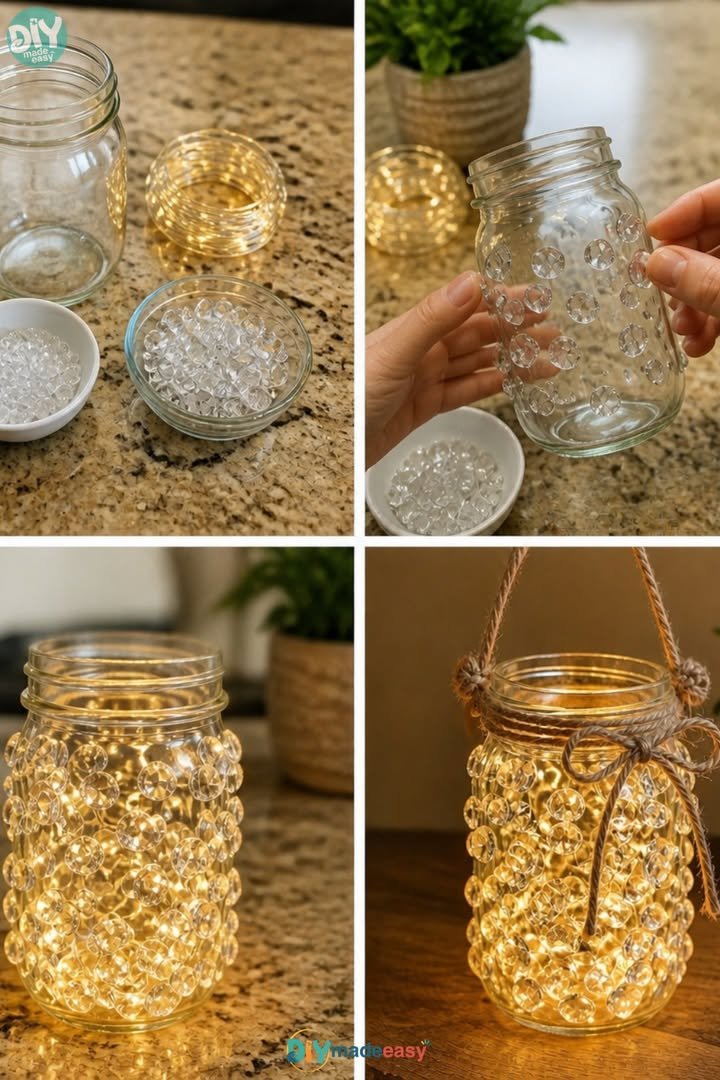
Wrap the Twine: Take the twine and begin wrapping it around the jar. Start at the base and work your way up. The movement is rhythmic; let it unwind gently, feeling the texture embrace the smooth glass.

-
Secure the Twine: Use a small dab of hot glue to secure the twine in place, ensuring it holds firm as you continue to wrap. Feel the warmth of the glue as it nestles against the twine.
-
Arrange the Crystals: Select your favorite crystals or gems. Play with their shapes and colors, arranging them around the top of the jar. This is your chance to create a mini tableau, letting your instincts guide you.
-
Adhere the Crystals: Once you find a pleasing arrangement, glue them into place one by one. Take your time. Observe how they catch the light, inviting a sparkle with every little detail.
-
Insert the Light Source: Finally, place your battery-operated tea light or small candle inside the jar. Close your eyes for a moment and envision the glow radiating warmth and magic.
-
Finishing Touches: Step back and admire your work. If you want, you can add a little paint or glitter to the twine or jar for extra sparkle.
With each step, trust your creative intuition. This is not just about building a lantern; it’s about nurturing your soul while you create something beautiful with your hands.
Enjoying the Finished Piece
The Crystal Fairy Lantern stands as a charming beacon in your space, radiating softness and warmth. Place it on a side table, a windowsill, or even by your bedside to create a cozy atmosphere. As the light flickers gently inside the jar, it casts enchanting shadows that dance across the walls, embracing the room with a sense of serenity.
In evening moments, when the world slips into darkness, turn on your lantern and let it fill your space with a calming glow. Sit beside it, curl up with a book, or enjoy a cup of tea while basking in its soft light. This lantern can become a comforting reminder to pause and breathe, offering a quiet space for reflection amidst the busyness of life.
Keeping It for Later
When not in use, the Crystal Fairy Lantern can be gently stored in a safe place, protecting it from dust and potential breakage. If you use a battery-operated candle, simply remove the light for storage. You might find it lovely to place the lantern in a spot where it can be admired, even when it is not lit.
If you choose to reuse the lantern for different occasions, consider changing the crystals or decorations based on the seasons. Perhaps you’ll adorn it with autumnal leaves, winter greens, spring flowers, or summer seashells. Each alteration brings freshness to your creation while preserving the warmth of the original design.
Gentle Tips & Variations
-
Personal Touches: Consider adding meaningful charms or small tokens that resonate with you. Each piece tells a story and infuses the lantern with personal significance.
-
Experiment with Colors: If you want to explore further, try different colors of twine or paint. Each variation creates a mood, allowing you to express different feelings through your craft.
-
Create a Lantern Series: If you feel inspired, make a collection of several fairy lanterns. Use varying sizes and designs to build a unique display in your home, creating a magical nook where light and creativity intertwine.
-
Seasonal Swaps: Use thematic decorations for different holidays or seasons. You might fill your jar with small, seasonal items like pinecones in winter or flowers in spring.
-
Invite Friends to Join: Sometimes, sharing the experience is even more rewarding. Host a crafting evening where friends can create their own lanterns. The atmosphere of creativity can ripple through shared laughter and joyful conversations.
FAQs About Crystal Fairy Lantern
Can I use a regular candle instead of a battery-operated one?
While you can use a regular candle, make sure to never leave it unattended. Battery-operated lights offer a safer alternative, especially if you have little ones or pets around.
How do I clean the lantern once it gets dusty?
A soft cloth or a gentle feather duster works well to remove dust without damaging the decorations. Avoid wetting the glass too much, as it can affect the adhesiveness of the glue.
What type of crystals should I use?
Natural crystals, glass gems, or even collected seashells can work beautifully. Choose what resonates with you, and don’t hesitate to explore various options.
Is this a good project for children?
This project can be lovely for older children or as a family craft. Just be careful with the hot glue gun and sharp materials. It can become a fun, shared experience, filling the space with laughter and creativity.
Can I change the decorations on my lantern later?
Yes, you can definitely refresh or change the decorations on your lantern as your mood or the seasons change. It’s a wonderful way to keep your creative spirit engaged.
A Gentle Note Before You Go
Creating your Crystal Fairy Lantern offers not just a finished piece, but a tranquil journey into crafting. Take time to enjoy each aspect of the process, and know that every gentle twist of twine and placement of crystals contributes to a reminder of creativity’s healing power. Allow the lantern to become a cherished part of your space, illuminating moments of peace and beauty in your everyday life.
As you engage in mindful making, remember that it’s not just the outcome that matters, but the calm and presence you cultivate along the way. Embrace your creativity, let it guide you in both the crafting and the living, and enjoy the soft, warm light that follows.
Print
Crystal Fairy Lantern
- Total Time: 15 minutes
- Yield: 1 lantern
- Diet: N/A
Description
Craft a charming Crystal Fairy Lantern that brings warmth and enchantment to your space, perfect for a cozy atmosphere.
Ingredients
- A clean glass jar (any size works)
- Twine or string (natural fibers are great)
- Small crystals or decorative gems (look for a variety of shapes and colors)
- Battery-operated tea light or small candle (for safety)
- Hot glue gun and glue sticks (easy to work with)
- Optional: paint or glitter (to add personal touches)
Instructions
- Prepare Your Jar: Start by cleaning your glass jar. Ensure it is completely dry before moving to the next step.
- Wrap the Twine: Take the twine and begin wrapping it around the jar, starting at the base and working your way up.
- Secure the Twine: Use a small dab of hot glue to secure the twine in place.
- Arrange the Crystals: Select your favorite crystals or gems and arrange them around the top of the jar.
- Adhere the Crystals: Glue them into place one by one.
- Insert the Light Source: Place your battery-operated tea light or small candle inside the jar.
- Finishing Touches: Step back and admire your work, adding paint or glitter if desired.
Notes
This project is a wonderful way to create a cozy atmosphere and can be customized with seasonal decorations.
- Prep Time: 15 minutes
- Cook Time: 0 minutes
- Category: Craft
- Method: Crafting
- Cuisine: N/A