

The first few Crochet Christmas Spiral Ornaments rest lightly in your palm, then gather a little weight as the spiral grows. I like making them in late afternoon, when the yarn catches the window light and the hook makes that small, familiar click through each loop. They suit a quiet Sunday morning, a mug of coffee near the yarn basket, or an evening when you want your hands occupied without asking your mind to hurry. This is a small seasonal project with enough repetition to settle into, and each ornament takes shape before the work feels like a commitment.
Why Crochet Christmas Spiral Ornaments Is So Soothing to Crochet
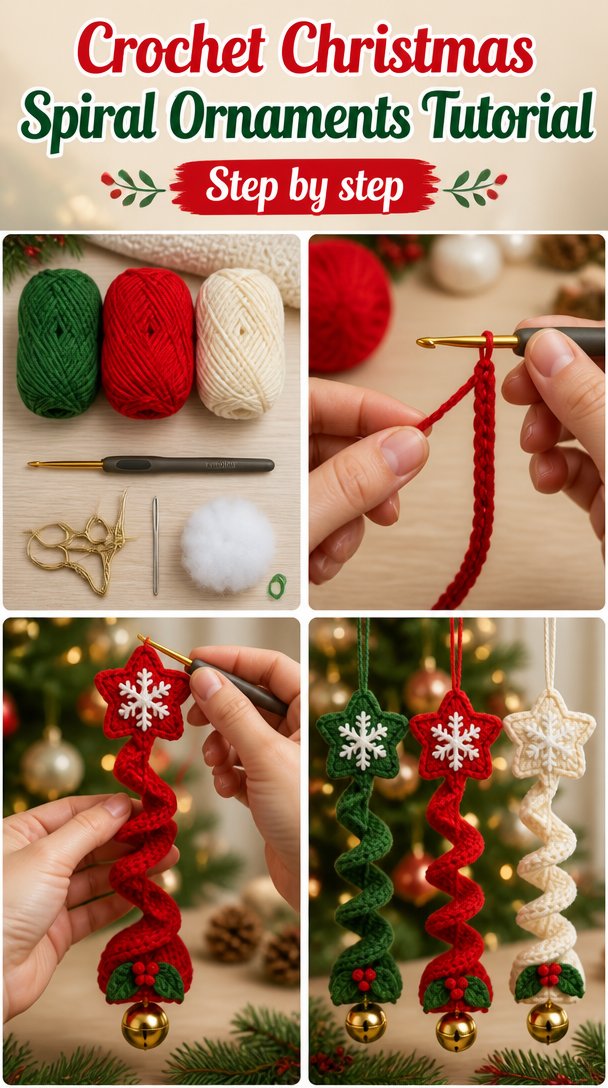
These ornaments give you a simple rhythm: make a few stitches, turn the work, make a few more, and watch the fabric begin to curl. The piece starts flat and a little uncertain, then the spiral becomes clearer as the rows build. That change keeps the project interesting without making every row demand close attention.
The main fabric uses double crochet, which grows quickly and leaves a soft, flexible texture. You can feel the hook pull through the yarn while the stitches remain easy to see. After the first ten minutes, my hands usually warm up and the motion feels less deliberate.
This kind of project works well beside the couch on a rainy evening. It also fits a summer porch, a long fall night, or the first cold snap when you bring the yarn basket closer to your chair. The finished ornaments are small enough to carry in a project bag, so you can take them along without bringing an entire blanket.
I made the first few rows with a little too much tension, and they curled more tightly than I expected. Once the fabric grew heavier, it settled into its shape. That small change reminded me that the project does not need to look perfect while it grows.
The Rhythm of This Crochet Project
You will begin with a foundation chain, which is the starting row of chain stitches that supports the rest of the work. From there, you will use double crochet stitches in joined rounds to create a gently widening spiral shape. A chain stitch, written as ch, forms the small spaces between sections, while a slip stitch, written as sl st, closes each round neatly.
The pattern uses US crochet terms. UK readers often find these posts too, and the same word can mean a different stitch there, so please check your preferred terminology before beginning. In this pattern, double crochet means the US double crochet, not the UK treble crochet.
The movement stays approachable. You will work the same small group of stitches around each round, with increases added at regular points so the ornament grows evenly. An increase means working two stitches into one stitch. You will not need a complicated color chart or a large collection of special techniques.
Plan on about 30 to 45 minutes per ornament once you know the rhythm. Your first one may take closer to an hour because joining the rounds and keeping count can feel fiddly. That is ordinary, not a sign that you are doing anything wrong.
Pattern at a Glance
Here is the whole project in one calm little list.
- Skill level: Easy, with basic shaping
- Finished size: 4 inches tall by 3 inches wide (10 cm by 7.5 cm)
- Gauge: 14 double crochet and 8 rows measure 4 inches (10 cm)
- Yarn: Worsted weight (weight 4, medium), about 170 yards per 100 g skein, using 60 yards total
- Hook: H-8 (5.0 mm)
- Other supplies: Yarn needle, scissors, stitch marker, and 6 inches of ribbon or cord
- Stitch multiple: Any multiple of 4 stitches, with 2 additional chain stitches for the turning chain
- Estimated time: 30 to 45 minutes per ornament
Materials for Crochet Christmas Spiral Ornaments
- Worsted weight yarn: weight 4, medium, in 100% acrylic or a smooth acrylic blend, about 170 yards per 100 g skein. You need 60 yards total for one ornament, or one 100 g skein for two to three ornaments, depending on tension and finishing.
- H-8 (5.0 mm) crochet hook: half a size up or down is fine depending on your tension.
- Yarn needle: for weaving in the ends and sewing the hanging loop securely.
- Scissors: small, sharp scissors make trimming easier.
- Stitch marker: optional, but helpful for marking the first stitch of each round.
- Tape measure: for checking the finished size and your gauge.
- 6 inches of ribbon or cotton cord: for the hanging loop, though yarn can be swapped in.
- One small stitch marker or safety pin: optional, for holding the loop while you finish the ornament.
A gauge swatch takes about twenty minutes, and it is worth that quiet investment even for a small project. Make a small square in double crochet, wash or gently dampen it if you plan to wash the finished ornament, then measure the center rather than the edges. The listed gauge is 14 double crochet and 8 rows measuring 4 inches (10 cm).
You can safely substitute another smooth worsted weight yarn with a similar thickness. A plain acrylic yarn keeps the ornament light, washable, and affordable, while a cotton yarn gives a firmer feel and slightly less spring. If you choose wool, remember that untreated wool can felt with agitation, while superwash wool tolerates machine washing more easily. Use the yarn label as your guide, and expect the size or drape to change a little.
Step by Step
- Skill level and stitch multiple: This is an easy pattern with basic shaping. The stitch multiple is any multiple of 4 stitches, with 2 additional chain stitches for the turning chain. For this ornament, chain 18 loosely. This foundation chain gives the ornament its starting length without pulling tight.
- Join the chain with a slip stitch, written as sl st, to the first chain. Keep the chain untwisted before joining. Chain 2 for the turning chain, which lifts the yarn to the height of the first double crochet.
- Work 2 double crochet, written as dc, into the same joining point. A double crochet uses a yarn over, draws up a loop, then completes the stitch in two pulls. Continue around with 3 dc in each chain space, joining with a slip stitch to the top of the turning chain. You will have 18 groups of 3 dc.
- For round 2, chain 2. Work 3 dc into the space between the next two groups from round 1. Continue working 3 dc into each space around. Join with a slip stitch to the top of the turning chain. You will still have 18 groups of 3 dc, and the fabric will begin to spiral softly.
- For round 3, chain 2. Work 3 dc into the next space, then 3 dc into the following space. Repeat this two-space sequence around the ornament. Join with a slip stitch to the top of the turning chain. You will have 18 groups of 3 dc, but the fabric will begin to widen and curl.
- For round 4, chain 2. Work 3 dc into each of the next 3 spaces, then work 3 dc into the following space twice. Repeat this pattern around. The repeated extra group acts as an increase, which means you add growth at a regular point. Join with a slip stitch to the top of the turning chain.
- For round 5, chain 2. Work 3 dc into each space around, keeping your tension relaxed. Place your stitch marker in the first space if you find the beginning difficult to see. Join with a slip stitch to the top of the turning chain. The ornament should measure close to 4 inches tall by 3 inches wide (10 cm by 7.5 cm).
- Pause and check the edge before moving on. If a missed stitch shows up at the end of a round, look for a space with only two double crochet or a space that has been skipped. Pull back one stitch at a time, calmly undoing the last few loops until the count looks right. It is much easier to correct now than after several more rounds.
- For round 6, chain 2 and work 3 dc into every space around. Do not add an increase in this round. Join with a slip stitch to the top of the turning chain, then fasten off with a 6-inch tail. The final edge may curl slightly, which helps create the spiral ornament shape.
- Use a yarn needle to weave in the beginning and ending tails. Weave each tail through several nearby stitches, change direction once, and trim the excess. This step keeps the small ornament tidy and prevents a loose tail from showing through.
- Fold 6 inches of ribbon or cotton cord in half to make a hanging loop. Thread the two cut ends through the top edge from back to front, then sew them down securely with the yarn needle. Check the loop with a gentle tug before hanging the ornament.
- If your yarn has a natural fiber content, dampen the ornament lightly and block it by shaping it flat with your fingers. Blocking means gently setting the fabric into its intended shape as it dries. Acrylic does not need heat blocking here, and a hot iron can melt acrylic, so use cool shaping only or steam from a distance.
The stitch groups make the work forgiving, but the first joining round deserves your full attention. I once joined a chain with a twist and did not notice until the second round, so I pulled back and started again. It took less time than trying to persuade the finished piece to lie flat.
Where This Piece Finds Its Place
These ornaments look sweet on a small tree, but they also work on a wrapped gift, a cabinet knob, or a branch in a simple winter arrangement. I like keeping a few in a shallow bowl on the living room table before they go onto the tree. Their texture gives the arrangement something handmade without making the room feel crowded.
They also make a gentle holiday gift for a neighbor, teacher, coworker, or friend who appreciates useful little things. Tie one to a plain paper package with the same ribbon used for the hanging loop. You can add the ornament as part of a small bundle with cocoa, a handwritten note, or a favorite cookie recipe.
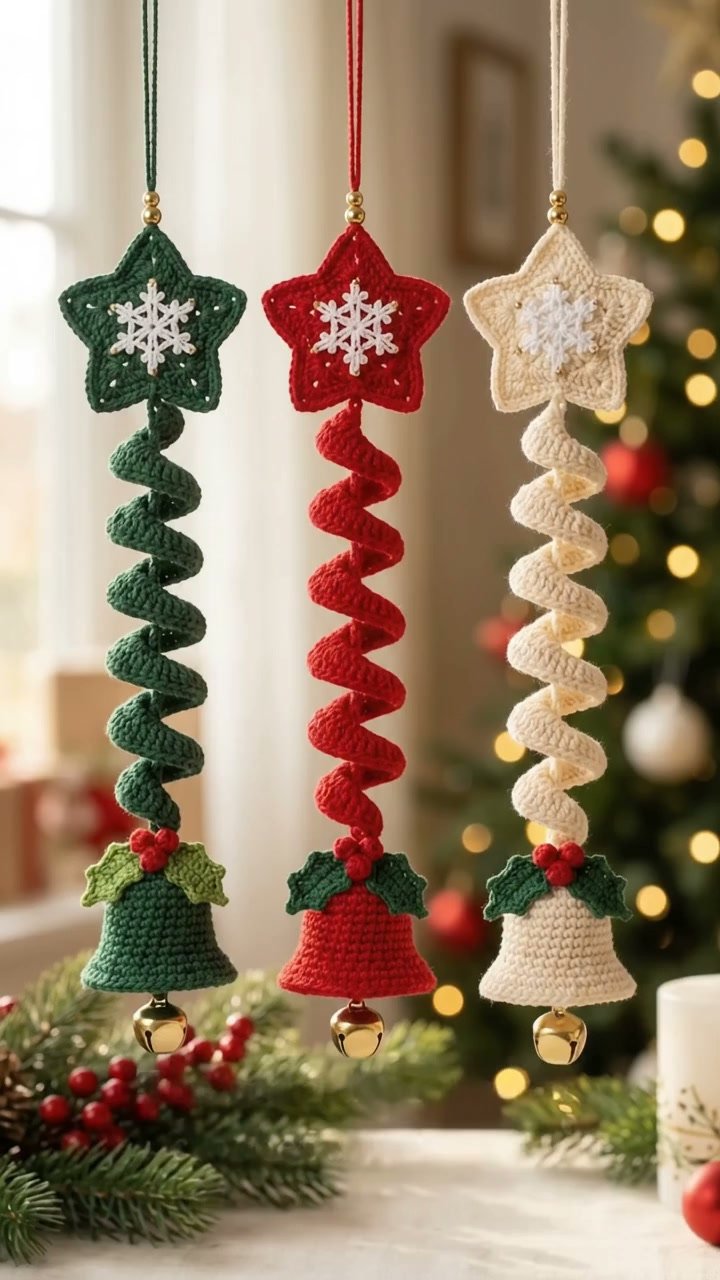
For a larger family tree, make a set in three quiet colors rather than changing color every round. Deep green, warm cream, and muted red create a traditional feeling, while soft blue, gray, and natural white keep the look calm. Each ornament takes only 30 to 45 minutes, so a small group can grow across several evenings.
Keep the ornaments away from a crib or car seat. Small parts, hanging loops, and long loose stitches are not safe for children under three. If you give one to a household with young children, label it as decoration for an adult-supervised space.
Caring for Crochet Christmas Spiral Ornaments
For the acrylic yarn named in the materials list, wash the ornament by hand or place it in a mesh bag on a gentle cycle with cold or warm water. Use a small amount of mild detergent and avoid bleach. Press out water in a towel rather than wringing the fabric.
Lay the ornament flat to dry and reshape the spiral while it is damp. Do not hang it wet, because the weight of the water can stretch the hanging loop and distort the shape. Acrylic dries fairly quickly when it has room for air to move around it.
Block the ornament cold if it needs a little shaping. Do not press a hot iron directly against acrylic, because acrylic can melt under high heat. If you use steam, hold it well away from the fabric and shape the piece with your fingers after the steam softens it slightly.
Store the ornaments folded loosely or laid flat in a breathable box rather than hanging them all year. Keep them away from damp storage areas and strong pressure that could flatten the spiral. If you use wool for a substitution, store it with cedar or lavender and remember that untreated wool can felt in warm, agitated washing.
Save leftover yarn with its label, especially if you plan to make more ornaments later. The label records the fiber, weight, and dye lot, and that small scrap can help you match the color when your yarn basket has grown crowded.
Small Ways to Make It Your Own
Try a thicker yarn if you want a larger ornament with a fuller hand. A bulky yarn will increase the finished size and make the spiral more sculptural, though you will need a larger hook and may want fewer rounds. A thinner yarn creates a smaller, lighter ornament with a more delicate drape.
Change the mood with color. One solid shade makes the texture easy to notice, while two colors can create gentle bands. You might work rounds 1 through 3 in one color and rounds 4 through 6 in another, joining the new yarn at the slip stitch so the color change stays near the back.
For a firmer, flatter ornament, substitute single crochet, written as sc, for the double crochet groups. Single crochet makes a denser fabric and grows more slowly, so you will need to watch the size rather than copying the number of rounds exactly. The finished piece will feel less open and more structured.
Resize the ornament by adjusting the foundation chain in multiples of 4. Add 4 chains for a longer starting edge or remove 4 chains for a smaller one, keeping the 2-chain turning chain separate from that multiple. Make a small test section first, because a change in the starting chain affects the final proportions.
Add a simple border if you want a cleaner edge. A round of slip stitches in a contrasting color can outline the spiral without making it stiff. For gifting, sew a small paper tag to the ribbon with the recipient’s name, or make three matching ornaments and tie them together with baker’s twine.
Frequently Asked Questions About Crochet Christmas Spiral Ornaments
Can I use a different crochet hook size?
Yes, you can use a different hook size, but it will change the fabric and finished size. The pattern uses an H-8 (5.0 mm) hook with worsted weight yarn. Use a G-6 (4.0 mm) hook for a denser ornament, or an I-9 (5.5 mm) hook for a softer, slightly larger piece. Check that your stitches still look even.
What yarn can I substitute for the worsted weight acrylic?
You can substitute smooth worsted weight, weight 4, medium yarn with a similar yardage and thickness. Cotton makes a firmer ornament, while wool gives a warmer, more textured surface. Acrylic keeps care simple and avoids much shrinking. If you choose untreated wool, wash it gently by hand because agitation and heat can cause felting.
What should I do if I find a mistake several rows later?
First, place a marker in the current round so you do not lose your place. Then decide whether the mistake changes the shape or simply hides inside the texture. If the edge pulls or the stitch count is off, pull back to the problem one stitch at a time and redo the section. A calm correction usually takes less time than forcing the next rounds to fit.
Is this ornament suitable for a beginner?
Yes, this project suits a beginner who knows how to chain, make a double crochet, and join with a slip stitch. The repeated groups make the rhythm easy to recognize, although the first joining round can feel fiddly. Use a stitch marker if you lose the beginning of the round, and count the spaces instead of trying to count every loop.
How long does one Crochet Christmas Spiral Ornament take?
One ornament takes about 30 to 45 minutes after you become familiar with the pattern. Your first may take closer to an hour while you check the joins, count the spaces, and sew in the ends. Making several at once often feels faster because your hands remember the motion, even if you work only in short evening sessions.
Does this pattern use US or UK crochet terms?
This pattern uses US crochet terms. The main stitch is the US double crochet, which is called a treble crochet in UK terminology. The abbreviations here are ch for chain, sl st for slip stitch, sc for single crochet, and dc for double crochet. Always check the terminology note when using a pattern written for a different audience.
Taking It Slow
Let the ornament take the time it takes. Notice the yarn sliding over your fingers, the small pull of the hook through each loop, and the way the fabric begins to hold its own shape. A missed stitch does not undo the quiet hour you spent making it, and a slightly different spiral still carries the warmth of your hands into the season.
—META—
SEO Title: Crochet Christmas Spiral Ornaments Pattern
Meta Description: Make calm Crochet Christmas Spiral Ornaments with simple US stitches, a small yarn supply, and gentle steps for slow seasonal crafting.
Slug: crochet-christmas-spiral-ornaments
Category: Crochet Patterns
Tags: crochet ornaments, christmas crochet, beginner crochet, slow crafting, handmade decor
Image Alt Text: A crochet spiral ornament in worsted weight yarn beside a crochet hook and yarn
Close view of double crochet spiral rounds forming a small Christmas ornament
Finished crochet Christmas spiral ornaments hanging from a simple holiday branch
Pinterest Title: Crochet Christmas Spiral Ornaments
Pinterest Description: Make a small set of Crochet Christmas Spiral Ornaments with simple stitches and a peaceful, repeatable rhythm. A gentle seasonal project for quiet evenings and handmade gifts.

Crochet Christmas Spiral Ornaments
- Total Time: 45 minutes
Description
Make calm Crochet Christmas Spiral Ornaments with simple US stitches, a small yarn supply, and gentle steps for slow seasonal crafting.
Materials
- Worsted weight yarn: weight 4, medium, 100% acrylic or smooth acrylic blend, about 170 yards per 100 g skein, 60 yards total for one ornament
- H-8 (5.0 mm) crochet hook: half a size up or down is fine depending on your tension
- Yarn needle: for weaving in the ends and sewing the hanging loop securely
- Scissors: small, sharp for trimming
- Stitch marker: optional for marking the first stitch of each round
- Tape measure: for checking the finished size and gauge
- 6 inches of ribbon or cotton cord: for the hanging loop, though yarn can be swapped in
- One small stitch marker or safety pin: optional for holding the loop while finishing the ornament
Instructions
- Chain 18 loosely, keeping the foundation chain untwisted.
- Join the chain with a slip stitch (sl st) to the first chain.
- Chain 2 for the turning chain.
- Work 2 double crochet (dc) into the same joining point.
- Continue with 3 dc in each chain space around, joining with a slip stitch to the top of the turning chain.
- For round 2, chain 2 and work 3 dc into the space between the next two groups from round 1. Join with a slip stitch to the top of the turning chain.
- For round 3, chain 2, work 3 dc into the next space, then 3 dc into the following space, and repeat around. Join with a slip stitch.
- For round 4, chain 2 and work 3 dc into each of the next 3 spaces, then work 3 dc into the following space twice for an increase. Join with a slip stitch.
- For round 5, chain 2 and work 3 dc into each space around. Place stitch marker if needed. Join with a slip stitch.
- For round 6, chain 2 and work 3 dc into every space around without an increase. Join with a slip stitch and fasten off.
- Use a yarn needle to weave in the starting and ending tails.
- Fold 6 inches of ribbon or cotton cord in half to create a hanging loop, thread through top edge from back to front, and sew down securely.
- If using natural fiber yarn, dampen and block the ornament by shaping it flat with your fingers.
Notes
Keep the ornaments away from cribs or car seats due to small parts and hanging loops. If gifting to a home with young children, label as suitable for adult-supervised spaces.
- Preparation Time: 20 minutes
- Active Time: 30 minutes