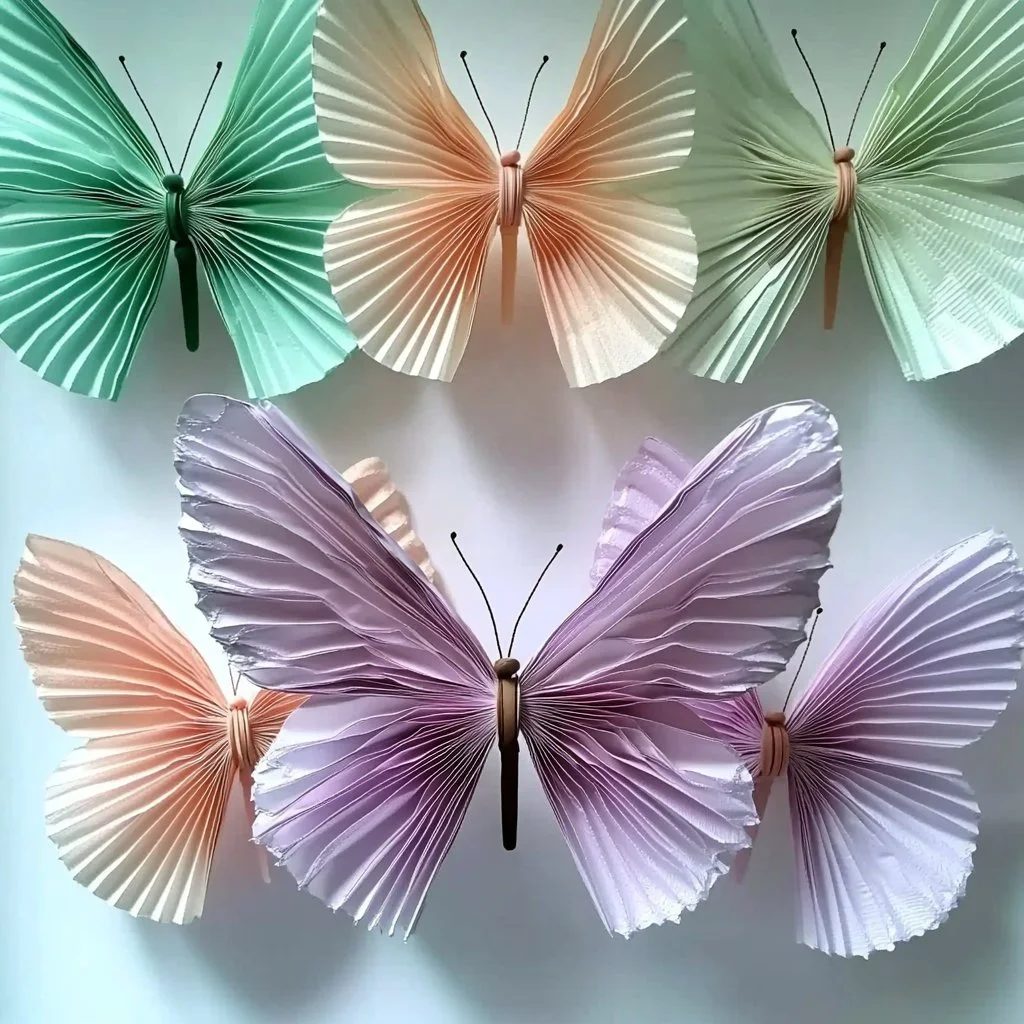
Making your own coffee filter butterflies is not just a fun arts and crafts project; it’s a delightful way to unleash your creativity while enjoying a relaxing afternoon. With a few simple materials, you can transform everyday coffee filters into vibrant, fluttering decorations that can brighten up any space. This DIY project is perfect for kids and adults alike, offering an opportunity to explore color mixing, shapes, and patterns in an engaging manner. Whether you plan to use them as window decorations, a colorful addition to party decor, or simply as a joyful creative outlet, these coffee filter butterflies are sure to bring a smile to your face. Let’s dive into the colorful world of coffee filter art!
Why You’ll Love This Coffee Filter Butterflies
- Easy and Fun: Perfect for all ages, making it an ideal project for families or group activities.
- Low-Cost Materials: Requires only a few inexpensive supplies, making it accessible to everyone.
- Creative Expression: Offers endless opportunities to explore colors and designs, encouraging individual creativity.
- Eco-Friendly: Repurposes coffee filters, reducing waste while creating something beautiful.
- Multi-Purpose: Use them as decorations, gifts, or even educational tools to teach kids about art and nature.
Materials
- Coffee filters (white or brown)
- Washable markers or watercolors
- Spray bottle filled with water
- Pipe cleaners (for antennae)
- Scissors
- Paper towels or a tray (for drying)
- Optional: Glitter or stickers for extra decoration
Step-by-Step Instructions
Step 1: Prepare Your Workspace
- Clear a flat surface and lay out all your materials.
- Place paper towels or a tray underneath to catch any excess water.
Step 2: Color Your Filters
- Take a coffee filter and lay it flat.
- Using markers or watercolors, create colorful designs on one side of the filter. Encourage blending colors for a more vibrant effect.
Step 3: Add Water
- Lightly spray the colored filter with water from your spray bottle. This will help the colors spread and blend together.
- Let it sit for a few minutes until the colors soak in and your design is all moistened.
Step 4: Dry the Filter
- Carefully place the wet filter on paper towels or a tray to dry.
- Repeat this process with additional filters if you plan to make more butterflies.
Step 5: Shape Your Butterflies
- Once dry, fold the filter in half.
- Pinch the center to create the butterfly shape, and use a pipe cleaner to twist around the center for the body.
Step 6: Add Antennae
- Cut the pipe cleaner to your desired length and shape the ends to resemble antennae.
Step 7: Final Touches
- Optionally, add glitter or stickers for extra flair.
- Display your butterflies by hanging them or using them as table decor.
Tips & Variations
- Color Mixing: Experiment with different shades by layering colors on your filter.
- Different Shapes: Create varying sizes of butterflies by using different sizes of coffee filters.
- Theme Designs: Try seasonal themes like fall colors or spring pastels to match holidays or decorations.
- Durability: If you want a more permanent piece, consider using acrylic paint instead of watercolors.
Frequently Asked Questions
Q1: Can I use other types of paper instead of coffee filters?
A: Yes! While coffee filters work best due to their absorbent quality, you can also experiment with other thin papers.
Q2: How long do the butterflies last?
A: If kept in a dry area away from direct sunlight, your butterflies can last for several weeks. However, they are made from paper, so high humidity may cause them to wilt.
Q3: Can I make these without watercolors?
A: Absolutely! Washable markers are a great alternative and can be used as standalone colors.
Q4: What if I don’t have pipe cleaners?
A: You can use string, ribbon, or even a piece of paper to create the butterfly’s body and antennae.
Serving Suggestions or Pairings
Serve your coffee filter butterflies alongside a delicious cup of herbal tea, or use them as whimsical table decorations at a gardening-themed party. Pairing these beauties with light snacks like fruit skewers or mini sandwiches will create a delightful atmosphere for any gathering.
Final Thoughts
Creating coffee filter butterflies is an imaginative and enjoyable way to bring color into your life. Whether you’re decorating your home, throwing a party, or engaging in a crafty afternoon with family, these butterflies are sure to delight. We’d love to see your unique designs! Share your versions or leave a comment below!
Print
Coffee Filter Butterflies
- Total Time: 15 minutes
- Yield: Multiple butterflies
- Diet: None
Description
Transform everyday coffee filters into vibrant, fluttering decorations with this fun DIY project that’s perfect for all ages.
Ingredients
- Coffee filters (white or brown)
- Washable markers or watercolors
- Spray bottle filled with water
- Pipe cleaners (for antennae)
- Scissors
- Paper towels or a tray (for drying)
- Optional: Glitter or stickers for extra decoration
Instructions
- Prepare Your Workspace: Clear a flat surface and lay out all your materials. Place paper towels or a tray underneath to catch any excess water.
- Color Your Filters: Take a coffee filter and lay it flat. Using markers or watercolors, create colorful designs on one side of the filter. Encourage blending colors for a more vibrant effect.
- Add Water: Lightly spray the colored filter with water from your spray bottle. This will help the colors spread and blend together. Let it sit for a few minutes until the colors soak in and your design is all moistened.
- Dry the Filter: Carefully place the wet filter on paper towels or a tray to dry. Repeat this process with additional filters if you plan to make more butterflies.
- Shape Your Butterflies: Once dry, fold the filter in half. Pinch the center to create the butterfly shape, and use a pipe cleaner to twist around the center for the body.
- Add Antennae: Cut the pipe cleaner to your desired length and shape the ends to resemble antennae.
- Final Touches: Optionally, add glitter or stickers for extra flair. Display your butterflies by hanging them or using them as table decor.
Notes
Experiment with colors and shapes to create unique butterfly designs. Use seasonal themes for decorations.
- Prep Time: 15 minutes
- Cook Time: 0 minutes
- Category: Arts and Crafts
- Method: Crafting
Nutrition
- Serving Size: 1 butterfly
- Calories: N/A
- Sugar: N/A
- Sodium: N/A
- Fat: N/A
- Saturated Fat: N/A
- Unsaturated Fat: N/A
- Trans Fat: N/A
- Carbohydrates: N/A
- Fiber: N/A
- Protein: N/A
- Cholesterol: N/A

