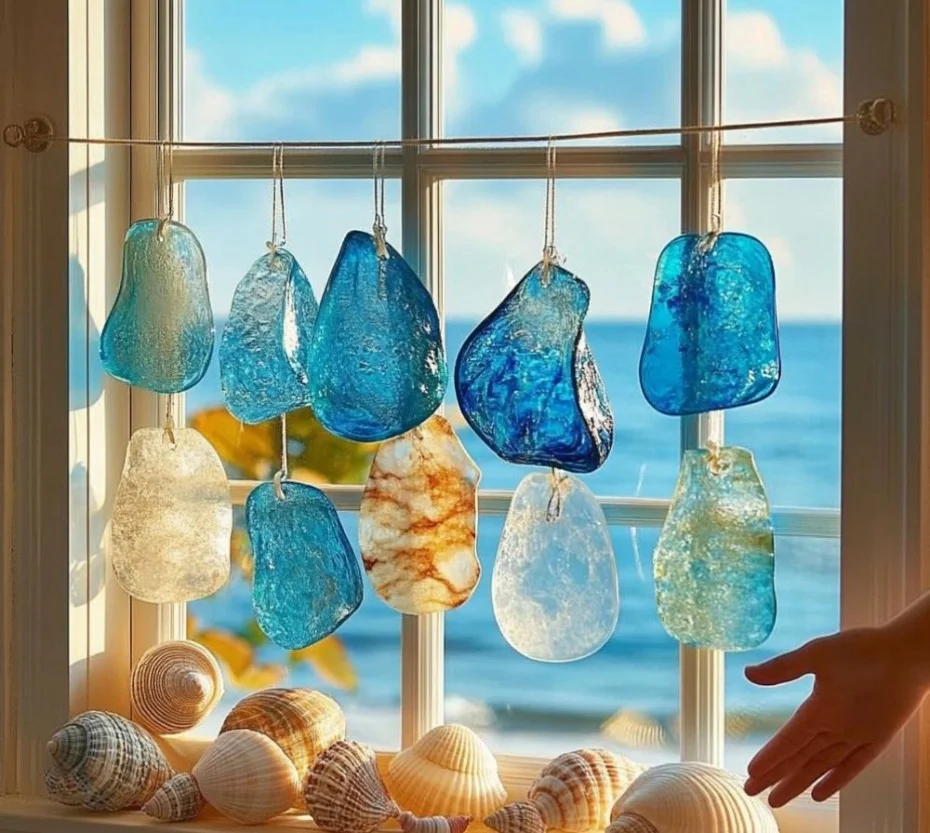
Whether you’re looking to brighten up your living space or add a touch of seaside charm, this Coastal Cottage Lightcatchers craft recipe is perfect for you. These DIY decorations not only elevate the ambiance of any room but also create a mesmerizing play of colors when sunlight dances through them. Ideal for adults and children alike, this project invites creativity and adds a personal touch to your decor. Plus, it’s a fun and engaging way to recycle materials and bring a piece of the beach right into your home. Prepare to embrace your artistic side as you turn ordinary items into stunning lightcatchers that reflect the beauty of coastal living.
Why You’ll Love This Coastal Cottage Lightcatchers:
- Eco-Friendly: Make use of recycled materials.
- Customizable: Personalize colors and designs to suit your style.
- Easy to Create: Simple enough for beginners; fun for all ages.
- Stunning Visuals: Enjoy vibrant displays of light and color in your home.
- Perfect Gifts: Handmade lightcatchers make thoughtful presents.
- Engaging Activity: Great for family crafting sessions or group projects.
Materials
- Clean glass or plastic bottles
- Acrylic paint (in coastal colors: blues, greens, whites)
- Paintbrushes (various sizes)
- String or twine (for hanging)
- Clear craft sealant or mod podge
- Scissors
- Small beads or seashells (optional for decoration)
- Palette or paper plates (for paint mixing)
Full Step-by-Step
Step 1: Prepare Your Bottles
- Start by cleaning your bottles thoroughly and removing any labels.
- Dry the bottles completely to prepare for painting.
Step 2: Paint the Base Layer
- Pour your acrylic paints onto a palette.
- Use a larger brush to apply a base layer of paint onto the exterior of the bottle.
- Experiment with blending colors to create an ombre effect reminiscent of the ocean.
Step 3: Add Details
- Once the base layer dries, switch to a smaller brush.
- Add details like waves, shells, or starfish designs using different colors.
- Be creative! You can use sponges or fingers to create textures.
Step 4: Seal Your Lightcatcher
- After painting is complete and dry, apply a clear craft sealant over the painted areas.
- This will protect your designs and help the colors pop when sunlight hits them.
Step 5: Attach String for Hanging
- Cut a length of string or twine.
- Tie it securely around the neck of the bottle.
- Make sure to leave enough length for easy hanging.
Step 6: Display Your Lightcatchers
- Hang your Coastal Cottage Lightcatchers near windows where they can catch the sun.
- Enjoy the play of light and color throughout your home!
Tips & Variations
- Personalization: Add glitter or sequins to your designs for extra sparkle.
- Material Swap: Use jars or old teacups instead of bottles for a unique shape.
- Seasonal Themes: Change colors and designs based on the seasons (e.g., pastels for spring).
- Group Activities: Consider hosting a crafting party with friends or family, providing various materials for even more creativity.
Frequently Asked Questions
Q: Can I use spray paint instead of acrylic paint?
A: Yes, spray paint can provide a smoother finish, but make sure to work in a well-ventilated area.
Q: How do I clean my lightcatchers?
A: Gently wipe the surface with a damp cloth. Avoid harsh chemicals that may cloud the paint.
Q: What if I don’t have any glass bottles?
A: Plastic bottles work just as well and are lighter for hanging purposes.
Q: Can I use other materials besides paint?
A: Absolutely! You can try decorating with washi tape, stickers, or even fabric.
Suggestions
- Pair your lightcatchers with other coastal-themed crafts, such as framed sea glass or sand art.
- Create a set of lightcatchers in varying sizes for an eye-catching display.
- Use them for seasonal home decor for ongoing versatility.
Final Thoughts
Crafting your Coastal Cottage Lightcatchers is a delightful experience that allows you to indulge in creativity while beautifying your home. We would love to see your unique versions of this craft! Share your creations or any tips you discovered along the way in the comments below! Happy crafting!
Print
Coastal Cottage Lightcatchers
- Total Time: 15 minutes
- Yield: 1 lightcatcher
- Diet: N/A
Description
Create stunning Coastal Cottage Lightcatchers that bring a touch of seaside charm to your home, inviting creativity and recycling materials.
Ingredients
- Clean glass or plastic bottles
- Acrylic paint (in coastal colors: blues, greens, whites)
- Paintbrushes (various sizes)
- String or twine (for hanging)
- Clear craft sealant or mod podge
- Scissors
- Small beads or seashells (optional for decoration)
- Palette or paper plates (for paint mixing)
Instructions
- Prepare Your Bottles: Clean your bottles thoroughly and remove any labels. Dry completely.
- Paint the Base Layer: Pour acrylic paints onto a palette. Use a larger brush to apply a base layer of paint onto the exterior.
- Add Details: Once the base layer dries, switch to a smaller brush and add designs like waves or shells.
- Seal Your Lightcatcher: Apply a clear craft sealant over the painted areas once dried.
- Attach String for Hanging: Cut a length of string or twine and tie it around the neck of the bottle.
- Display Your Lightcatchers: Hang them near windows to catch sunlight and enjoy the colors.
Notes
Personalize your designs with glitter or seasonal themes. Consider hosting a crafting party for group activities.
- Prep Time: 15 minutes
- Cook Time: 0 minutes
- Category: Craft
- Method: DIY
- Cuisine: American
Nutrition
- Serving Size: 1 lightcatcher
- Calories: 0
- Sugar: 0g
- Sodium: 0mg
- Fat: 0g
- Saturated Fat: 0g
- Unsaturated Fat: 0g
- Trans Fat: 0g
- Carbohydrates: 0g
- Fiber: 0g
- Protein: 0g
- Cholesterol: 0mg

