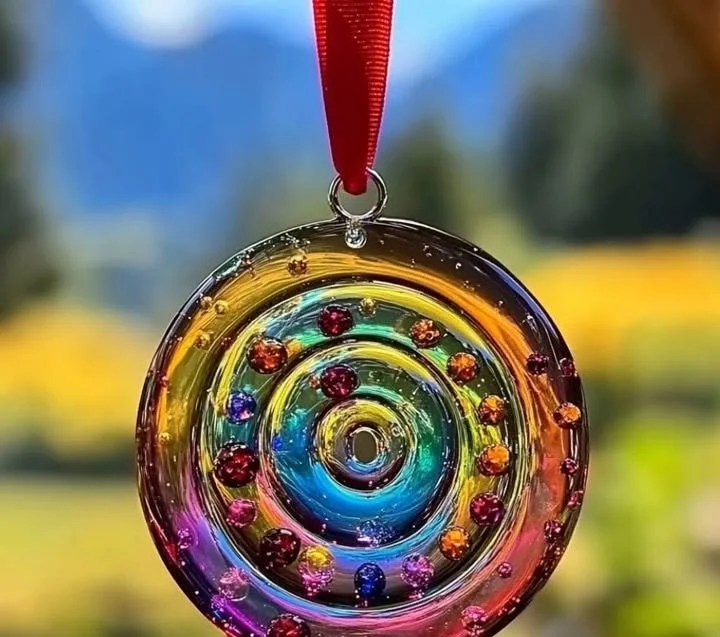
Creating beautiful suncatchers is a delightful and engaging way to brighten your home while encouraging creativity. This DIY project using clear glue is not only fun but also inexpensive and easy to execute, making it a perfect craft for individuals of all ages. The joy of watching the sunlight filter through your finished creation can bring warmth and color into any living space. Whether you’re a seasoned crafter or a beginner looking for a simple and rewarding project, this clear glue suncatcher recipe offers just the right combination of creativity and satisfaction. So gather your materials and let’s bring an artistic spark to your windows!
Why You’ll Love This Clear Glue Suncatcher
- Simple to Make: Requires minimal materials and can be completed in a short time.
- Versatile Designs: You can customize colors and shapes according to your style.
- Educational Experience: Great for teaching kids about colors, shapes, and art techniques.
- Beautiful Decor: Adds a pop of color and charm to any room.
- Kid-Friendly: Safe for children, allowing them to experiment with creativity.
- Seasonal or Year-Round: Perfect for any occasion, from holidays to everyday decor.
Materials
- Clear school glue
- Food coloring or liquid watercolors
- Wax paper or a silicone mat
- Paintbrush or spoon for spreading
- Scissors
- Optional embellishments (glitter, sequins, etc.)
Step-by-Step Instructions
Prepare Your Work Surface
- Lay down wax paper or a silicone mat to protect your workspace and create a smooth surface for your suncatcher.
Mix Your Glue
- In a mixing bowl, combine clear school glue with a few drops of food coloring or liquid watercolors.
- Stir until you achieve a vibrant color that you are satisfied with.
Create Your Design
- Using a paintbrush or spoon, spread the colored glue onto the wax paper or silicone mat in your desired shape (e.g., hearts, stars, or abstract designs).
- If using optional embellishments, sprinkle or add them to your glue design now.
Let It Dry
- Allow your suncatcher to dry completely. This can take several hours or overnight, depending on the thickness of your design.
- Ensure that it is completely dry before proceeding.
Cut It Out
- Once dry, carefully peel your suncatcher off the wax paper or silicone mat.
- Use scissors to trim any excess edges for a polished look.
Tips & Variations
- Color Mixing: Experiment by combining different colors of glue for a more unique suncatcher.
- Shape Templates: Use cookie cutters for easy shape creation if freehand isn’t your style.
- Seasonal Themes: Create designs specific to seasons or holidays (e.g., leaves for fall, snowflakes for winter).
- Glow in the Dark: Add glow-in-the-dark paint to your glue mixture for a magical twist.
Frequently Asked Questions
Q: Can I use other types of glue?
A: Yes! While clear school glue is recommended for its transparency and ease of use, you can experiment with other clear adhesives, though the results may vary.
Q: How can I hang my suncatcher?
A: Use fishing line, string, or suction cups to hang your suncatcher in a sunny window for the best visual effect.
Q: Can I make this project outside?
A: Yes! Just ensure that your workspace is clean and that the weather conditions are appropriate for drying.
Q: What should I do if my glue didn’t dry clear?
A: This may happen if the glue is applied too thickly. For the best results, keep your glue layer thin and even when spreading.
Serving Suggestions or Pairings
Consider pairing your suncatcher crafting session with a refreshing homemade lemonade or iced tea to keep everyone cool and hydrated. Light snacks like finger sandwiches or fresh fruit are also great to enjoy during your creative break!
Final Thoughts
Making a clear glue suncatcher is a wonderful way to unleash your creativity while bringing vibrant colors into your home. Whether it’s a centerpiece during family gatherings or a cherished piece made by your children, your creations will surely spark joy. Once you’ve made your own suncatcher, don’t forget to share your version or leave a comment—we’d love to see your unique designs!
Print
DIY Clear Glue Suncatcher
- Total Time: 370 minutes
- Yield: 1 suncatcher
- Diet: N/A
Description
Brighten your home with beautiful, handmade suncatchers using simple materials like clear glue and food coloring. This fun DIY project is perfect for all ages.
Ingredients
- Clear school glue
- Food coloring or liquid watercolors
- Wax paper or a silicone mat
- Paintbrush or spoon for spreading
- Scissors
- Optional embellishments (glitter, sequins, etc.)
Instructions
- Prepare your work surface by laying down wax paper or a silicone mat.
- In a mixing bowl, combine clear school glue with food coloring or liquid watercolors and stir.
- Spread the colored glue onto the wax paper or silicone mat in your desired shapes.
- If using embellishments, add them to your design now.
- Allow your suncatcher to dry completely, which may take several hours or overnight.
- Carefully peel your suncatcher off the wax paper or silicone mat and trim any excess edges.
Notes
Experiment with different colors and shapes for unique designs. Use cookie cutters for easy shape creation and consider seasonal themes for added fun.
- Prep Time: 10 minutes
- Cook Time: 360 minutes
- Category: Craft
- Method: Crafting
- Cuisine: N/A
Nutrition
- Serving Size: 1 suncatcher
- Calories: 0
- Sugar: 0g
- Sodium: 0mg
- Fat: 0g
- Saturated Fat: 0g
- Unsaturated Fat: 0g
- Trans Fat: 0g
- Carbohydrates: 0g
- Fiber: 0g
- Protein: 0g
- Cholesterol: 0mg

