

Bubble wrap held between your fingers creates a familiar, satisfying sensation. Each little bubble beckons to be poked, releasing a soft pop as it breathes out air. It’s simple yet delightful. Imagine transforming that playful material into extraordinary art, where vibrant colors swirl like galaxies in deep space. Bubble wrap stamps form colorful galaxy patterns with stars, planets, and deep space texture. A fun project to try this weekend invites you to immerse yourself in this sensory experience. Let’s discover the calmness and joy that crafting can bring.
The Heart Behind This DIY
Creating something with your hands often brings a soothing rhythm to the mind. As you begin to work with bubble wrap, you explore tactile sensations that ground you in the moment. The repetition of swirling paint with each stamp provides a comforting beat, like a gentle song that reminds you to slow down and savor each step.
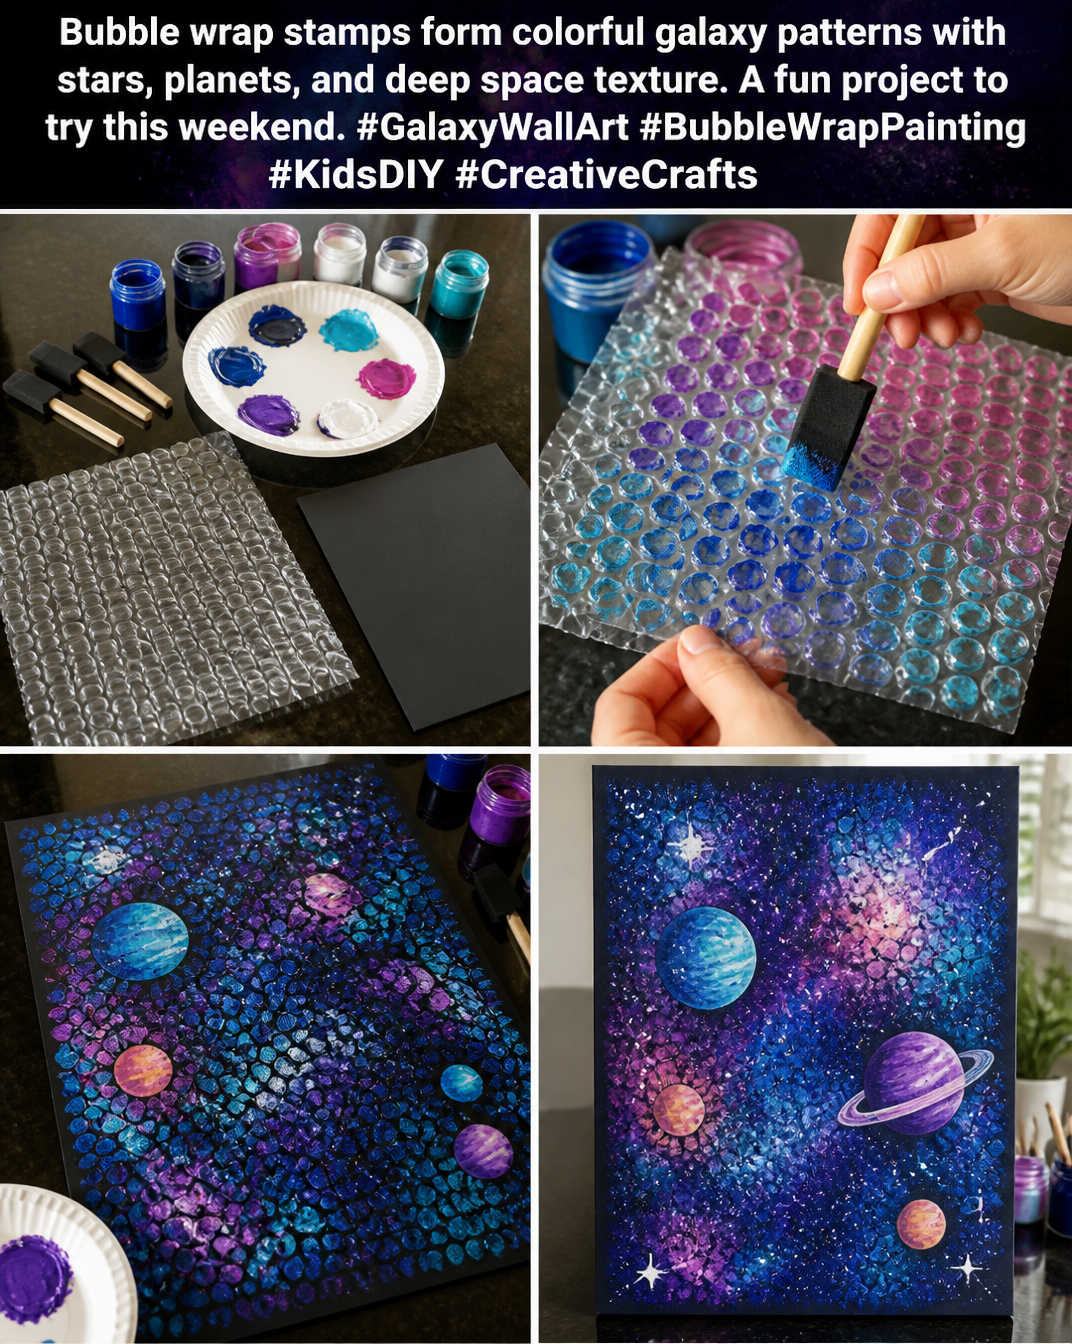
This project offers a wonderful escape from busy thoughts. As you press the bubble wrap onto paper or canvas, you see the colors blend and dance together, forming unique patterns. Each print is a visual representation of your creativity, blooming forth in a playful galaxy of stars and planets. There’s a warm familiarity about it. It’s an invitation to let your imagination roam freely.
By focusing on the small moments of creation, you find clarity. The act of making feels nurturing, adding an inviting coziness to your day. The textures, the colors, and the rhythm of your hands at work all come together to create a meditative state. This project allows you to step away from distractions and settle into a space that feels safe and encouraging.
A Gentle Look at the Process
Let’s take a gentle stroll through the process of creating your galaxy art. Think of it as a delicate dance, where each step flows into the next. The sound of paint being applied to bubble wrap is like a soft whisper, and the splash of colors brings excitement to the canvas.
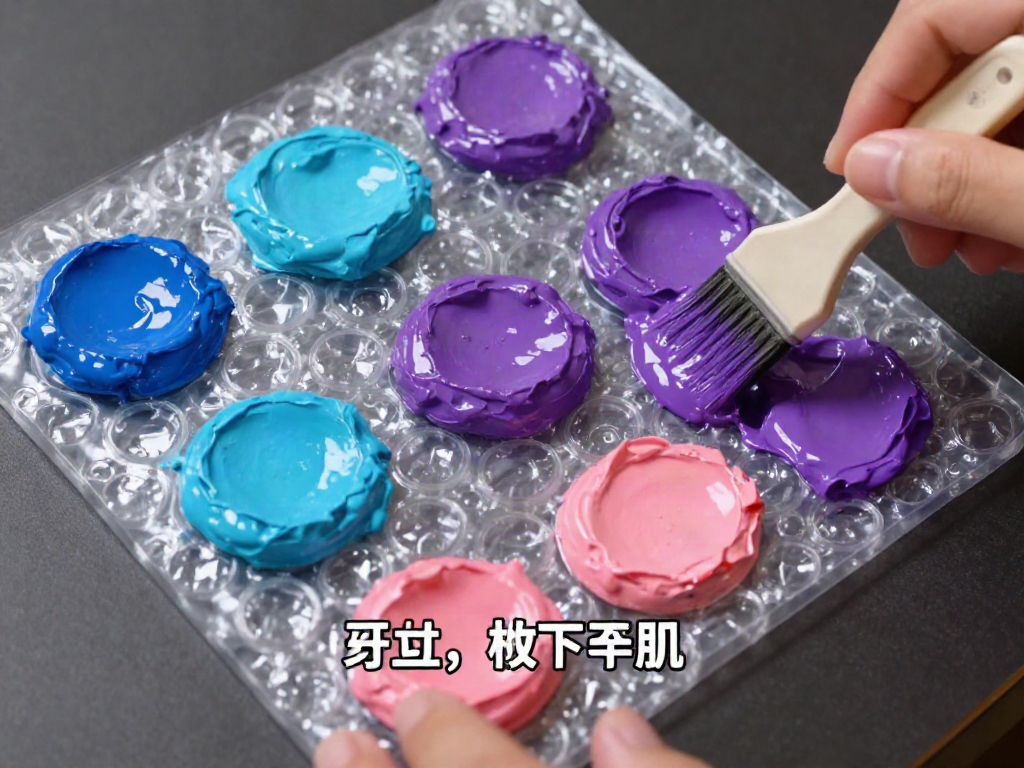
You will explore movement in each stamp as your hands glide across the surface. The tactile sensation of bubble wrap, with its smooth feel and comforting texture, adds a layer of joy. You will witness colors come alive as you layer and press, each moment building on the last. This is a space for joyful experimentation and letting go.
As we dive into the materials and steps, allow yourself to be fully present. Let the sensations guide you through the process, giving you permission to breathe and enjoy every moment.
Materials You’ll Need
- Bubble wrap (easy to find in various sizes)
- Acrylic paints (choose vibrant colors that inspire you)
- Paintbrushes (a few, including a flat brush for larger areas)
- Paper or canvas (thick enough to handle paint)
- A shallow tray or plate (for mixing colors)
- Water (for rinsing brushes between colors)
- Paper towels or cloth (for cleanup)
- Optional: A sponge or soft cloth (for additional texture)
Gathering your materials becomes part of the journey. As you pick each item, consider the textures and colors you adore. There are no strict rules here—only an invitation to create as your heart desires.
Step-by-Step Directions
-
Start by selecting your paper or canvas. Lay it flat on a comfortable surface, making sure you have enough space to move about freely.
-
Squeeze out small amounts of acrylic paint onto your tray or plate. Choose a few colors to form your galaxy. Let your intuition guide you; mixing colors can be part of the fun.
-
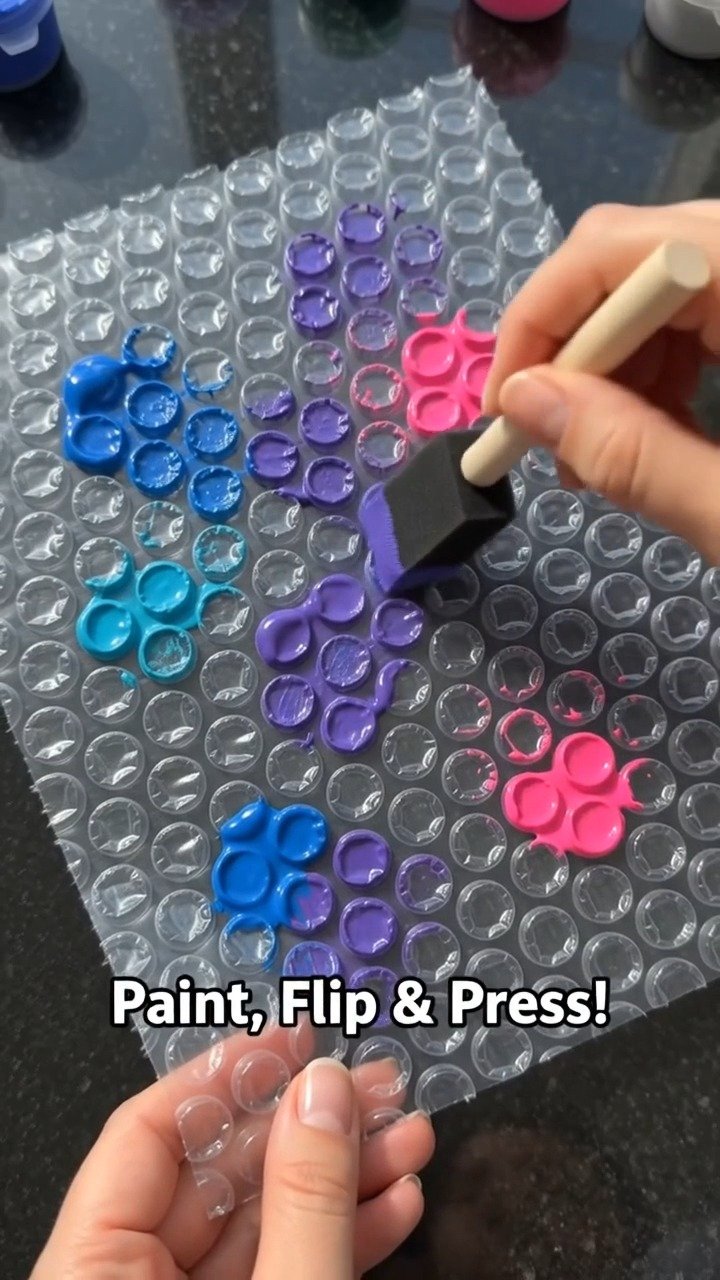
Using a paintbrush, apply a layer of paint directly onto the bubble wrap. Take your time, letting the brush glide smoothly over the surface as you enjoy the transformation of color.
-
Once you have a nice layer of paint, gently press the bubble wrap onto your paper or canvas. You can be playful with placement—slightly rotating or shifting the bubble wrap adds extra dimension.
-
Lift the bubble wrap to reveal your unique imprint. Notice how the colors blend and swirl, creating beautiful patterns reminiscent of distant galaxies.
-
Continue layering and stamping with different colors and textures. Each print will become a masterpiece in its own right. Allow yourself to enjoy the unexpected surprises of color interplay.
-
Once satisfied, let your artwork dry completely. Inhaling deeply, enjoy the calmness that comes from completing the process.
-
When the artwork is dry, take a moment to reflect on this creative journey. Celebrate the time spent in this gentle, mindful practice.
Enjoying the Finished Piece
Now that you have completed your galaxy art, it’s time to think about how to enjoy it in your space. Displaying your art can be a simple process. Consider framing it in a soft-toned frame that complements the colors in your artwork. This allows the vibrant patterns to stand out and become a focal point in your home.
You might choose to hang it in a cozy reading nook, where its colors can inspire your imagination. Or place it in a shared area where family and friends can admire the uniqueness of your piece. Each time you gaze upon it, let it remind you of the calm and intentional moments spent creating—a little piece of galaxy magic in your everyday life.
You can also gift your artwork to someone special, sharing the experience of creativity and the joy it brings. Wrapping it with kind thoughts adds an extra layer of warmth. This art is not just about its beauty; it embodies the moments of care and creativity invested within it.
How to Store or Reuse Bubble wrap stamps form colorful galaxy patterns with stars, planets, and deep space texture. A fun project to try this weekend. #GalaxyWallArt #BubbleWrapPainting #KidsDIY #CreativeCrafts
If you wish to keep your artwork for a long time, it is ideal to store it flat in a safe place, away from humidity or direct sunlight, which can fade colors over time. Consider using a portfolio or between sheets of acid-free paper to protect it.
Additionally, if you have leftover bubble wrap, don’t let it go to waste. You can clean and store it for future projects. It can transform into new art, whether it’s for stamping again or trying out different paint techniques. By reusing materials, you help the environment while enjoying your creative outlets.
Gentle Tips & Variations
-
Experiment with background colors: Before you start stamping, try painting a light wash of color over your whole canvas or paper. This can add depth and richness to the final artwork.
-
Use different tools: Beyond bubble wrap, consider using everyday items like fruits or kitchen utensils to create unique patterns. A potato or even a fork can yield surprising results.
-
Incorporate textures: Try pressing different fabric pieces onto your canvas as stamps to create complex designs. Each material brings its unique dimension to your artwork.
-
Make it a family activity: Invite loved ones to join in the fun. Each person can bring their style, and together, you can create a collaborative piece of art that captures shared memories.
FAQs About Bubble wrap stamps form colorful galaxy patterns with stars, planets, and deep space texture. A fun project to try this weekend. #GalaxyWallArt #BubbleWrapPainting #KidsDIY #CreativeCrafts:
What type of paint works best for this project?
Acrylic paint is excellent for this DIY. It dries quickly and offers vibrant colors that adhere well to the bubble wrap.
Can I do this project with kids?
Absolutely! Just make sure they have a space to work that you don’t mind getting a bit messy. Supervision might be helpful with younger kids, especially when working with paints.
What if I don’t have bubble wrap?
You can substitute with other textured materials like foam sheets or textured fabric. The key is to have a surface that can create an imprint.
How long does it take for the artwork to dry?
Depends on the thickness of your paint layers, but most acrylic paintings dry within a few hours. Consider leaving it overnight for complete dryness.
Can I re-use the bubble wrap?
Yes, you can definitely clean bubble wrap and use it for future art projects. Rinse it gently and allow it to dry completely before storing it for later use.
A Gentle Note Before You Go
As you conclude this creative project, take a moment to breathe deeply and embrace the satisfaction of what you’ve made. Each stroke, each layer, each fun pop of bubble wrap tells your personal story. This journey, filled with textures and colors, reflects not just a finished artwork but the process of slowing down and nurturing your creativity.
Embrace the calmness that comes from this mindful making. Carry this sense of tranquility with you, allowing it to flow into your everyday moments. Remember, creativity is not just about the end result; it’s about finding peace and joy in the journey itself.
Print
Bubble Wrap Galaxy Art
- Total Time: 130 minutes
- Yield: 1 art piece
- Diet: N/A
Description
Transform bubble wrap into beautiful galaxy art with vibrant colors and unique patterns. A fun DIY project that encourages creativity and mindfulness.
Ingredients
- Bubble wrap (easy to find in various sizes)
- Acrylic paints (choose vibrant colors that inspire you)
- Paintbrushes (a few, including a flat brush for larger areas)
- Paper or canvas (thick enough to handle paint)
- A shallow tray or plate (for mixing colors)
- Water (for rinsing brushes between colors)
- Paper towels or cloth (for cleanup)
- Optional: A sponge or soft cloth (for additional texture)
Instructions
- Start by selecting your paper or canvas. Lay it flat on a comfortable surface, making sure you have enough space to move about freely.
- Squeeze out small amounts of acrylic paint onto your tray or plate. Choose a few colors to form your galaxy.
- Using a paintbrush, apply a layer of paint directly onto the bubble wrap.
- Once you have a nice layer of paint, gently press the bubble wrap onto your paper or canvas.
- Lift the bubble wrap to reveal your unique imprint. Notice how the colors blend and swirl, creating beautiful patterns.
- Continue layering and stamping with different colors and textures.
- Once satisfied, let your artwork dry completely.
- When the artwork is dry, take a moment to reflect on this creative journey.
Notes
Consider framing your art or giving it as a gift. Enjoy the process of creating, and don’t hesitate to experiment with different tools and techniques.
- Prep Time: 10 minutes
- Cook Time: 120 minutes
- Category: Craft
- Method: Stamping
- Cuisine: N/A