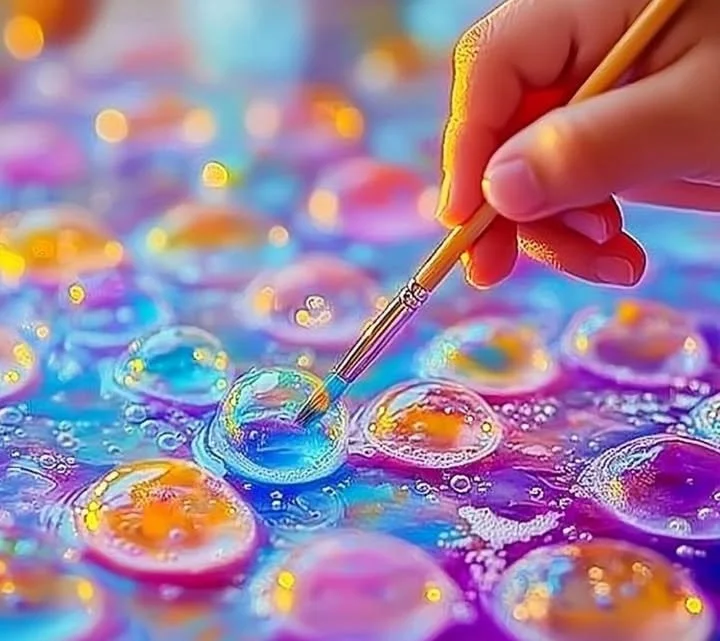
Bubble painting is an engaging and fun art activity for kids that combines creativity with a little bit of science. Using simple materials, children can create vibrant pieces of artwork while exploring the concept of bubbles and colors. This hands-on activity is perfect for encouraging self-expression and developing fine motor skills. Plus, it’s a wonderful opportunity for parents and caregivers to bond with little artists. Whether you’re hosting a playdate, an art class, or just looking for a rainy day activity, bubble painting can spark joy and excitement in kids of all ages. Get ready to unleash creativity and see colors swirl and blend!
Why You’ll Love This Bubble Painting Art for Kids
- Encourages Creativity: Kids can experiment with colors and techniques, fostering creativity.
- Sensory Experience: The bubbling action provides an engaging tactile experience.
- Easy Cleanup: Most materials are simple to clean, making it a stress-free activity.
- Educational Value: Introduces concepts of mixing colors and scientific principles of bubbles.
- Flexible Activity: Suitable for various age groups and can be adapted for different skill levels.
Materials
- Liquid food coloring (various colors)
- Bubble solution (store-bought or homemade)
- Paper (white or colored works best)
- Drinking straws
- A shallow dish or tray
- Gloves (optional, but recommended for easy cleanup)
- Optional: Aprons or old t-shirts to protect clothing
Step-by-Step Instructions
Step 1: Prepare the Bubble Solution
- If you’re making your own bubble solution, mix 1 cup of water, 2 tablespoons of dish soap, and 1 tablespoon of sugar in a container. Stir gently to avoid creating excess foam.
Step 2: Set Up Your Workspace
- Place the paper inside a shallow dish or tray to catch any spills.
- Put on gloves and aprons to keep your space clean.
Step 3: Add Colors
- In the shallow dish, pour in the bubble solution, covering the bottom.
- Add a few drops of liquid food coloring in different spots to create multiple colors.
Step 4: Create Bubbles
- Using the drinking straw, gently blow into the bubble solution. Watch as the bubbles gradually rise and overflow.
Step 5: Paint with Bubbles
- Carefully place your piece of paper over the bubbling solution.
- The bubbles will leave colorful prints and patterns as they burst!
Step 6: Dry Your Artwork
- Let the painted paper dry completely before displaying it.
Tips & Variations
- Customize Colors: Try using natural dyes or safe paint instead of food coloring to create different shades.
- Add Glitter: Sprinkle a little glitter into the bubble solution for some extra sparkle.
- Use Different Paper Sizes: Experiment with various sizes of paper, from small cards to large sheets.
- Try Different Tools: Instead of straws, you can use bubble wands or even your mouth (with caution) to create different bubble sizes.
Frequently Asked Questions
Q: Can I use homemade bubble solution?
A: Absolutely! A homemade bubble solution can work just as well as a store-bought option.
Q: What if I don’t have food coloring?
A: You can use watercolors or tempera paint diluted with some water as alternatives.
Q: How long will it take for the artwork to dry?
A: Depending on the thickness of the bubbles, the artwork may take anywhere from 30 minutes to a couple of hours to fully dry.
Q: Can older kids participate in this activity?
A: Yes! Older children can explore more complex techniques, like mixing colors or creating abstract designs.
Serving Suggestions or Pairings
Enhance the bubble painting experience by pairing it with some refreshing drinks like lemonade or fruit-infused water. Consider serving healthy snacks such as fruit skewers or veggie sticks with dip, fostering a fun and artistic atmosphere.
Final Thoughts
Bubble painting is not just an art project; it’s an adventure in creativity and science. Kids will love experimenting with colors, and the sensory experience will leave lasting memories. We’d love to see your bubble painting creations! Share your versions or leave a comment below. Happy painting!
Print
Bubble Painting Art for Kids
- Total Time: 45 minutes
- Yield: Variable based on paper size
- Diet: N/A
Description
An engaging and fun art activity for kids that combines creativity with science, allowing them to create vibrant artwork using bubbles and colors.
Ingredients
- Liquid food coloring (various colors)
- Bubble solution (store-bought or homemade)
- Paper (white or colored)
- Drinking straws
- A shallow dish or tray
- Gloves (optional)
- Optional: Aprons or old t-shirts
Instructions
- Prepare the bubble solution by mixing 1 cup of water, 2 tablespoons of dish soap, and 1 tablespoon of sugar in a container, stirring gently.
- Set up your workspace by placing paper inside a shallow dish or tray to catch spills and putting on gloves and aprons.
- Add colors by pouring bubble solution into the dish and adding drops of food coloring.
- Create bubbles by blowing gently into the solution with a straw.
- Paint with bubbles by placing paper over the bubbling solution to transfer colorful prints.
- Dry your artwork completely before displaying.
Notes
Customize colors with natural dyes, add glitter for sparkle, use different paper sizes, and experiment with various bubble creation tools.
- Prep Time: 15 minutes
- Cook Time: 30 minutes
- Category: Craft
- Method: Creative Activity
- Cuisine: N/A
Nutrition
- Serving Size: 1 artwork
- Calories: 0
- Sugar: 0g
- Sodium: 0mg
- Fat: 0g
- Saturated Fat: 0g
- Unsaturated Fat: 0g
- Trans Fat: 0g
- Carbohydrates: 0g
- Fiber: 0g
- Protein: 0g
- Cholesterol: 0mg

