Introduction
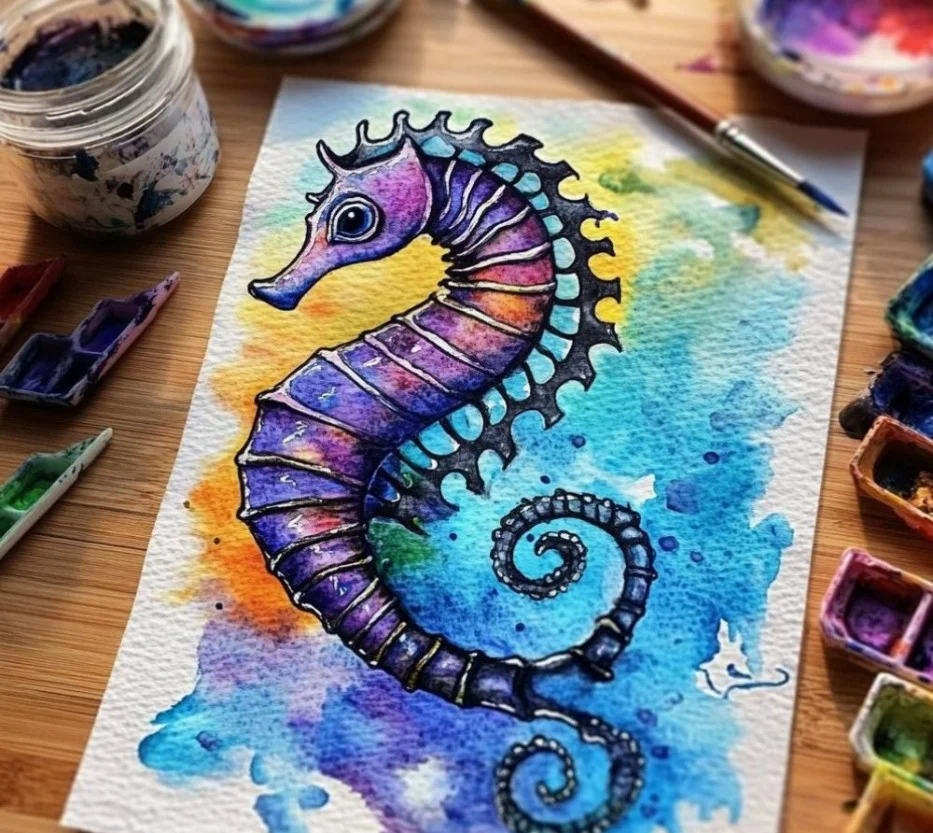
Crafting is an enjoyable and creative way to spend time, whether alone or with family and friends. One delightful project that captivates crafters of all ages is the Black Glue Seahorse. This unique craft blends creativity with the magic of texture, allowing you to explore different colors, patterns, and designs. The process of creating your seahorse not only lets you express your artistic side but also provides a fantastic opportunity to learn about marine life. This craft recipe is perfect for rainy days, summer vacations, or any time you want to indulge your creative instincts. Ready to dive into an ocean of creativity? Keep reading to learn more about why you’ll love this project!
Why You’ll Love This Black Glue Seahorse:
- Fun for All Ages: Perfect for kids and adults alike, making it an ideal family project.
- Easy Materials: Most supplies are easily found at home or in local craft stores.
- Textural Effect: The black glue creates a unique and striking design that stands out.
- Educational Element: A fun way to learn about seahorses and marine ecosystems.
- Customizable Design: Personalize your seahorse with colors and embellishments to reflect your style.
Materials:
- Black glue (or regular white glue mixed with black paint)
- Watercolor paints or markers
- Thick paper or cardstock
- Paintbrushes
- Scissors
- Pencil
- Optional: Glitter, sequins, or beads for embellishments
Full Step-by-Step
Step 1: Draw Your Seahorse
- Using a pencil, sketch the outline of a seahorse on the thick paper. Focus on curving lines and the unique shape of its body.
Step 2: Apply Black Glue
- Carefully trace the pencil outline with black glue. The glue will give your seahorse a raised and textured effect.
Step 3: Let it Dry
- Allow the black glue to dry completely. This may take a couple of hours, so be patient!
Step 4: Add Color
- Once dry, use watercolor paints or markers to fill in your seahorse. Experiment with colors – vibrant blues, greens, and yellows can make it pop!
Step 5: Embellish
- Add decorative elements like glitter, sequins, or beads to enhance your seahorse’s design. Use extra glue to secure these embellishments.
Step 6: Final Touches
- Once everything is dry, carefully cut out the seahorse if you wish to display it separately.
Tips & Variations:
- Color Swaps: Try using different shades or even metallic paints for a more dramatic effect.
- Size Variations: Change the size of your seahorse; larger ones make great wall art, while smaller ones can be used as fun bookmarks.
- Mixed Media: Combine your seahorse with other materials like fabric or natural elements (e.g., sand) for added texture.
Frequently Asked Questions:
1. Can I use regular glue instead of black glue?
Yes! You can mix white glue with black paint before applying if you can’t find black glue.
2. What if I don’t have watercolor paints?
You can use markers, colored pencils, or any paint you have available.
3. How do I store my finished seahorse?
Keep it in a cool, dry place away from direct sunlight to preserve the colors and embellishments.
4. Can I make multiple seahorses?
Absolutely! Create an entire seahorse family and experiment with different colors and sizes.
Suggestions:
- Consider pairing your seahorse project with a marine-themed storytime for children.
- Use the completed seahorses for party decorations or gifts.
- Organize a crafting day with friends to create a whole ocean mural!
Final Thoughts
Creating your Black Glue Seahorse is not just a craft; it’s a joyful journey into the world of creativity and imagination. We’d love to see your unique versions! Please share your creations or any modifications you made in the comments below. Happy crafting!

Black Glue Seahorse Craft
- Total Time: 135 minutes
- Yield: Multiple seahorses
- Diet: N/A
Description
A fun and creative project to make unique seahorse designs using black glue and watercolor paints.
Ingredients
- Black glue (or regular white glue mixed with black paint)
- Watercolor paints or markers
- Thick paper or cardstock
- Paintbrushes
- Scissors
- Pencil
- Optional: Glitter, sequins, or beads for embellishments
Instructions
- Draw Your Seahorse: Sketch the outline of a seahorse on the thick paper.
- Apply Black Glue: Trace the pencil outline with black glue.
- Let it Dry: Allow the black glue to dry completely for a couple of hours.
- Add Color: Use watercolor paints or markers to fill in your seahorse.
- Embellish: Add decorative elements like glitter, sequins, or beads.
- Final Touches: Cut out the seahorse if you wish to display it separately.
Notes
Remember to be patient while the black glue dries. Experiment with colors and create different sizes of seahorses for varied displays.
- Prep Time: 15 minutes
- Cook Time: 120 minutes
- Category: Craft
- Method: Crafting
- Cuisine: N/A
Nutrition
- Serving Size: 1 seahorse
- Calories: 0
- Sugar: 0g
- Sodium: 0mg
- Fat: 0g
- Saturated Fat: 0g
- Unsaturated Fat: 0g
- Trans Fat: 0g
- Carbohydrates: 0g
- Fiber: 0g
- Protein: 0g
- Cholesterol: 0mg

