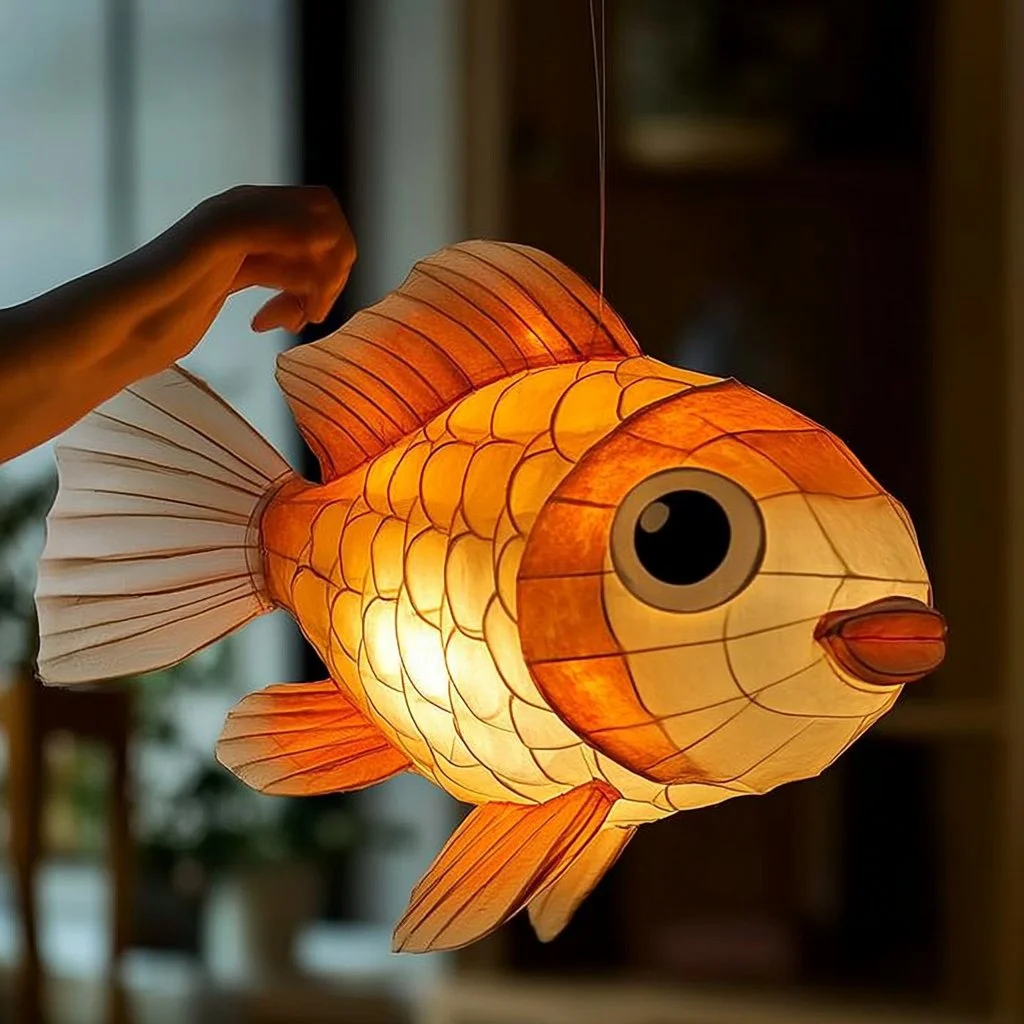
Creating a DIY goldfish tissue paper lantern is not just a delightful craft; it’s an opportunity to bring a splash of color and whimsy into your home. This charming project is perfect for kids and adults alike, making it a fantastic activity for family gatherings, playdates, or even as a solo endeavor. Every step of the process invites creativity, whether you’re choosing colors, shapes, or sizes. Not only will you have a beautiful lantern to display, but you will also enjoy the satisfying experience of crafting something unique and personal. Let’s dive into the joys and beauties of making your own goldfish lantern!
Why You’ll Love This DIY Goldfish Tissue Paper Lantern:
- Creative Expression: Personalize your lantern with colors and patterns.
- Fun for All Ages: This project is easy enough for children yet engaging for adults.
- Versatile Decor: Perfect for parties, holidays, or simply brightening up your living space.
- Simple Materials: Uses everyday items that are budget-friendly and easy to find.
- Light Up Your Space: The lantern provides a cozy glow, enhancing your ambiance.
Materials
- Colored tissue paper (orange, white, and black)
- LED tealight candle
- Clear plastic balloon or round lantern frame
- Scissors
- Glue stick or liquid glue
- A small brush (for liquid glue)
- Marker
- Optional: Googly eyes, ribbons, or other decorative items
Full Step-by-Step
Step 1: Prepare the Lantern Base
- Inflate the clear plastic balloon or set up your lantern frame.
- Ensure it’s securely positioned for decorating.
Step 2: Cut the Tissue Paper
- Sensory Cue: Feel the soft, delicate texture of the tissue paper as you handle it.
- Cut the orange tissue paper into scales or petal shapes, and black paper into small circles for the eyes.
Step 3: Attach the Goldfish Scales
- Start at the bottom of the balloon/frame, applying glue gently.
- Key Action: Layer the orange shapes overlapping slightly to create a fish scale effect.
- Continue adding layers until the desired look is achieved.
Step 4: Create the Face
- Use the marker to add a mouth and any additional features.
- Stick googly eyes or create your own eyes using the black paper circles.
Step 5: Insert the Light
- Place the LED tealight candle inside the lantern.
- Sensory Cue: Ensure the lantern feels stable; it should not wobble when the light is turned on.
Step 6: Illuminate and Enjoy
- Turn on the LED tealight and watch as your goldfish lantern comes to life!
Tips & Variations
- Color Swap: Experiment with different colors of tissue paper for unique fish designs.
- Add Glitter: For a sparkle effect, sprinkle glitter while the glue is still wet.
- Custom Shapes: Try creating other ocean creatures like jellyfish or starfish using the same technique.
- Functional Decor: Use a larger lantern for outdoor events or as a centerpiece.
Frequently Asked Questions
Q1: Can I use a regular candle instead of an LED tealight?
A1: It’s best to use an LED tealight to avoid any fire hazards since tissue paper is flammable.
Q2: What if I don’t have colored tissue paper?
A2: You can paint regular paper with watercolors or markers for a DIY solution.
Q3: How do I store the lantern after making it?
A3: Keep it in a cool, dry place, and if possible, store it in a box to maintain its shape.
Q4: Can I make this project with younger children?
A4: Absolutely! Just supervise carefully, especially when using scissors and glue.
Suggestions
- Host a lantern-making party with friends or family to share ideas and techniques.
- Incorporate this project into a themed party, such as an ocean or underwater adventure.
- Consider pairing this craft with a storytime session about marine life.
Final Thoughts
Creating your own goldfish tissue paper lantern is a rewarding and entertaining craft that can brighten any space. Whether you keep it for personal enjoyment or gift it to someone special, this project is sure to bring smiles. We’d love to see your unique versions! Please share your creations or leave a comment with your experiences below!
Print
DIY Goldfish Tissue Paper Lantern
- Total Time: 30 minutes
- Yield: 1 lantern
- Diet: N/A
Description
A delightful craft project that creates a colorful goldfish lantern, perfect for family gatherings and personal decor.
Ingredients
- Colored tissue paper (orange, white, and black)
- LED tealight candle
- Clear plastic balloon or round lantern frame
- Scissors
- Glue stick or liquid glue
- A small brush (for liquid glue)
- Marker
- Optional: Googly eyes, ribbons, or other decorative items
Instructions
- Prepare the Lantern Base: Inflate the clear plastic balloon or set up your lantern frame, ensuring it’s securely positioned for decorating.
- Cut the Tissue Paper: Cut the orange tissue paper into scales or petal shapes and the black paper into small circles for the eyes.
- Attach the Goldfish Scales: Start at the bottom of the balloon/frame, applying glue gently. Layer the orange shapes overlapping slightly to create a fish scale effect.
- Create the Face: Use the marker to add a mouth and any additional features, then stick googly eyes or create your own eyes using the black paper circles.
- Insert the Light: Place the LED tealight candle inside the lantern, ensuring stability.
- Illuminate and Enjoy: Turn on the LED tealight and watch as your goldfish lantern comes to life!
Notes
Use LED tealights for safety; feel free to experiment with colors and patterns.
- Prep Time: 30 minutes
- Cook Time: 0 minutes
- Category: Craft
- Method: Crafting
- Cuisine: N/A
Nutrition
- Serving Size: 1 lantern
- Calories: 0
- Sugar: 0g
- Sodium: 0mg
- Fat: 0g
- Saturated Fat: 0g
- Unsaturated Fat: 0g
- Trans Fat: 0g
- Carbohydrates: 0g
- Fiber: 0g
- Protein: 0g
- Cholesterol: 0mg

