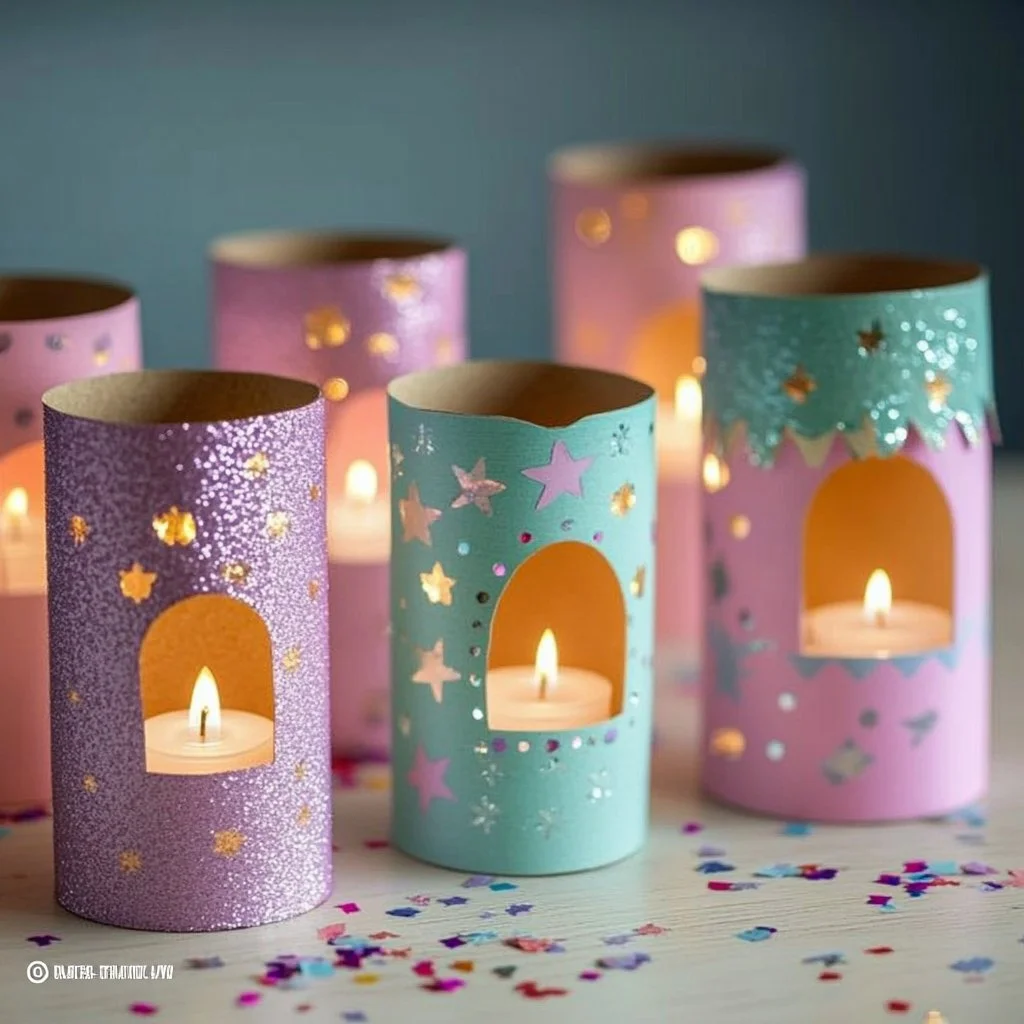
Creating beautiful fairy lanterns is a delightful and rewarding DIY project, perfect for adding a touch of magic to your home. These paper roll fairy lanterns make a charming decoration for parties or can be a cozy addition to your evening ambiance. Made from simple materials, you can customize them in countless ways to suit your style. Whether it’s for a festive celebration, a romantic dinner, or a whimsical children’s room, these glowing lanterns can elevate any space. With the warmth of candlelight dancing through the intricate designs, you’ll find joy in crafting these adorable lights. Gather your materials and let’s get started on this enchanting journey!
Why You’ll Love This Paper Roll Fairy Lanterns
- Eco-Friendly Craft: Uses recycled materials, promoting sustainability.
- Creative Expression: Customize designs and colors to match your decor.
- Easy and Fun: Simple steps make it accessible for all ages.
- Budget-Friendly: Requires minimal investment for a beautiful outcome.
- Great for Parties: Create a magical atmosphere for special occasions.
- Perfect Gift: Handmade lanterns make thoughtful and unique presents.
Materials
- Empty toilet paper rolls
- White glue or a glue stick
- LED tea lights
- Craft paint (various colors)
- Scissors
- Craft knife
- Paintbrush
- Optional: glitter, decorative paper, or washi tape
Step-by-Step Instructions
Step 1: Prepare the Paper Rolls
- Start with clean and dry toilet paper rolls.
- Trim the roll if you desire a shorter lantern.
Step 2: Designing the Lanterns
- Use the craft knife to carefully cut shapes into the sides of the roll. Think stars, hearts, or abstract patterns.
- Make sure to leave some part of the roll uncut to maintain stability.
Step 3: Painting
- Use a brush to apply craft paint to the outside of the roll.
- Consider using multiple colors to create a gradient or a fun design.
- Allow the paint to dry completely.
Step 4: Finishing Touches
- If desired, add glitter or decorative paper to enhance the aesthetics.
- Secure any additional elements with glue.
Step 5: Insert the LED Light
- Place an LED tea light inside the roll.
- Turn on the light and watch the patterns shimmer!
Tips & Variations
- Use Different Roll Sizes: Try using paper towel rolls for larger lanterns.
- Experiment with Materials: Swap out paint for colored tissue paper for a stained-glass effect.
- Decoration: Incorporate natural elements like twine or dried flowers for a rustic touch.
- Themes: Create themed designs for holidays or celebrations, such as pumpkins for Halloween.
Frequently Asked Questions
Q1: Can I use real candles instead of LED lights?
A1: It’s not recommended due to fire hazards. Always prioritize safety.
Q2: How can I make my lanterns more durable?
A2: Apply a layer of clear sealant over the paint to protect the surface.
Q3: What’s the best way to hang the lanterns?
A3: Use string or fishing line to hang them up, or place on a flat surface.
Q4: Can I make these lanterns outside?
A4: Yes! Just ensure materials are protected from moisture.
Serving Suggestions or Pairings
Pair your paper roll fairy lanterns with soft, ambient background music. For a cozy evening, enjoy them with herbal tea, mulled wine, or spiced cider. As a delightful touch, serve some vanilla cake pops or chocolate-dipped marshmallows alongside your lanterns for a sweet treat.
Final Thoughts
Crafting paper roll fairy lanterns is not just about creating beautiful decor, but also about embracing your creativity and finding joy in DIY projects. Get inspired, customize your designs, and light up your spaces with these enchanting pieces. We’d love to see your versions! Share your creations in the comments below!
Print
Paper Roll Fairy Lanterns
- Total Time: 15 minutes
- Yield: 2 lanterns
- Diet: N/A
Description
Create beautiful and eco-friendly fairy lanterns using simple materials that bring a magical ambiance to any space.
Ingredients
- Empty toilet paper rolls
- White glue or a glue stick
- LED tea lights
- Craft paint (various colors)
- Scissors
- Craft knife
- Paintbrush
- Optional: glitter, decorative paper, or washi tape
Instructions
- Start with clean and dry toilet paper rolls. Trim the roll if you desire a shorter lantern.
- Use the craft knife to carefully cut shapes into the sides of the roll. Think stars, hearts, or abstract patterns. Make sure to leave some part of the roll uncut to maintain stability.
- Use a brush to apply craft paint to the outside of the roll. Consider using multiple colors to create a gradient or a fun design. Allow the paint to dry completely.
- If desired, add glitter or decorative paper to enhance the aesthetics. Secure any additional elements with glue.
- Place an LED tea light inside the roll. Turn on the light and watch the patterns shimmer!
Notes
For a rustic touch, incorporate natural elements like twine or dried flowers. Ensure safety by using LED lights instead of real candles.
- Prep Time: 15 minutes
- Cook Time: 0 minutes
- Category: Crafts
- Method: DIY
- Cuisine: N/A
Nutrition
- Serving Size: 1 lantern
- Calories: 0
- Sugar: 0g
- Sodium: 0mg
- Fat: 0g
- Saturated Fat: 0g
- Unsaturated Fat: 0g
- Trans Fat: 0g
- Carbohydrates: 0g
- Fiber: 0g
- Protein: 0g
- Cholesterol: 0mg

