Introduction
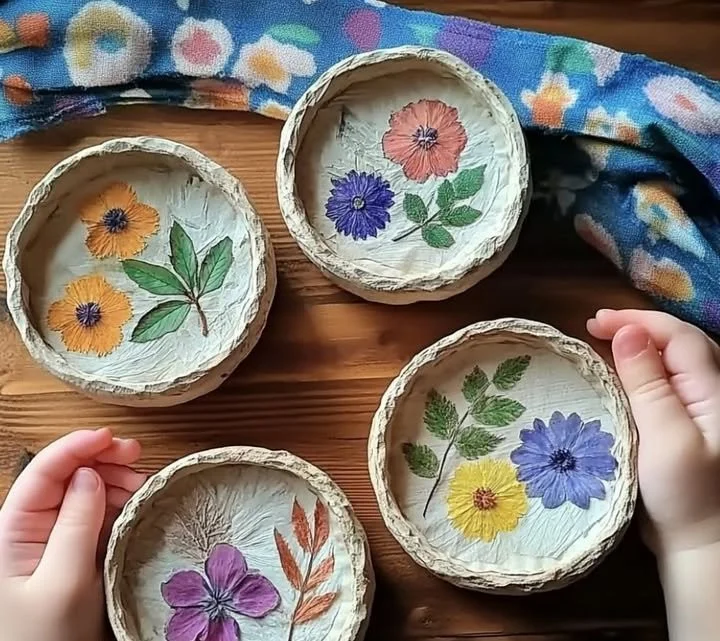
Pinch pots are a delightful way to create personalized, functional artworks for your home. These small, hand-formed pots add a touch of charm and character to any space, making them perfect for showcasing succulents, storing small items, or even serving as whimsical gift containers. The simplicity of the pinch pot technique allows beginners and experienced crafters alike to explore their creativity while enjoying a satisfying hands-on experience. Whether you’re hosting a crafty gathering or looking for a soothing solo project, pinch pots are the perfect medium to express your artistic flair and transform clay into beautiful, usable pieces.
Why You’ll Love This Pinch Pots
- Creativity Unleashed: Easy to shape and customize, allowing for unique designs.
- Stress Relief: The tactile experience of working with clay is therapeutic.
- Great for All Ages: Perfect family activity; everyone can join in the fun!
- Practical Uses: Ideal for small plants, trinkets, or as decorative objects.
- Gift-Ready: Handcrafted items make thoughtful presents for friends and family.
Materials
- Air-dry clay or oven-bake clay
- A small bowl of water (for smoothing)
- A rolling pin
- A craft knife or clay cutter
- A clay sculpting tool (optional)
- Paints or sealants (optional for decoration)
Step-by-Step Instructions
1. Prepare Your Workspace
- Lay down newspaper or a plastic sheet to keep your area clean.
- Gather all materials within reach.
2. Roll Out the Clay
- Take a portion of your clay and knead it until soft and pliable.
- Use a rolling pin to flatten the clay to about 1/4 inch thick.
3. Shape Your Pinch Pot
- Cut out a circle from the clay using a craft knife.
- Pinch the edges of the circle to form a shallow bowl shape, pressing up from the bottom.
4. Smooth the Surface
- Dip your fingers in water and gently smooth out any cracks or rough edges for a polished look.
5. Let It Dry
- Allow your pinch pot to dry completely as per your clay’s instructions (may take several hours to a day).
6. Decorate (Optional)
- Once dry, paint your pinch pot or apply sealants for added design and durability.
Tips & Variations
- Texture: Use tools or natural objects (like leaves) to imprint textures into the pot.
- Size: Adjust the size of your circles to create varying pot sizes.
- Colors: Experiment with different paint colors or glazes to match your decor.
- Add Handles: If desired, roll small clay coils to add decorative handles.
Frequently Asked Questions
1. What type of clay should I use?
You can use air-dry or oven-bake clay, depending on your preference and project requirements.
2. How do I prevent cracking while drying?
Ensure even thickness and avoid direct sunlight during drying, which can promote cracking.
3. Can I use these pots outdoors?
If you use air-dry clay, it’s best for indoor use only. Oven-bake clay may be more durable; however, it is still recommended for indoor settings.
4. What if I don’t have a rolling pin?
You can use any cylindrical object for rolling out the clay, like a wine bottle or a sturdy glass.
Serving Suggestions or Pairings
- Pair your pinch pots with vibrant succulents or herbs for a natural aesthetic.
- Consider using them for small snacks, like nuts or candies, at gatherings.
- Great alongside beverages; they can serve as charming drink coasters as well.
Final Thoughts
Creating pinch pots is not just about crafting; it’s about embedding personal stories and creativity into everyday items. We encourage you to try your hand at this joyful activity, and we’d love to see your finished creations! Share your versions in the comments below or add any tips you’ve discovered along the way! Happy crafting!
Print
Pinch Pots
- Total Time: 120 minutes
- Yield: 1 pot
- Diet: N/A
Description
Learn to create charming pinch pots using simple clay techniques, perfect for decoration or practical use.
Ingredients
- Air-dry clay or oven-bake clay
- A small bowl of water (for smoothing)
- A rolling pin
- A craft knife or clay cutter
- A clay sculpting tool (optional)
- Paints or sealants (optional for decoration)
Instructions
- Prepare Your Workspace: Lay down newspaper or a plastic sheet to keep your area clean and gather all materials within reach.
- Roll Out the Clay: Take a portion of your clay and knead it until soft and pliable. Use a rolling pin to flatten the clay to about 1/4 inch thick.
- Shape Your Pinch Pot: Cut out a circle from the clay using a craft knife. Pinch the edges of the circle to form a shallow bowl shape, pressing up from the bottom.
- Smooth the Surface: Dip your fingers in water and gently smooth out any cracks or rough edges for a polished look.
- Let It Dry: Allow your pinch pot to dry completely as per your clay’s instructions (may take several hours to a day).
- Decorate (Optional): Once dry, paint your pinch pot or apply sealants for added design and durability.
Notes
Consider adding textures with natural objects. Adjust sizes for varying pot dimensions.
- Prep Time: 15 minutes
- Cook Time: 0 minutes
- Category: Craft
- Method: Hand-forming
- Cuisine: Crafting
Nutrition
- Serving Size: 1 pot
- Calories: 0
- Sugar: 0g
- Sodium: 0mg
- Fat: 0g
- Saturated Fat: 0g
- Unsaturated Fat: 0g
- Trans Fat: 0g
- Carbohydrates: 0g
- Fiber: 0g
- Protein: 0g
- Cholesterol: 0mg

