Introduction
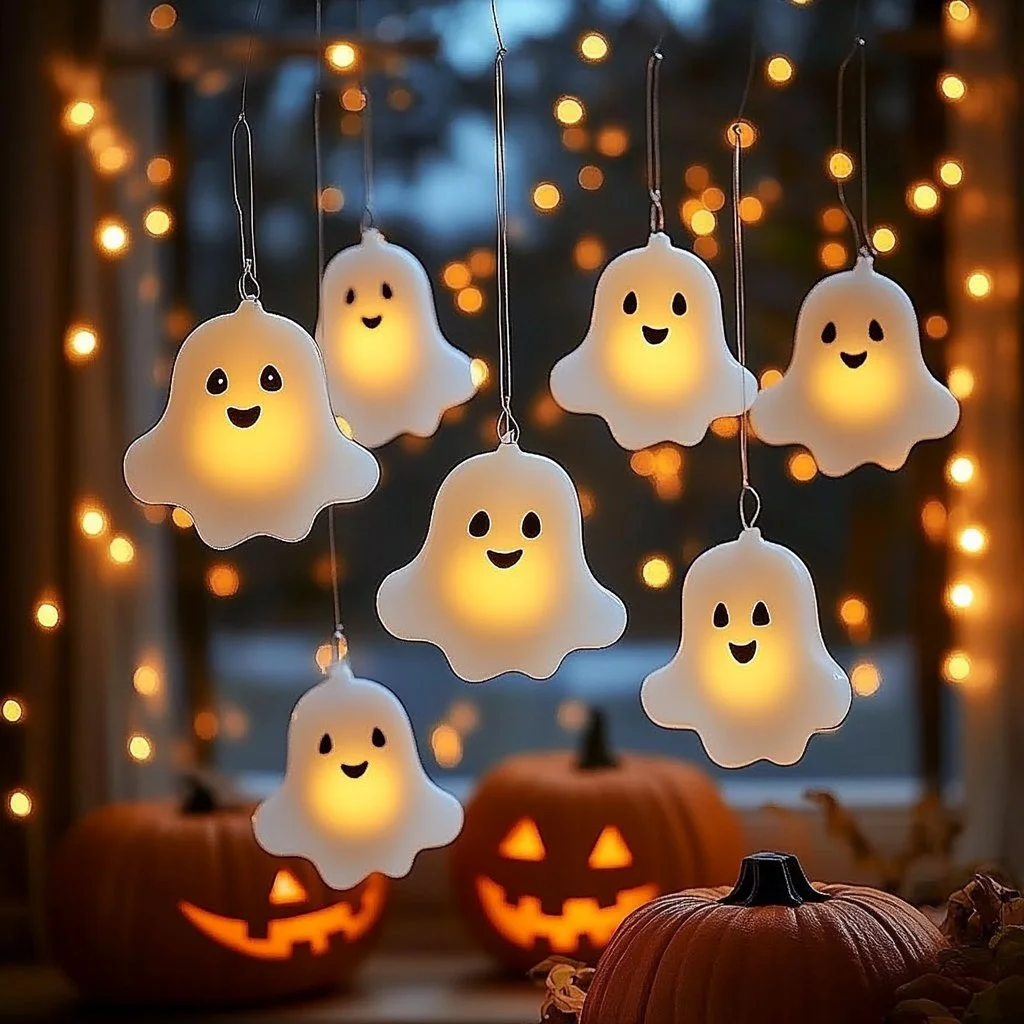
As the spooky season approaches, decorating your home becomes a thrilling adventure. One whimsical option to consider is creating DIY floating white ghost window stickers. These playful decorations can transform any window into a ghostly sight, delighting both children and adults alike. Not only are they easy to make, but they also bring an enchanting atmosphere to your home, perfect for Halloween or any haunted gathering. Let’s dive into the details of how you can create these charming ghostly figures and add a touch of spookiness to your space.
Why You’ll Love This DIY Floating White Ghost Window Stickers
- Easy to Make: With simple materials and clear instructions, you can create these ghosts in no time.
- Cost-Effective: You can craft these decorations at home, saving money on store-bought options.
- Safe & Non-Toxic: Made with child-friendly materials, perfect for homes with little ones.
- Customizable: Tailor the size and design of each ghost to fit your unique aesthetic.
- Reusable: Create a lasting decoration that you can enjoy year after year.
Materials
- White window film or contact paper
- Black permanent marker or craft paint
- Scissors
- A clean, flat surface
- Tape (optional for securing)
Step-by-Step Instructions
Preparing the Window Film
- Cut the Film: Measure and cut pieces of white window film into ghost shapes. Aim for a size that suits your window.
- Design Faces: Use a black permanent marker to draw spooky or silly faces on each ghost. Get creative!
Applying the Stickers
- Clean the Surface: Wipe the window with a glass cleaner to ensure it’s free of dust and grime.
- Peel and Stick: Carefully peel the backing off the window film and apply it to the cleaned surface. Smooth out any bubbles with your fingers.
Finishing Touches
- Secure if Needed: If your ghosts aren’t sticking well, use a bit of tape at the corners to hold them in place.
- Step Back and Enjoy: Take a moment to admire your ghostly creations and see how they float in the sunlight.
Tips & Variations
- Go Glow-in-the-Dark: Use glow-in-the-dark paint for the faces to make your ghosts visible at night.
- Add Accessories: Attach ribbons, hats, or other spooky accessories to personalize your designs.
- Create Different Sizes: Experiment with small, medium, and large ghosts to enhance visual interest.
- Theme It: Incorporate other Halloween symbols like pumpkins or bats alongside the ghosts.
Frequently Asked Questions
Q1: Can I use regular paper instead of window film?
A1: While you can use regular paper, it won’t adhere as well to the window and may not hold up as long.
Q2: How do I remove the stickers once Halloween is over?
A2: To remove, gently peel them off the window. Any residue can be cleaned with soapy water.
Q3: Where can I find window film?
A3: Window film can be purchased at craft stores, home improvement shops, or online retailers.
Q4: What if the stickers aren’t sticking?
A4: Make sure the window is thoroughly cleaned. If sticky issues persist, use a small piece of tape to secure the corners.
Serving Suggestions or Pairings
Pair your ghost window stickers with spooky treats like ghost-shaped cookies or pumpkin spice lattes to enhance your haunted atmosphere. You could also use eerie sound effects or dim lighting to elevate your Halloween décor.
Final Thoughts
Creating these DIY floating white ghost window stickers is a fantastic way to infuse your home with Halloween spirit. It’s an engaging activity that allows for creativity while bringing a playful touch to your decorations. We’d love to hear your unique versions or how you customized your ghosts! Leave a comment below and share your Halloween spirit with us!
Print
DIY Floating White Ghost Window Stickers
- Total Time: 15 minutes
- Yield: As many ghosts as desired
- Diet: N/A
Description
Create enchanting floating white ghost window stickers for a spooky home decoration perfect for Halloween.
Ingredients
- White window film or contact paper
- Black permanent marker or craft paint
- Scissors
- A clean, flat surface
- Tape (optional for securing)
Instructions
- Cut the Film: Measure and cut pieces of white window film into ghost shapes that suit your window.
- Design Faces: Use a black permanent marker to draw faces on each ghost.
- Clean the Surface: Wipe the window with a glass cleaner to ensure it’s clean.
- Peel and Stick: Carefully peel the backing off and apply to the cleaned surface.
- Secure if Needed: If ghosts aren’t sticking well, use tape at the corners.
- Step Back and Enjoy: Admire your creations in the sunlight.
Notes
Go glow-in-the-dark with the paint for nighttime visibility; add accessories for a personal touch.
- Prep Time: 15 minutes
- Cook Time: 0 minutes
- Category: Decoration
- Method: Crafting
- Cuisine: N/A
Nutrition
- Serving Size: 1 window
- Calories: 0
- Sugar: 0g
- Sodium: 0mg
- Fat: 0g
- Saturated Fat: 0g
- Unsaturated Fat: 0g
- Trans Fat: 0g
- Carbohydrates: 0g
- Fiber: 0g
- Protein: 0g
- Cholesterol: 0mg

