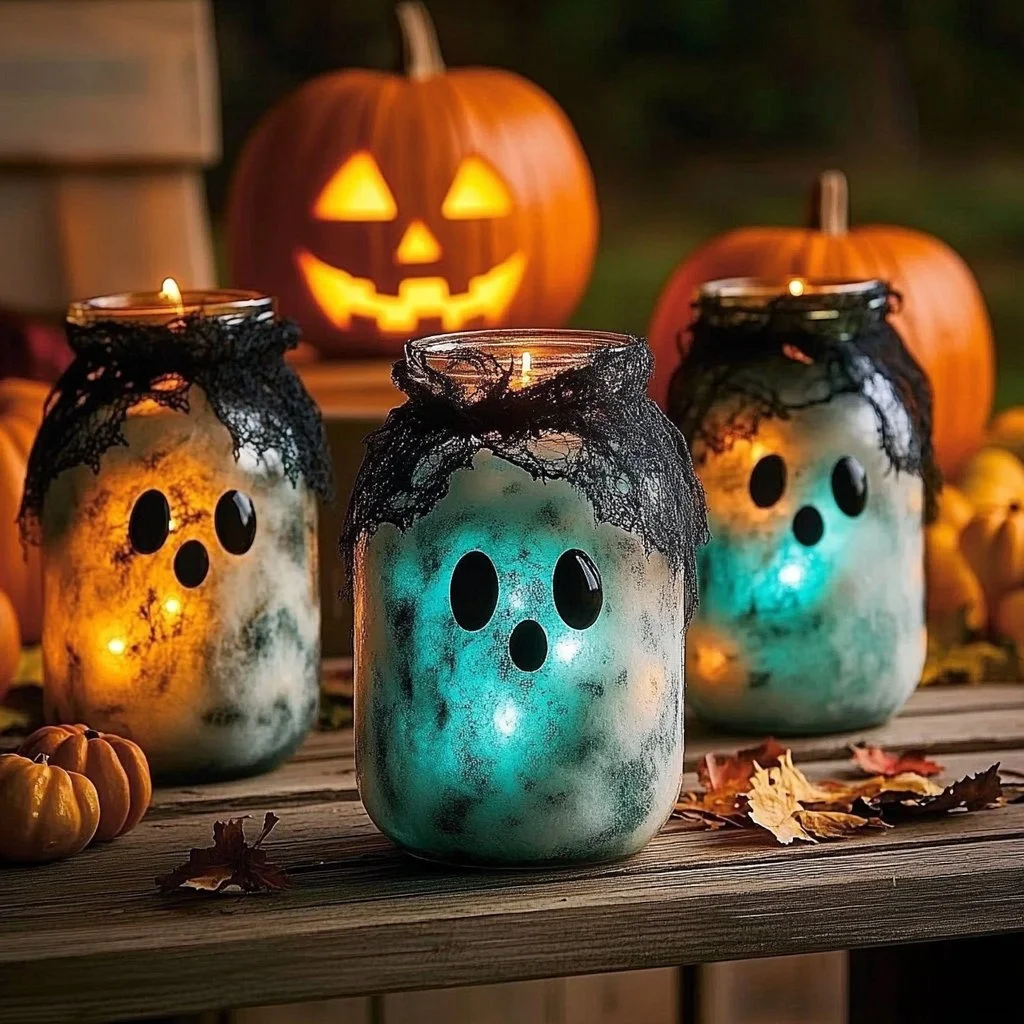
Transform your space into a spooky haven with glow-in-the-dark ghost jars! These whimsical decorations are perfect for Halloween parties or as fun nightlights for kids. Using simple materials, you can create these eerie yet charming jars that flicker with an enchanting glow. Not only do they add a spooky flair to your home, but they also spark creativity and fun for all ages. In this guide, we’ll walk you through the process of crafting your very own glow-in-the-dark ghost jars, ensuring a delightful experience that you can cherish every Halloween season or anytime you want to brighten up your space with a ghostly twist.
Why You’ll Love This Glow-in-the-Dark Ghost Jars
- Easy and Fun: Perfect for all ages, these jars bring families together for a crafty bonding experience.
- Customizable: Personalize your jars with various designs and colors – no two jars need to be the same!
- Budget-Friendly: Made from inexpensive materials, this DIY project won’t break the bank.
- Versatile Decoration: Ideal for Halloween, parties, or as unique nightlights in kids’ rooms.
- Glow Effect: The glow-in-the-dark feature adds a magical touch, providing a soft, eerie light in the dark.
Materials
- Mason jars or glass jars
- Glow-in-the-dark paint or glow sticks
- White craft or acrylic paint
- Paintbrushes or sponges
- Black construction paper or permanent markers (for faces)
- Water (if using glow sticks)
- Mod Podge (optional for sealing)
- Twine or ribbon (for decoration)
Step-by-Step Instructions
Prepare Your Jars
- Clean the Jars: Start by thoroughly cleaning and drying your mason jars to ensure a smooth surface for painting.
- Paint the Inside: Use a paintbrush or sponge to apply a thin layer of glow-in-the-dark paint on the inside of the jar. If using glow sticks, cut them open and pour the contents inside.
Add Some Color
- Create the Base Color: Once the glow paint has dried, add a thin layer of white craft paint to the inside. This enhances the glow effect.
- Optional Sealing: If desired, apply a layer of Mod Podge over the paint for added durability.
Design Your Faces
- Cut Out Faces: Use black construction paper to cut out spooky shapes for eyes, mouths, or other ghostly features. Alternatively, you can draw directly onto the jar using permanent markers.
- Attach Faces: Secure the paper cutouts to the outside of the jar or let your drawings dry before displaying.
Finishing Touches
- Add Twine: Use twine or ribbon to wrap around the neck of the jar for a rustic touch.
- Charge the Glow: Place your jars in a light source for a few minutes to "charge" the glow for maximum brightness in the dark.
Tips & Variations
- Color Choices: Experiment with different colors of glow-in-the-dark paint for unique effects.
- Aged Look: For a rustic appearance, use sandpaper to distress the outside of the jars.
- Additional Features: Add spider webbing or other embellishments for an even spookier scene.
- Lighting Alternatives: Use battery-operated tea lights for a safe, flickering glow inside the jar.
Frequently Asked Questions
Q1: Can I use regular paint?
A1: While you can use regular paint, the glow-in-the-dark effect won’t be present. It’s essential to use specialized glow paint.
Q2: How long does the glow last?
A2: The glow from glow-in-the-dark materials typically lasts a few hours after being charged with light.
Q3: What if I want my jars to be more vibrant?
A3: You can layer multiple coats of glow paint for a brighter effect. Let each layer dry before applying the next.
Q4: Can I use other types of jars?
A4: Absolutely! Feel free to use any glass or clear plastic jars, adjusting the designs to fit the shape.
Serving Suggestions or Pairings
Pair your ghost jars with spooky-themed drinks like “witches’ brew” punch or eerie purple lemonade. For added fun, serve finger foods like "mummy" hot dogs or ghost-shaped cookies. These pairings will create a cohesive theme, perfect for any Halloween gathering.
Final Thoughts
Creating glow-in-the-dark ghost jars is not only an easy and enjoyable DIY project, but it also adds a touch of creativity to your seasonal décor. Whether you’re making them for yourself or as gifts for friends, these jars are sure to enchant everyone who sees them. We’d love to see your creative versions! Share your projects in the comments below or let us know if you have any additional tips to make these ghost jars even spookier!
Print
Glow-in-the-Dark Ghost Jars
- Total Time: 15 minutes
- Yield: 4 jars
- Diet: N/A
Description
Transform your space with these enchanting glow-in-the-dark ghost jars, perfect for Halloween or as whimsical nightlights for kids.
Ingredients
- Mason jars or glass jars
- Glow-in-the-dark paint or glow sticks
- White craft or acrylic paint
- Paintbrushes or sponges
- Black construction paper or permanent markers (for faces)
- Water (if using glow sticks)
- Mod Podge (optional for sealing)
- Twine or ribbon (for decoration)
Instructions
- Clean the Jars: Start by thoroughly cleaning and drying your jars.
- Paint the Inside: Apply a thin layer of glow-in-the-dark paint inside the jar.
- Create the Base Color: Once dry, add a layer of white craft paint for enhanced glow.
- Optional Sealing: Apply Mod Podge for durability, if desired.
- Cut Out Faces: Use black paper for spooky features, or draw directly on the jar.
- Attach Faces: Secure paper cutouts to the jar or let drawings dry.
- Add Twine: Wrap twine or ribbon around the neck for decoration.
- Charge the Glow: Place the jars in light for a few minutes to
Notes
Experiment with different colors and effects for a unique look.
- Prep Time: 15 minutes
- Cook Time: 0 minutes
- Category: DIY Craft
- Method: Crafting
- Cuisine: N/A
Nutrition
- Serving Size: 1 jar
- Calories: 0
- Sugar: 0g
- Sodium: 0mg
- Fat: 0g
- Saturated Fat: 0g
- Unsaturated Fat: 0g
- Trans Fat: 0g
- Carbohydrates: 0g
- Fiber: 0g
- Protein: 0g
- Cholesterol: 0mg

