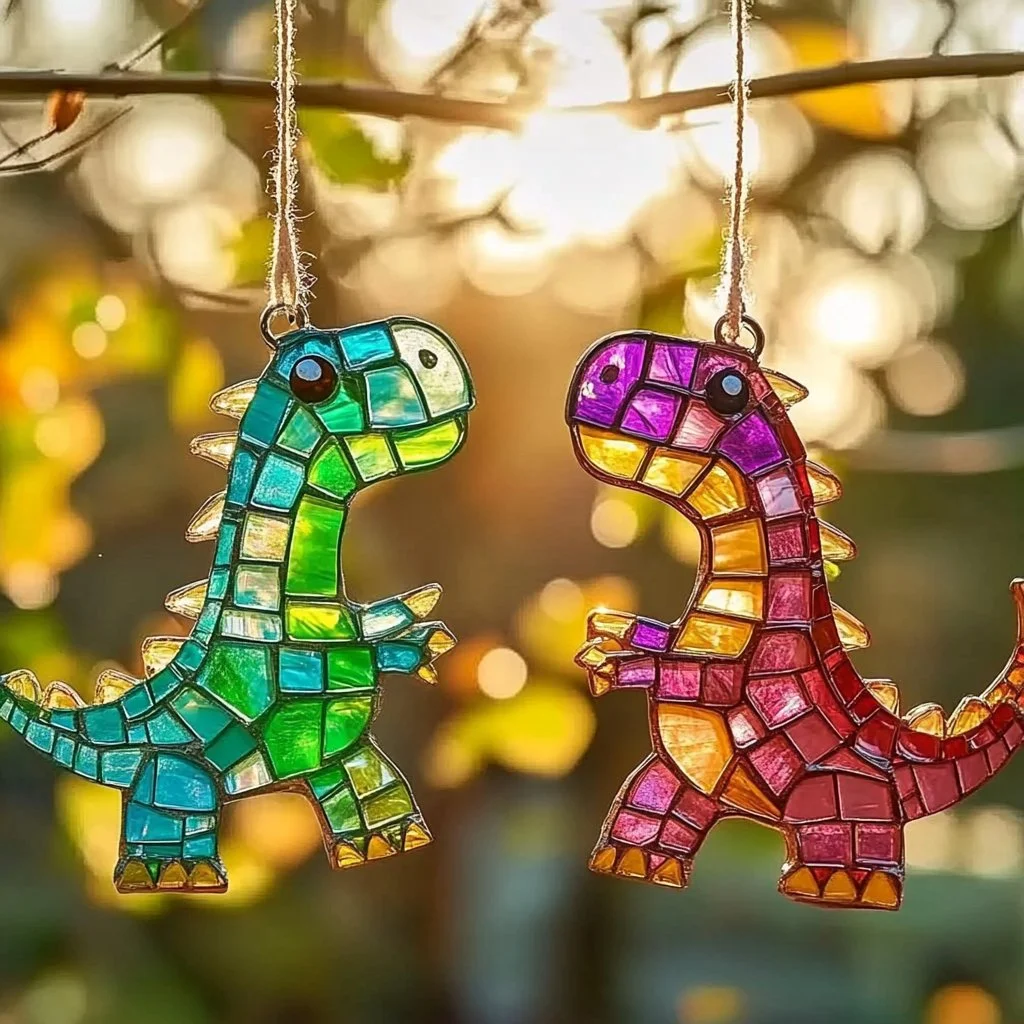
Creating suncatchers is a delightful way to brighten up your home while encouraging creativity, especially for kids. DIY Dinosaur Suncatchers are not only fun to make but also educational, allowing children to explore the fascinating world of dinosaurs while fostering their artistic skills. Combining vibrant colors and crafty techniques, these suncatchers will catch the sunlight and cast cheerful patterns around your space, enhancing any window with aesthetic allure. Whether you’re looking for a fun weekend project or a way to keep the kids engaged, this DIY activity promises to be a hit. Plus, with simple materials and easy-to-follow instructions, it’s an accessible crafting option for all ages.
Why You’ll Love This DIY Dinosaur Suncatchers
- Creative Expression: Encourages imaginative designs and color use.
- Educational: Teaches kids about dinosaurs while crafting.
- Indoor & Outdoor Fun: Brightens any space and can be hung indoors or outdoors.
- Sensory Experience: Engaging hands-on activity that stimulates visual and tactile senses.
- Quality Family Time: Perfect for bonding over a shared, enjoyable project.
- Customizable: Easily tailor the colors and sizes to match personal preferences or home decor.
Materials
- Clear Contact Paper (or transparency sheets)
- Tissue Paper (various colors)
- Scissors
- Black Marker (for outlining dinosaur shapes)
- Dinosaur Template (printable))
- String or Ribbon (for hanging)
- Crafting Surface (like a table or large cutting board)
Step-by-Step Instructions
Prepare Your Workspace
- Clear a flat area and cover it with newspaper or a disposable tablecloth to catch any tissue paper scraps.
Create the Dinosaur Template
- Print a dinosaur silhouette or draw your own on paper.
- Use black marker for extra visibility.
Cut the Contact Paper
- Cut two pieces of clear contact paper, about 12×12 inches each, making sure they are the same size.
Assemble the Suncatcher
- Peel the backing off one piece of contact paper and lay it sticky side up.
- Place the dinosaur template on top if using, then arrange your tissue paper pieces inside the outline.
- Use a mix of colors for a vibrant design.
Seal the Design
- Once satisfied with the arrangement, peel the second piece of contact paper and carefully place it sticky side down over the tissue paper and the first piece, sealing everything together.
Finish & Hang
- Trim any excess contact paper around the edges to create a clean finish.
- Attach string or ribbon to the top for hanging.
Tips & Variations
- Customize Colors: Use themed colors for different holidays or seasons.
- Different Shapes: Try other silhouettes, like stars or hearts, for variety.
- Add Glitter: Sprinkle a bit of glitter on top of the tissue before sealing for extra sparkle.
- Make Them Big: Experiment with larger designs to cover a bigger window area.
Frequently Asked Questions
1. What if I don’t have contact paper? Can I use something else?
Yes! Transparency sheets can also work, although you may need to use tape to secure the edges.
2. Can I use regular paper instead of tissue paper?
Regular paper can work, but it won’t be as translucent. It may not catch the sunlight as effectively.
3. How do I make the suncatcher last longer?
Keep your suncatcher away from direct sunlight for prolonged periods to prevent fading, and store it carefully when not in use.
4. Is this project safe for younger children?
Yes, but supervision is recommended, especially with scissors. Use child-friendly scissors for safety.
Serving Suggestions or Pairings
Pair your DIY Dinosaur Suncatchers with a refreshing glass of lemonade or iced tea during crafting sessions. For an extended fun experience, consider setting up a themed dinosaur movie marathon or serving dinosaur-shaped cookies for a delightful treat.
Final Thoughts
Creating DIY Dinosaur Suncatchers is a wonderful way to bring some sunshine and creativity into your home. This project not only engages kids in crafting but also sparks their imagination and curiosity about the prehistoric world. We encourage you to share your unique designs and experiences in the comments below! Happy crafting!
Print
DIY Dinosaur Suncatchers
- Total Time: 45 minutes
- Yield: 1 suncatcher
- Diet: N/A
Description
Create vibrant DIY Dinosaur Suncatchers that brighten up your home while fostering creativity and learning about dinosaurs.
Ingredients
- Clear Contact Paper (or transparency sheets)
- Tissue Paper (various colors)
- Scissors
- Black Marker (for outlining dinosaur shapes)
- Dinosaur Template (printable)
- String or Ribbon (for hanging)
- Crafting Surface (like a table or large cutting board)
Instructions
- Prepare Your Workspace: Clear a flat area and cover it with newspaper or a disposable tablecloth.
- Create the Dinosaur Template: Print or draw a dinosaur silhouette on paper and outline it with a black marker.
- Cut the Contact Paper: Cut two pieces of clear contact paper, about 12 inches each.
- Assemble the Suncatcher: Peel the backing off one piece of contact paper, lay it sticky side up, place the dinosaur template on top, and arrange your tissue paper pieces inside the outline.
- Seal the Design: Peel the second piece of contact paper and place it sticky side down over the tissue paper.
- Finish & Hang: Trim excess contact paper and attach string or ribbon for hanging.
Notes
Customize colors and shapes for different themes. Add glitter for extra sparkle and experiment with larger designs.
- Prep Time: 15 minutes
- Cook Time: 30 minutes
- Category: Craft
- Method: Crafting
- Cuisine: N/A
Nutrition
- Serving Size: 1 suncatcher
- Calories: N/A
- Sugar: N/A
- Sodium: N/A
- Fat: N/A
- Saturated Fat: N/A
- Unsaturated Fat: N/A
- Trans Fat: N/A
- Carbohydrates: N/A
- Fiber: N/A
- Protein: N/A
- Cholesterol: N/A

