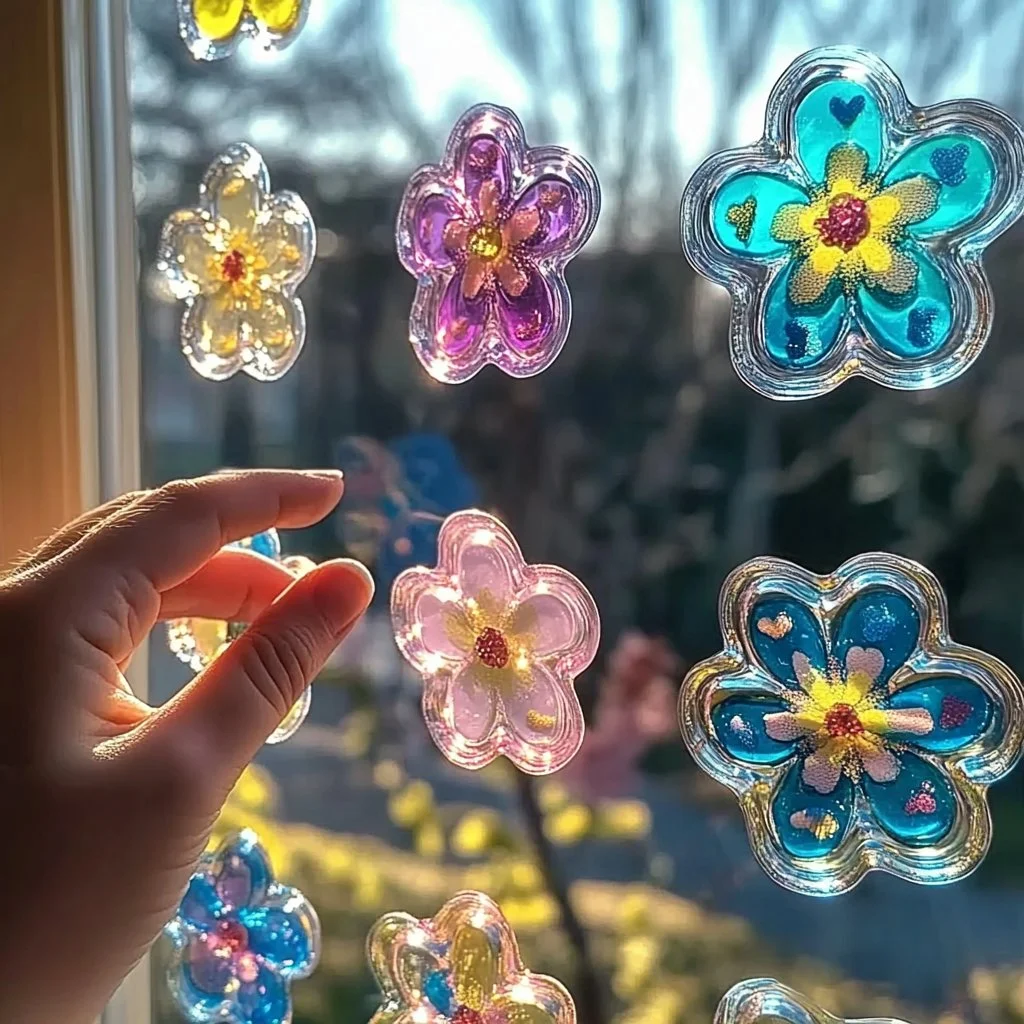
DIY window clings are a fun and creative way to brighten up your home decor or add a splash of seasonal cheer. With just a few simple ingredients, you can create vibrant designs that not only decorate your windows but are also easy to remove and reuse. Perfect for kids’ activities or adult craft sessions, these cling designs can be customized to fit holidays, special occasions, or personal style. Plus, they provide an engaging project that promotes creativity while developing fine motor skills. Dive into this simple guide and unleash your imagination!
Why You’ll Love This DIY Window Clings
- Easy to Make: Requires minimal ingredients and time.
- Customizable: Tailor designs for any holiday or occasion.
- Non-toxic: Safe for kids to create and play with.
- Reusable: Easy to clean and reapply as you change decor.
- Budget-friendly: Affordable materials that yield wonderful results.
Materials
- 1 cup of white school glue
- 1 cup of cornstarch
- 1 tablespoon of vinegar
- Food coloring or liquid watercolors
- Parchment paper or wax paper
- Mixing bowl
- Spoon or spatula
- Squeeze bottles or piping bags (optional)
Step-by-Step Instructions
1. Prepare the Mixture
- In a mixing bowl, combine the white school glue, cornstarch, and vinegar.
- Stir thoroughly until the mixture is smooth and lump-free.
2. Add Color
- Divide the mixture into smaller bowls if you want multiple colors.
- Add a few drops of food coloring or liquid watercolors to each bowl, mixing until you achieve the desired shade.
3. Transfer to Paper
- Take the parchment or wax paper and lay it flat on a clean surface.
- Use a spoon or a squeeze bottle to layer your designs onto the paper.
- Experiment with different shapes, outlines, and patterns!
4. Dry the Clings
- Allow the designs to dry for 24 hours at room temperature.
- Once dry, gently peel them off the paper. They should come off easily without any residue.
5. Display Your Creations
- Apply your window clings to clean, dry windows. They can be rearranged multiple times without damage.
Tips & Variations
- Custom Shapes: Use cookie cutters to outline shapes before filling in the designs.
- Glitter Additions: Mix in some glitter for extra sparkle.
- Seasonal Themes: Create designs specifically for holidays, like hearts for Valentine’s Day, leaves for autumn, etc.
- Layering Colors: Fill in one color, let it dry slightly, and then layer another for depth.
Frequently Asked Questions
Q1: Can I use other types of glue?
A: While white school glue is best for this project, other clear or washable glues might work, but results may vary in stickiness.
Q2: How do I store unused clings?
A: Store them flat between sheets of parchment paper in a cool, dry place.
Q3: What if my clings aren’t sticking well?
A: Make sure your windows are clean and dry before applying the clings. You may also want to try a thicker application.
Q4: Can I add scents to my clings?
A: Yes! A couple of drops of essential oils can be added for a pleasant aroma, though it may affect texture.
Serving Suggestions or Pairings
Pair your colorful window clings with seasonal decorations, or enjoy a crafting day with friends and family alongside refreshing drinks like lemonade or hot cocoa. Adding a fun soundtrack or crafting snacks can elevate your DIY experience!
Final Thoughts
Creating DIY window clings is a delightful way to express creativity and personalize your space. Whether you’re making them for a holiday or just for fun, these clings are sure to bring joy and color to your windows. We’d love to hear about your creations! Share your versions in the comments or let us know how you customized your clings!
Print
DIY Window Clings
- Total Time: 1455 minutes
- Yield: Multiple designs
- Diet: Non-dietary
Description
Brighten up your home with colorful and customizable DIY window clings that are fun for all ages.
Ingredients
- 1 cup of white school glue
- 1 cup of cornstarch
- 1 tablespoon of vinegar
- Food coloring or liquid watercolors
- Parchment paper or wax paper
- Mixing bowl
- Spoon or spatula
- Squeeze bottles or piping bags (optional)
Instructions
- In a mixing bowl, combine the white school glue, cornstarch, and vinegar. Stir thoroughly until the mixture is smooth and lump-free.
- Divide the mixture into smaller bowls if you want multiple colors. Add a few drops of food coloring or liquid watercolors to each bowl, mixing until you achieve the desired shade.
- Take the parchment or wax paper and lay it flat on a clean surface. Use a spoon or a squeeze bottle to layer your designs onto the paper. Experiment with different shapes, outlines, and patterns!
- Allow the designs to dry for 24 hours at room temperature. Once dry, gently peel them off the paper. They should come off easily without any residue.
- Apply your window clings to clean, dry windows. They can be rearranged multiple times without damage.
Notes
You can customize shapes with cookie cutters and add glitter for extra sparkle. Use essential oils for a pleasant aroma when making your clings.
- Prep Time: 15 minutes
- Cook Time: 1440 minutes
- Category: Craft
- Method: Crafting
- Cuisine: American
Nutrition
- Serving Size: 1 design
- Calories: 5
- Sugar: 0g
- Sodium: 0mg
- Fat: 0g
- Saturated Fat: 0g
- Unsaturated Fat: 0g
- Trans Fat: 0g
- Carbohydrates: 1g
- Fiber: 0g
- Protein: 0g
- Cholesterol: 0mg

