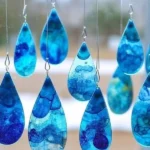
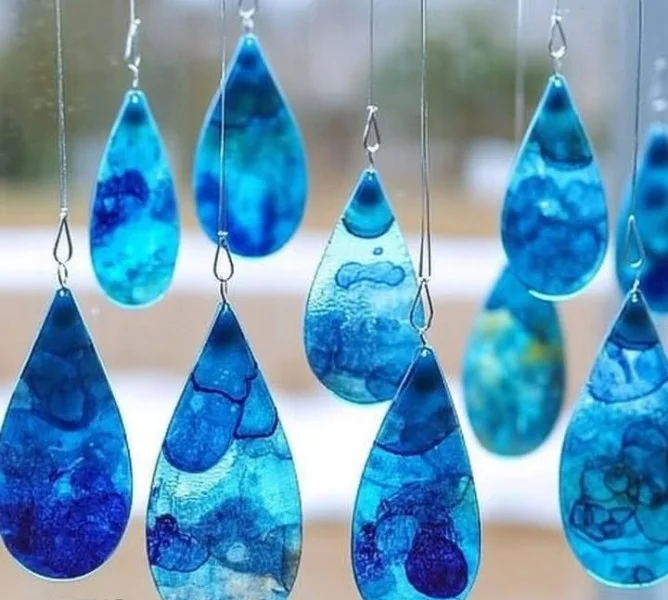
Creating vibrant and whimsical decorative items for your windows can be a delightful endeavor, especially when it involves a simple DIY project. The Blue Crayon Raindrop Suncatchers not only add a playful touch to your home but also serve as a beautiful way to play with light and color. Using just a few materials, you can craft stunning suncatchers that diffuse sunlight into a spectrum of blues. This project is perfect for a rainy day or a fun activity with kids, offering an opportunity to explore creativity and color blending. With their eye-catching design, these suncatchers will bring a splash of joy to any space, making it a wonderful addition to your home decor.
Why You’ll Love This Blue Crayon Raindrop Suncatchers
- Easy to Make: Simple steps suitable for all ages.
- Creative Expression: Allows for personalization and artistic flair.
- Colorful Addition: Brightens up your home with beautiful hues.
- Educational Activity: Encourages learning about colors and light refraction.
- Great Gift Idea: Perfect for birthdays or special occasions.
Materials
- Blue crayons (various shades)
- Wax paper or transparency sheets
- Scissors
- Iron (with adult supervision)
- Pencil
- String or fishing line for hanging
- Optional: Glue or glitter for extra flair
Step-by-Step Instructions
1. Prep Your Materials
Gather all your materials and set up your workspace. Lay down some newspaper to protect your surfaces.
2. Shave the Crayons
- Use a pencil sharpener or a knife (adult supervision required) to shave the blue crayons into small curls or shards.
3. Create the Suncatcher Base
- Cut the wax paper or transparency sheets into raindrop shapes. Aim for sizes between 4-6 inches tall.
4. Assemble the Crayon Shavings
- Sprinkle the crayon shavings onto one half of the raindrop shape. Don’t overcrowd; you want enough space for the colors to mix.
5. Seal the Suncatcher
- Fold the other half of the wax paper over the shavings.
6. Iron to Melt
- With a medium heat setting, gently press an iron over the top layer of wax paper. Move it around for even melting. Use caution to avoid burns.
7. Cut and Hang
- Once cooled, carefully cut around the edge, leaving a little border for durability. Use a hole punch to create a hole for stringing, then hang your suncatcher in a sunny window!
Tips & Variations
- Customize Colors: Try different colors of crayons for varied effects or mix in some metallic crayon shavings for sparkle.
- Different Shapes: Instead of raindrops, make stars, hearts, or circles.
- Add Accents: Consider adding glitter or additional embellishments to enhance the design.
Frequently Asked Questions
Q1: Can I use other types of paper?
A1: Yes, but wax paper or transparency sheets work best for melting and transparency.
Q2: What if I don’t have access to an iron?
A2: You can use a hair straightener as an alternative to melt the crayon shavings.
Q3: How do I clean up crayon shavings?
A3: Sweep up shavings immediately to avoid staining surfaces. Use a damp cloth for any leftover residue.
Q4: Can I hang these outside?
A4: While they can hang outside, prolonged exposure to the sun may fade the colors, so it’s best to keep them indoors.
Serving Suggestions or Pairings
Enjoy a cozy crafting session with a warm cup of hot chocolate or tea. If you’re making these suncatchers for a children’s activity, pair it with some healthy snacks like fruit slices or veggie sticks to keep the energy up!
Final Thoughts
Crafting Blue Crayon Raindrop Suncatchers is a fun and easy way to brighten your space with homemade charm. This DIY project not only teaches creativity but also brings an intricate piece of art to your windows. We hope you enjoy making your own versions that reflect your unique style. Feel free to share photos or leave comments about your creations! Happy crafting!
Print
Blue Crayon Raindrop Suncatchers
- Total Time: 25 minutes
- Yield: 1 suncatcher
- Diet: N/A
Description
Create vibrant and whimsical Blue Crayon Raindrop Suncatchers that bring a splash of joy to your home with beautifully blended colors.
Ingredients
- Blue crayons (various shades)
- Wax paper or transparency sheets
- Scissors
- Iron (with adult supervision)
- Pencil
- String or fishing line for hanging
- Optional: Glue or glitter for extra flair
Instructions
- Gather all your materials and set up your workspace. Lay down some newspaper to protect your surfaces.
- Use a pencil sharpener or a knife (adult supervision required) to shave the blue crayons into small curls or shards.
- Cut the wax paper or transparency sheets into raindrop shapes, aiming for sizes between 4-6 inches tall.
- Sprinkle the crayon shavings onto one half of the raindrop shape, ensuring enough space for the colors to mix.
- Fold the other half of the wax paper over the shavings.
- With a medium heat setting, gently press an iron over the top layer of wax paper. Move it around for even melting. Use caution to avoid burns.
- Once cooled, carefully cut around the edge, leaving a little border for durability. Use a hole punch to create a hole for stringing, then hang your suncatcher in a sunny window!
Notes
Customize colors and shapes for creative variations. Use caution when handling hot materials.
- Prep Time: 15 minutes
- Cook Time: 10 minutes
- Category: Craft
- Method: DIY Crafting
- Cuisine: N/A
Nutrition
- Serving Size: 1 suncatcher
- Calories: 0
- Sugar: 0g
- Sodium: 0mg
- Fat: 0g
- Saturated Fat: 0g
- Unsaturated Fat: 0g
- Trans Fat: 0g
- Carbohydrates: 0g
- Fiber: 0g
- Protein: 0g
- Cholesterol: 0mg

