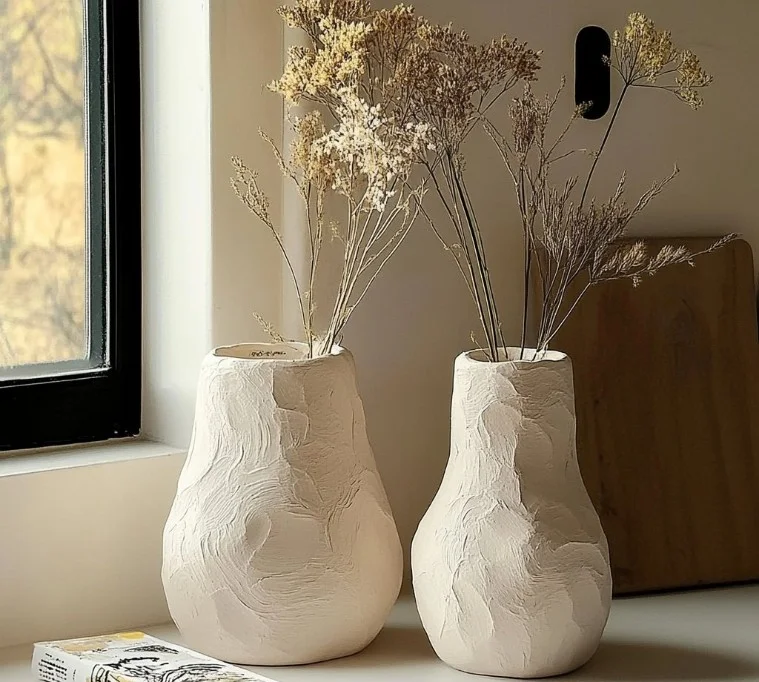
Creating with your hands is one of the most rewarding experiences, and DIY air-dry paper clay is an easy and fun way to explore your artistic side. This versatile material, made from common household items, allows you to craft unique sculptures, ornaments, and decorations without the need for an oven or kiln. Unlike traditional clay, air-dry paper clay dries naturally in the air, making it perfect for kids and beginners alike. Not only can you unleash your creativity, but you’ll also appreciate the satisfaction of making something from scratch. This guide will equip you with everything you need to know to create your very own air-dry paper clay, explaining its benefits, materials, step-by-step instructions, and tips for customization.
Why You’ll Love This DIY Air-Dry Paper Clay
- Easy to Make: Simple ingredients found at home.
- Non-Toxic: Safe for all ages, including children.
- Lightweight: Easy to mold and shape for various projects.
- Versatile: Perfect for crafting, sculpting, and making ornaments.
- Eco-Friendly: Made from paper products and glue, reducing waste.
- Customizable: Add colors, textures, and shapes to your creations.
- No Special Equipment Needed: No need for ovens or specialized tools.
Materials
- 1 cup of shredded paper (newspaper or plain paper works well)
- 1/2 cup of white glue (like PVA or school glue)
- 1/2 cup of cornstarch
- 1 tablespoon of olive oil (or any cooking oil)
- 1 tablespoon of vinegar
- Optional: Food coloring or acrylic paint for tinting
Step-by-Step Instructions
1. Prepare the Paper
- Shred the paper into small pieces.
- Soak the shredded paper in warm water for about 30 minutes until it softens.
2. Blend the Mixture
- Drain the water from the soaked paper.
- Place the soaked paper in a blender.
- Add the white glue, cornstarch, olive oil, and vinegar.
- Blend until you have a smooth, thick paste. You can adjust the consistency with a little more glue or cornstarch if needed.
3. Form the Clay
- Transfer the blended mixture to a bowl.
- Let it cool for a few minutes, then knead with your hands until smooth.
- If you’d like colored clay, add food coloring or acrylic paint and knead well until fully blended.
4. Shape and Dry
- Mold the clay into your desired shapes or items.
- Place your creations on a flat surface covered with parchment paper.
- Allow the pieces to air dry for at least 24 hours, depending on thickness.
5. Finish Your Creations
- Once dry, you can paint and seal your projects with a varnish if desired.
Tips & Variations
- Color Customization: Use natural dyes (like beet juice) for eco-friendly coloring.
- Texture Fun: Add sand or fine glitter to give your clay a unique feel.
- Mix up Ingredients: Replace olive oil with glycerin for a different texture.
- Storage: Keep leftover clay wrapped tightly in plastic to prevent drying.
Frequently Asked Questions
1. Can I use any type of paper for this recipe?
Yes, any plain paper works, but recycled paper like newspapers is ideal.
2. How long does the paper clay take to dry completely?
Drying time can vary between 24-48 hours based on the humidity and thickness of the piece.
3. Can I paint the dried clay?
Absolutely! You can paint your creations using acrylic or watercolor paints.
4. What do I do if my clay feels too dry or crumbly?
Add a little more glue or oil and knead well to restore the moisture and workability.
Serving Suggestions or Pairings
While enjoying your crafting experience, pair it with a hot cup of herbal tea or a refreshing lemonade. These delightful beverages can enhance your relaxation and creativity as you mold your air-dry paper clay.
Final Thoughts
DIY air-dry paper clay offers endless possibilities for creativity, allowing you to express your artistic vision while using simple household ingredients. We hope you enjoy making your own clay creations just as much as we do! Don’t forget to share your versions or leave a comment below; we would love to hear about your unique projects and any variations you’ve tried!
Print
DIY Air-Dry Paper Clay
- Total Time: 1455 minutes
- Yield: Multiple creations
- Diet: Non-toxic
Description
An easy and fun way to make your own air-dry paper clay using simple household items, perfect for crafting and sculpting.
Ingredients
- 1 cup of shredded paper (newspaper or plain paper)
- 1/2 cup of white glue (like PVA or school glue)
- 1/2 cup of cornstarch
- 1 tablespoon of olive oil (or any cooking oil)
- 1 tablespoon of vinegar
- Optional: Food coloring or acrylic paint for tinting
Instructions
- Shred the paper into small pieces and soak it in warm water for about 30 minutes until it softens.
- Drain the water from the soaked paper, then place it in a blender along with the white glue, cornstarch, olive oil, and vinegar. Blend until smooth.
- Transfer the mixture to a bowl, let it cool for a few minutes, and knead with hands until smooth. Add food coloring or acrylic paint if desired.
- Mold the clay into desired shapes, and place creations on a flat surface covered with parchment paper to air dry for at least 24 hours.
- Once dry, you can paint and seal your projects if desired.
Notes
Use natural dyes for eco-friendly coloring. Keep leftover clay wrapped tightly to prevent drying.
- Prep Time: 15 minutes
- Cook Time: 1440 minutes
- Category: Crafting
- Method: Mixing
- Cuisine: N/A
Nutrition
- Serving Size: 1 batch
- Calories: 50
- Sugar: 0g
- Sodium: 5mg
- Fat: 1g
- Saturated Fat: 0g
- Unsaturated Fat: 1g
- Trans Fat: 0g
- Carbohydrates: 10g
- Fiber: 1g
- Protein: 1g
- Cholesterol: 0mg

