

The paper house takes shape slowly in your hands, one soft row at a time, while late afternoon light rests across the yarn basket. The little pull of the hook through each loop feels especially gentle when you make Haunted Paper House at Ghost Alley Pop-Up, a small seasonal crochet piece with a quiet, storybook feeling. It is the sort of project that fits beside a mug of coffee, on the couch during a rainy evening, or near the porch door when the first cool air arrives. You do not need a perfect rhythm to enjoy it. The rhythm finds you as the fabric grows.
Why Haunted Paper House at Ghost Alley Pop-Up Is So Soothing to Crochet
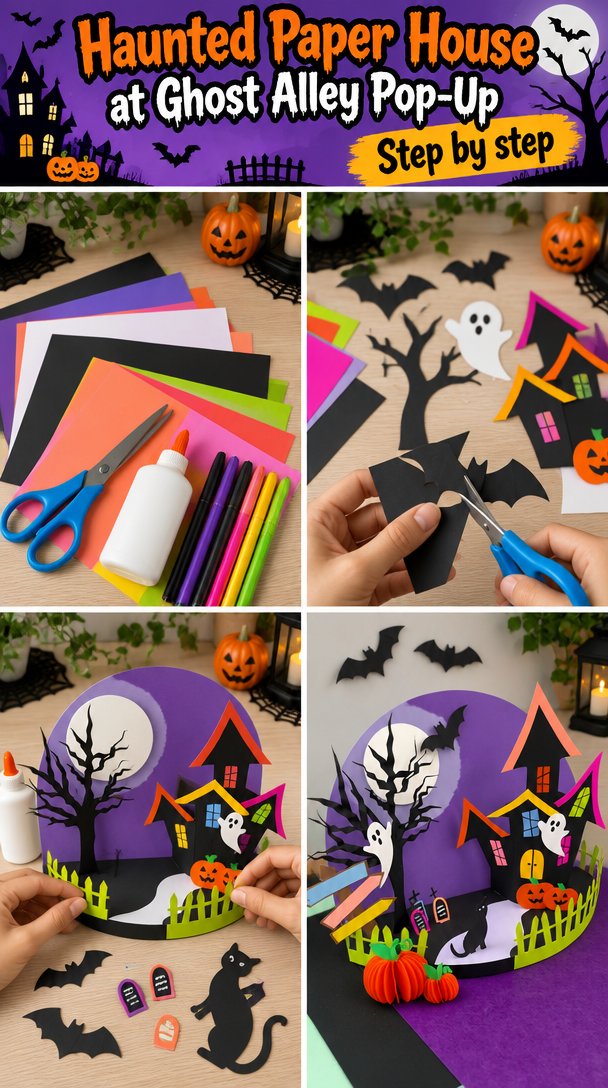
This project uses simple shaping and repeating stitches, so your hands have enough direction to stay interested without asking you to solve something new every minute. The fabric grows in a steady rectangle, then gains a little character through its color and finishing details. I like that balance. You can look down often, but you do not need to stare at every loop.
The main fabric has a soft, lightly ridged surface from alternating rows of double crochet and single crochet. The double crochet keeps the work moving, while the single crochet gives the next row a firm place to sit. Together, they make a texture that feels more like a tiny piece of cloth than a flat string of stitches.
My favorite part comes after the first few rows. The chain may curl a little at first, and the fabric can look unimpressive while it is still small. Then the piece grows heavy enough to settle across your palm, and your hands warm up after the first ten minutes. You begin to recognize the quiet click of the hook against the stitch.
This is a good project for a couch basket, a porch chair in summer, or a long fall evening when you want something useful to do with your hands. Many people find crocheting calming because the repeated movement gives the mind a gentle place to rest. This project does not demand speed, and the finished house does not need to look identical to anyone else’s.
How Haunted Paper House at Ghost Alley Pop-Up Comes Together
You will make a small rectangular wall hanging or table accent from the bottom up. The body uses a repeated four-row rhythm: a foundation chain, a double crochet row, a single crochet row, and another double crochet row. A narrow border and a few embroidered details turn the simple fabric into a little haunted paper house.
This pattern uses US crochet terms. That note matters because UK readers find these posts too, and the same word can mean a different stitch there. When I say double crochet, I mean the US double crochet, not the UK treble crochet.
The main stitch is double crochet, abbreviated dc. You yarn over, insert the hook, pull up a loop, yarn over and pull through two loops twice. It makes a fabric that grows quickly while still showing enough structure for a small wall piece.
The stitch repeat uses any multiple of four stitches plus two stitches for the turning chain. Beginners can follow the written steps one row at a time, while more experienced crocheters can settle into the pattern and let the color changes provide the interest. Allow about three to five evenings, or roughly four to six hours of relaxed work, depending on your pace and finishing choices.
Pattern at a Glance
Here are the details to keep beside you while you work.
- Skill level: Easy, with simple color changes and surface embroidery
- Finished size: 10 inches wide by 12 inches tall (25.5 cm by 30.5 cm)
- Gauge: 14 double crochet and 8 rows measure 4 inches (10 cm)
- Yarn: Worsted weight (weight 4, medium), about 500 total yards
- Hook: H-8 (5.0 mm)
- Other supplies: Yarn needle, scissors, tape measure, stitch marker, black embroidery thread, and a 10-inch wooden dowel
- Stitch multiple: Any multiple of 4 stitches plus 2 for the turning chain
- Estimated time: Four to six relaxed hours over three to five evenings
What You Need for Haunted Paper House at Ghost Alley Pop-Up
- Worsted weight yarn (weight 4, medium), cotton or acrylic, about 500 total yards, or three 170-yard skeins of 100 g each. Choose one main color for the house and two small accent colors for the roof and windows (easy to find)
- One H-8 (5.0 mm) crochet hook. A half size up or down is fine depending on your tension
- Yarn needle for weaving in the ends, with an eye large enough for your yarn
- Sharp scissors
- Two stitch markers, optional, for marking the first stitch of a row
- Tape measure
- Black embroidery thread or a small amount of sport weight black yarn for windows, a door, and roof lines
- One 10-inch wooden dowel, twig, or narrow craft stick for hanging (can be swapped for a small curtain rod)
- Small amount of polyester fiberfill, optional, if you want to lightly pad the roof peak before sewing it down
For the sample, I used a smooth worsted weight acrylic yarn with about 170 yards per 100 g skein, similar to the widely available worsted weight options from Lion Brand. Acrylic keeps this small home decoration affordable, light, and easy to wash. Cotton also works well if you prefer a firmer fabric, though it may feel less springy in your hands.
Make a gauge swatch before you begin if you want the finished measurements to stay close to mine. Twenty minutes of swatching can spare you an evening of discovering that the fabric is too wide or too loose. Measure after gently flattening the swatch, not while stretching it.
If your foundation chain pulls tight, go up one hook size just for the chain, then return to H-8 (5.0 mm) for the first row. A safe substitution means keeping the same worsted weight category and checking the label yardage. Different fibers can change the drape, so match the gauge rather than relying only on the label.
Step by Step
- This is an easy pattern using a stitch multiple of any multiple of 4 stitches plus 2 for the turning chain. Chain 38 with your main color. This foundation chain gives you 36 working stitches plus 2 chains for turning, and it measures close to 10 inches when your gauge matches.
- For Row 1, make one double crochet, or dc, in the fourth chain from the hook and in each chain across. A double crochet begins with a yarn over, then you pull through two loops twice. You will have 36 double crochet stitches at the end of Row 1.
- Chain 2 to turn. This is your turning chain, the small lift that brings the yarn to the height of the next row. Turn your work, then make one single crochet, or sc, in the first stitch and in each stitch across. A single crochet pulls through both loops at once. You will have 36 single crochet stitches.
- Chain 2 to turn, then make one double crochet in the first stitch and in every stitch across. Keep the hook moving gently rather than pulling the yarn tight. Row 3 ends with 36 double crochet stitches.
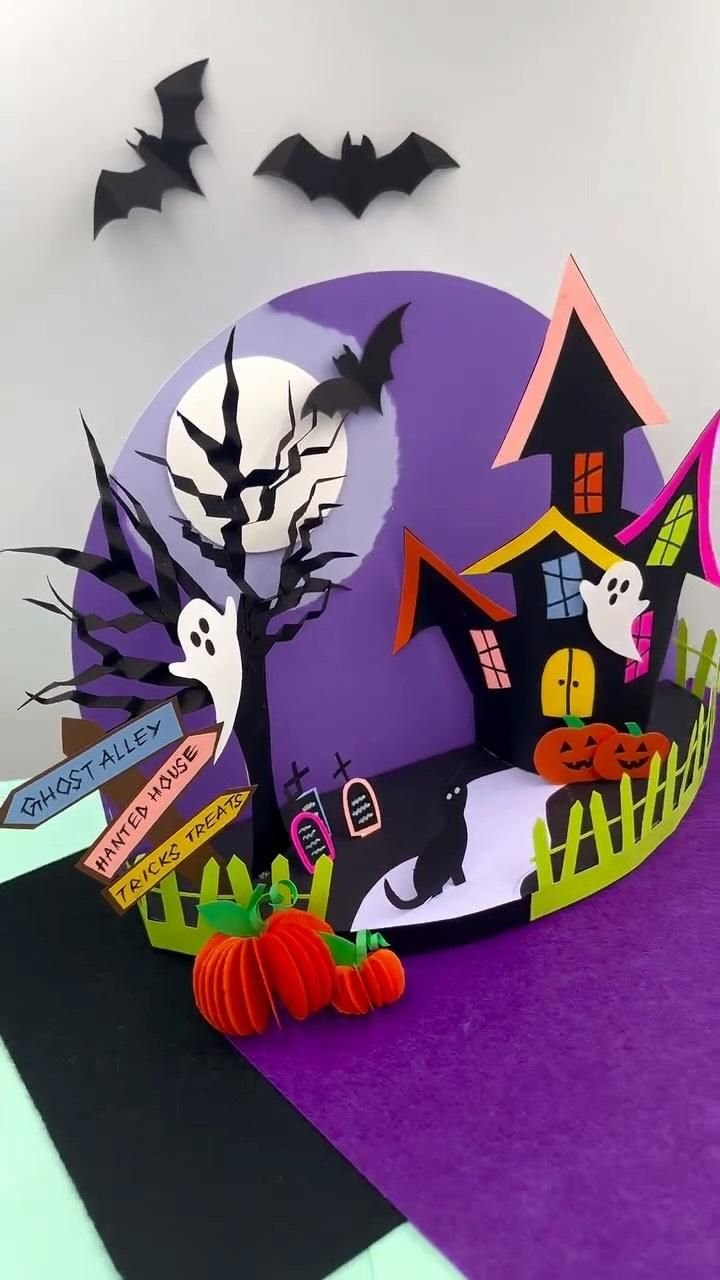
- Repeat Rows 2 through 4 six more times. Each repeat contains one single crochet row followed by two double crochet rows, so the fabric keeps its soft ridge without complicated counting. After the final double crochet row, you still have 36 stitches across.
- Change to your roof color at the end of the final double crochet row if you want a contrasting roof band. To change colors neatly, stop before the last yarn over of the final stitch, place the new color over the hook, and pull it through the remaining loops. Cut the old yarn, leaving a 6-inch tail.
- For the roof band, chain 2 and turn. Make one single crochet in each stitch across for 36 stitches. Chain 2 and turn, then make one double crochet in each stitch across for 36 stitches. This two-row band gives the top edge a little visual weight.
- Make the hanging loop. Chain 18 at the end of the final roof row, then slip stitch, or sl st, into the first chain to form a loop. A slip stitch joins without adding height. Fasten off, leaving a 6-inch tail for sewing.
- Lay the piece flat and find the center. With black embroidery thread or black yarn, stitch two small square windows, a narrow door, and a few roof lines. Keep the stitches loose enough that the fabric does not pucker. For a softly spooky look, make one window slightly uneven.
- If the edges curl, do not panic. Look across the top edge and count the stitches before pulling back. A missed stitch usually appears as a shorter edge or a gap near the row end. If you find one several rows later, undo one stitch at a time until the count is correct, then continue calmly.
- Use a yarn needle to weave in every tail on the wrong side, or WS, of the fabric. The wrong side is the back of the work, while the right side, or RS, is the side you want to show. Thread each tail through several stitches in different directions before trimming.
- Slide the wooden dowel through the hanging loop and check the finished size. If the acrylic fabric needs flattening, block it cold by lightly misting it, shaping it on a towel, and letting it dry flat. Do not press acrylic with a hot iron because acrylic can melt. Cotton may accept gentle steam from a distance, but always test first.
Where Haunted Paper House at Ghost Alley Pop-Up Fits Into Your Day
The finished piece works as a small wall hanging, a shelf accent, or a seasonal decoration near a basket of blankets. Mine rests against the living room wall beside a lamp, where the dark windows show up after sunset without making the room feel overly themed.
You can hang it from a peg in the entryway, place it on a mantel with a few autumn leaves, or bring it to the porch when the weather turns cool. Its small size makes it easy to store with other seasonal pieces rather than taking over a whole room.
It also makes a thoughtful handmade gift for someone who enjoys quiet Halloween decorations. Add the piece to a small basket with tea, a candle, and a handwritten note about the colors you chose. If you sell finished items, my policy is simple: I sell only pieces I made myself and I credit the pattern designer when the pattern is not mine.
Care and Storage for Haunted Paper House at Ghost Alley Pop-Up
Care depends on the yarn you choose. For the smooth acrylic worsted weight yarn used in my sample, wash by hand or use a gentle machine cycle with cold water. Place it in a mesh bag if the embroidery feels delicate, then reshape it and dry it flat.
Never hang the piece while it is wet. Water adds weight and can stretch the hanging loop or pull the fabric out of square. Keep the wooden dowel out during washing and slide it back in only after the piece is completely dry.
Block acrylic cold or with very distant steam. Acrylic can melt under a hot iron, so do not press directly on it. If you use cotton instead, you can usually use a little more steam, but keep the temperature moderate and check the yarn label first.
Store the house folded rather than hung, with tissue paper between seasonal decorations if needed. Choose a breathable drawer or box instead of an airtight plastic bag. If you use wool for a special version, untreated wool can felt with heat and agitation, while superwash wool tolerates machine washing more easily. Add cedar or lavender nearby for moth protection.
Keep leftover yarn with its label so you still have the dye lot information if you need to repair a window or add another house later.
Small Ways to Make Haunted Paper House at Ghost Alley Pop-Up Your Own
Try a thicker yarn if you want a larger, bolder wall hanging. A bulky yarn will increase the finished size and give the house more visual weight, but it will also change the drape and may need a larger dowel. Check your gauge again instead of assuming the original chain will fit.
Use a thinner yarn for a delicate garland or small shelf piece. The fabric will feel lighter and the windows will need smaller embroidery stitches. You may want to keep the same stitch multiple while reducing the starting chain to make a narrow house.
Play with color blocking. A charcoal body with a rust roof feels autumnal, while cream with black details looks more like old paper. You can also make the lower rows one color and the upper rows another by changing yarn at the end of a row.
If you want a denser fabric, replace the double crochet rows with single crochet. The piece will grow more slowly and feel firmer, with smaller spaces between stitches. You will need more rows to reach 12 inches tall, so measure as you go.
Resize the house by adjusting the foundation chain in multiples of four, then adding the two turning chains. Add a simple single crochet border if you prefer a framed edge. For gifting, make several small houses in different colors and hang them together from one longer piece of twine.
Frequently Asked Questions About Haunted Paper House at Ghost Alley Pop-Up
Can I use a different crochet hook size?
Yes, you can use a different hook size if your tension needs it. Start with H-8 (5.0 mm), then move down to G-6 (4.0 mm) for a denser fabric or up to I-9 (5.5 mm) for a softer, looser fabric. Check your gauge after changing hooks because the finished width and height will shift.
What yarn can I substitute for the worsted weight yarn?
Choose another worsted weight yarn, listed as weight 4 or medium, with about 170 yards per 100 g skein when possible. Smooth acrylic, cotton, or a washable wool blend can work. Match the gauge and remember that cotton feels firmer, acrylic keeps its shape easily, and wool may need gentler washing.
What should I do if I find a mistake several rows later?
Pause and inspect the row where the mistake first appears. If a stitch went missing, pull back one stitch at a time until the count returns to 36, then continue. You do not need to unravel the whole piece automatically. Mark the corrected row and check the stitch count at the end of the next row.
Is this haunted house crochet pattern good for a beginner?
Yes, this pattern suits a beginner who knows how to chain and make basic crochet stitches. The only fiddly parts are changing colors and adding the embroidered details. Work slowly at the row ends, use a stitch marker if helpful, and remember that slightly uneven windows can add charm rather than spoil the piece.
How long does this crochet project take?
Plan on four to six relaxed hours spread over three to five evenings. The crocheted fabric takes less time than the embroidery and finishing. Your pace, hook tension, color changes, and number of details will affect the total, so leave extra time if you want a careful handmade gift.
Does this pattern use US or UK crochet terms?
This pattern uses US crochet terms throughout. That means sc is single crochet, hdc is half double crochet, dc is double crochet, and tr is treble crochet. The pattern uses sc, dc, sl st, and ch, but knowing the broader US vocabulary helps if you compare it with other patterns.
Take the Time You Need
Let the small house grow at the pace your hands can hold. A missed stitch, a slightly crooked window, or a color choice that changes halfway through can all become part of the quiet record of making. Set the piece down when you need to, pick it up when you feel ready, and allow the simple rhythm to be enough.
—META—
SEO Title: Haunted Paper House Crochet Pattern
Meta Description: Make a calm haunted paper house crochet piece with simple US stitches, worsted yarn, gentle texture, and relaxed seasonal charm for your home.
Slug: haunted-paper-house-crochet
Category: Crochet Patterns
Tags: crochet, halloween crochet, home decor, easy crochet, seasonal crafts
Image Alt Text: A small crocheted haunted paper house hanging from a wooden dowel
A close view of double crochet texture and embroidered house windows
A crochet hook working the haunted house fabric in dark seasonal yarn
Pinterest Title: Haunted Paper House Crochet
Pinterest Description: Make a small haunted paper house with simple crochet stitches and soft seasonal texture. A gentle project for quiet fall evenings.

Haunted Paper House at Ghost Alley Pop-Up
- Total Time: 260 minutes
Description
Create a small rectangular wall hanging or table accent that resembles a haunted house. This soothing crochet project features a soft textured fabric with simple shaping and repetitive stitches, perfect for adding seasonal charm to your home.
Materials
- Worsted weight yarn (weight 4, medium), cotton or acrylic, about 500 total yards, or three 170-yard skeins of 100 g each
- One H-8 (5.0 mm) crochet hook
- Yarn needle for weaving in the ends
- Sharp scissors
- Two stitch markers, optional
- Tape measure
- Black embroidery thread or a small amount of sport weight black yarn
- One 10-inch wooden dowel, twig, or narrow craft stick for hanging
- Small amount of polyester fiberfill, optional
Instructions
- Chain 38 with your main color. This gives you 36 working stitches plus 2 chains for turning.
- For Row 1, make one double crochet in the fourth chain from the hook and in each chain across for 36 double crochet stitches.
- Chain 2 to turn, then make one single crochet in the first stitch and in each stitch across for 36 single crochet stitches.
- Chain 2 to turn, then make one double crochet in the first stitch and in every stitch across for 36 double crochet stitches.
- Repeat Rows 2 through 4 six more times, keeping 36 stitches across after the final double crochet row.
- Change to your roof color at the end of the final double crochet row if desired.
- For the roof band, chain 2 and turn. Make one single crochet in each stitch across for 36 stitches.
- Chain 2 and turn, then make one double crochet in each stitch across for 36 stitches.
- Make the hanging loop by chaining 18 at the end of the final roof row, then slip stitch into the first chain to form a loop. Fasten off, leaving a 6-inch tail.
- Stitch two small square windows, a narrow door, and a few roof lines with black embroidery thread or black yarn.
- Weave in every tail on the wrong side of the fabric with a yarn needle.
- Slide the wooden dowel through the hanging loop and check the finished size.
- Block the piece if necessary by lightly misting it and shaping it on a towel.
Notes
For care, wash in cold water using a gentle cycle and reshape and dry flat. Do not press acrylic with a hot iron as it can melt.
- Preparation Time: 20 minutes
- Active Time: 240 minutes