

The yarn has started to gather across your knees, warm from your hands, while late afternoon light rests on the quiet pink stitches. Each small pull of the hook draws the fabric a little closer to becoming something useful. This Strawberry Heart Pouch🍓 has that gentle kind of progress, the sort you can feel in a Sunday morning chair or beside a cooling mug of coffee. It is small enough to finish over several evenings, but still gives your hands plenty of time to settle into a steady rhythm.
Why Strawberry Heart Pouch Is So Soothing to Crochet
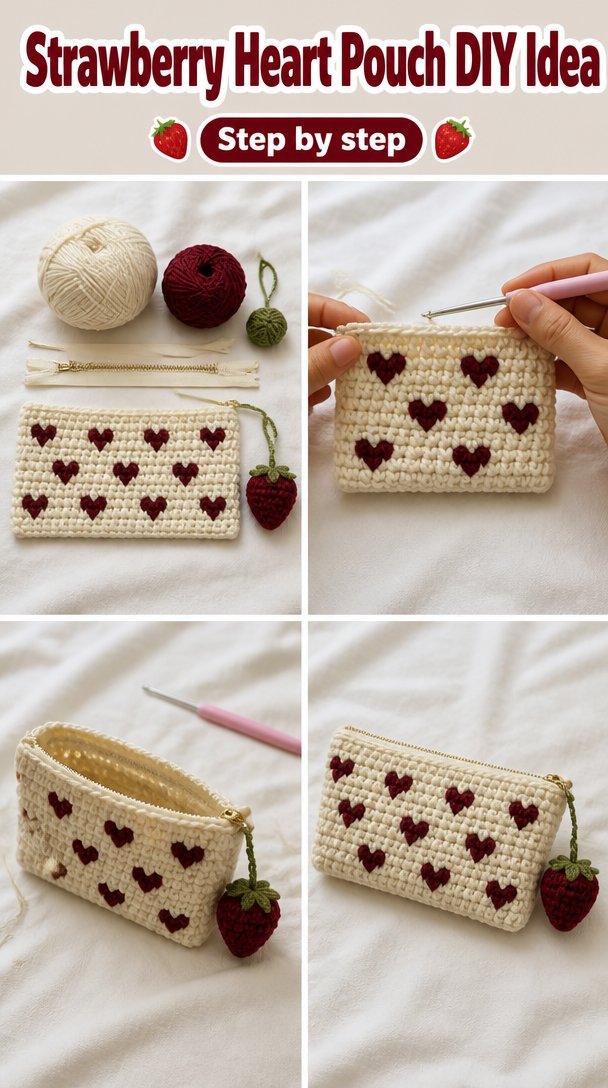
A small pouch offers a pleasant balance. You can see the shape grow after only a few rows, yet the project does not ask you to hurry. The fabric rests lightly in your palm, and the repeated double crochet stitches give your hands a dependable path to follow.
I made this kind of pouch on the couch during a rainy evening, with the yarn basket on the floor and one lamp turned low. The first few rows curled toward me, as crochet often does, then the piece grew heavy enough to settle. After about ten minutes, my hands warmed up and the quiet click of the hook became part of the room.
The strawberry shape also gives the work a little character without making the construction fussy. You crochet two simple panels, add a narrow edging, and join them with a crocheted strap. The small details feel satisfying because they arrive one at a time.
This makes a sweet place for earbuds, a few stitch markers, lip balm, or a small collection of treasures from a walk. You can keep it in the basket beside your armchair, tuck it into a tote, or leave it near the front door for small things that otherwise wander.
Many people find crocheting calming because repetition gives attention somewhere kind to rest. This project does not ask for perfect tension or a fast finish. It asks you to notice the yarn sliding through your fingers, the shape under your thumb, and the next stitch waiting on the hook.
How Strawberry Heart Pouch Comes Together
The pouch uses double crochet as its main stitch. A double crochet creates a fabric that grows at a comfortable pace, so the shape develops without requiring a long sitting. It also leaves enough flexibility for the pouch to open and close easily when you reach inside.
You will crochet two matching strawberry panels from the bottom point upward. Each panel begins with a foundation chain, which is the first row of chain stitches that supports the rest of the work. The stitch count increases in the lower rows, then stays steady through the body.
This pattern uses US crochet terms. That note matters because readers in the United Kingdom may use the same words for different stitches. Here, double crochet means the tall US stitch made with one yarn over, and all stitch names and instructions follow American terminology.
The project is suitable for a confident beginner who can work chain, single crochet, and double crochet. The shaping is simple, but the points and joining need a little attention. Plan on about 3 to 5 hours, spread over several evenings if you prefer a slower pace.
You will make increases at the lower edges, work even rows through the middle, and then decrease near the top. An increase means working two stitches into one stitch. A decrease combines two stitches into one, narrowing the fabric gently.
Pattern at a Glance
Here are the details to keep beside you while you work.
- Skill level: Confident beginner
- Finished size: About 6 inches wide by 6 inches tall (15 cm by 15 cm), not including the strap
- Gauge: 14 double crochet and 8 rows measure 4 inches (10 cm)
- Yarn: Worsted weight (weight 4, medium), about 170 yards per 100 g skein, 150 yards total, or 1 skein
- Hook: H-8 (5.0 mm)
- Other supplies: Yarn needle, scissors, tape measure, and 2 optional stitch markers
- Stitch multiple: The body is worked over a multiple of 2 stitches, with shaping at the edges
- Estimated time: About 3 to 5 hours
Materials for Strawberry Heart Pouch
- Worsted weight yarn, weight 4, medium: Choose a smooth acrylic yarn with about 170 yards per 100 g skein. You need about 150 yards total, or 1 skein, in red, pink, or strawberry red. A worsted acrylic yarn such as I Love This Yarn can work well as an example, but any similar yarn is welcome.
- Small amount of green worsted weight yarn: About 10 yards for the leafy top and optional strap accent. You can use a leftover skein in the same fiber.
- H-8 (5.0 mm) crochet hook: A half size up or down is fine depending on your tension. Use H-8 (5.0 mm) if your stitches tend to be loose, and I-9 (5.5 mm) if your foundation chain pulls tightly.
- Yarn needle: Choose one with an eye large enough for worsted weight yarn. You will use it to sew the panels and weave in the ends.
- Scissors: Small sharp scissors make clean yarn cuts.
- 2 stitch markers: Optional, but useful for marking the first and last stitch while you shape the panels.
- Tape measure: Helpful for checking gauge and the finished width.
The gauge is 14 double crochet and 8 rows measuring 4 inches (10 cm). A small swatch takes about twenty minutes, and it tells you more than a guess at tension can. If your swatch comes out wider than 4 inches, try the smaller hook. If it comes out narrower, try the larger hook.
You can safely substitute another worsted weight yarn with a similar yardage and smooth texture. Cotton will make a firmer pouch and can suit items that need frequent washing, while acrylic keeps the pouch light, affordable, and easy to care for. If you change the fiber, make a swatch first because the drape and finished size may shift.
Step by Step
- Difficulty and setup: This is a confident beginner project. The body uses a multiple of 2 stitches, with shaping worked at both edges. Make one red panel first, then repeat the same instructions for the second panel.
- Make a foundation chain of 12 chains. A chain, abbreviated ch, forms a small loop with the yarn and gives the next row a place to sit. Your chain should lie flat rather than twist.
- Row 1: Work 1 double crochet, or dc, in the 4th chain from the hook, then work 1 dc in each chain across. A double crochet begins with a yarn over, goes into the stitch, and finishes through two loops twice. You will have 10 dc, because the skipped chains count as the first dc.
- Row 2: Chain 3 for the turning chain, which lifts the yarn to the height of the next row. Turn your work, then work 2 dc in the first stitch, 1 dc in each stitch across to the last stitch, and 2 dc in the last stitch. You will have 12 dc.
- Row 3: Chain 3 and turn. Work 2 dc in the first stitch, 1 dc in each stitch across, and 2 dc in the last stitch. You will have 14 dc. The fabric may curl a little at this point, so keep your edges relaxed rather than pulling the turning chain tight.
- Row 4: Chain 3 and turn. Work 2 dc in the first stitch, 1 dc in each stitch across, and 2 dc in the last stitch. You will have 16 dc. Place a stitch marker in the first and last stitch if those edge stitches are difficult to see.
- Rows 5 through 10: Chain 3 and turn at the beginning of each row. Work 1 dc in every stitch across. You will have 16 dc at the end of every row. Let the piece rest on your lap as it grows, since the weight helps the rows settle and makes your tension easier to judge.
- Row 11: Chain 3 and turn. Work 1 dc2tog over the first 2 stitches, then work 1 dc in each stitch across to the last 2 stitches, and work 1 dc2tog over the final 2 stitches. A dc2tog is a decrease that turns two stitches into one. You will have 14 dc.
- Row 12: Chain 3 and turn. Work 1 dc2tog over the first 2 stitches, 1 dc in each stitch across to the last 2 stitches, and 1 dc2tog over the final 2 stitches. You will have 12 dc.
- Row 13: Chain 3 and turn. Work 1 dc2tog over the first 2 stitches, 1 dc in each stitch across to the last 2 stitches, and 1 dc2tog over the final 2 stitches. You will have 10 dc. The upper edge should now begin to narrow toward the heart shape.
- Row 14: Chain 3 and turn. Work 1 dc2tog over the first 2 stitches, 1 dc in each stitch across to the last 2 stitches, and 1 dc2tog over the final 2 stitches. You will have 8 dc.
- Row 15: Chain 3 and turn. Work 1 dc2tog over the first 2 stitches, 1 dc in each stitch across to the last 2 stitches, and 1 dc2tog over the final 2 stitches. You will have 6 dc. Fasten off, leaving a yarn tail about 8 inches long for sewing.
- Make the second panel by repeating Rows 1 through 15. Check both panels before joining them. Lay them together with the right sides facing outward, where the right side, or RS, is the side you want to show. The wrong side, or WS, is the back.
- Join the panels with single crochet. A single crochet, abbreviated sc, is a shorter stitch that gives the edge a neat, firm finish. Starting at the lower point, use red yarn to work 1 sc through both layers around the two long sides and the top, leaving the bottom point open only if you want a different finishing method. For this pouch, join all around and fasten off at the starting point.
- Make the leafy top with green yarn. Attach the yarn near the center top dip, chain 4, then work 1 slip stitch, or sl st, in the 2nd chain from the hook, 1 sc in the next chain, and 1 hdc in the last chain. A half double crochet, or hdc, sits between single crochet and double crochet in height. Slip stitch into the next red edge stitch to anchor the leaf, then repeat two more small leaves. Fasten off.
- Make the strap with red yarn. Chain 46 for a strap about 18 inches (46 cm) long. Work 1 sc in the 2nd chain from the hook and in each chain across, for 45 sc. Turn, chain 1, and work 1 sc in each stitch across for 45 sc. Fasten off, leaving tails for sewing.
- Sew the strap ends inside the pouch near the upper side edges. Use the yarn needle and small, even stitches. Before you finish, hold the pouch by the strap and check that the seams feel secure.
- Look over the edges before weaving in the ends. If a mistake appears, count the stitches at the row end first. A missed stitch often makes the next row look shorter or pulls one edge inward. If you need to pull back, remove one stitch at a time until you reach the problem, then place the hook through the live loop and continue calmly.
- Weave in the ends by passing the yarn needle through several stitches on the wrong side, changing direction once or twice. Trim the excess after the yarn feels secure. Acrylic yarn does not need a hot iron, and heat can melt or flatten it, so block cold if needed by pinning the pouch to shape and letting it dry naturally.
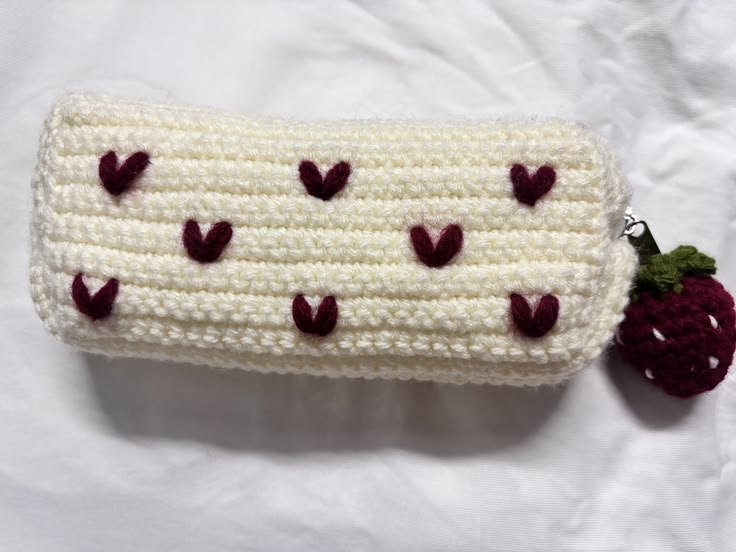
Where This Piece Finds Its Place
The finished pouch is small enough to carry from room to room. I like it beside the armchair with a few stitch markers and a tape measure inside, but it also works in a living room basket, a desk drawer, or a summer tote.
The strap gives you a simple way to carry small essentials without making the pouch bulky. Slip in lip balm, keys, a charging cord, or a pair of earbuds before heading to the porch. The strawberry shape brings a little color to cool fall evenings when the yarn basket comes back out.
For a gift, tuck in a small packet of tea, a wrapped chocolate, or a handmade note. A child may enjoy it for pretend play, but remember that small parts and long loose stitches can be unsafe for children under three. If you give it to a young child, keep the pouch simple and check every seam carefully.
You can also make one as a cheerful holiday stocking stuffer or a small baby shower favor for an adult guest. Do not use it loose in a crib or car seat, where anything attached or unsecured can create a safety concern.
Care and Storage
This pattern uses worsted weight acrylic, so you can wash the pouch on a gentle cycle with cold or warm water. Place it in a mesh bag if you want to protect the strap and edges, then reshape it while damp.
Lay the pouch flat on a clean towel to dry. Do not hang it wet, because the water weight may stretch the strap or pull the top edge out of shape. Avoid a hot dryer if the pouch has a firm shape you want to preserve, even though acrylic can usually tolerate gentle machine drying.
For blocking, pin the pouch flat and smooth the edges with your fingers. Use no direct heat. Acrylic can melt under a hot iron, so if you use steam, keep the source at a distance and never press the iron onto the fabric.
Store the pouch folded or resting flat in a breathable basket rather than hanging it by the strap. Acrylic does not attract moths in the same way wool can, but a clean, dry storage place still helps. Keep leftover yarn with its label so you have the dye lot if you make a second pouch later.
Small Ways to Make It Your Own
Try a thicker yarn if you want a larger pouch with a more substantial feel. A bulky yarn will increase the finished size and give the fabric more weight, but you may need a larger hook and a shorter strap. A thinner yarn will create a smaller, lighter pouch with a softer drape.
Play with color blocking. You could make the lower half red, switch to pink for the upper rows, and finish with a green leaf. Change colors at the end of a row so the edge stays cleaner, and weave in the tails as you go if several shades begin to collect.
For a firmer pouch, substitute single crochet for the double crochet body. The fabric will grow more slowly and feel denser, and the finished pouch will likely be smaller unless you add rows. This option suits items that need more structure.
Resize the pouch by changing the foundation chain in multiples of 2. Add 2 chains for each extra stitch in the first row, then keep the increase and decrease pattern balanced at both edges. Make a small note of your new stitch counts before you begin.
A simple single crochet border in a contrasting color can frame the pouch. You could also make a longer strap for crossbody wear, or sew a short loop instead for hanging the pouch from a peg. If you sell finished items, my policy is simple: I sell only pieces I made myself and identify the pattern source when asked.
Frequently Asked Questions About Strawberry Heart Pouch
Can I use a different hook size for Strawberry Heart Pouch?
Yes, you can use a different hook size if your tension needs it. The pattern uses H-8 (5.0 mm), with I-9 (5.5 mm) as a good choice if your stitches are tight. A smaller hook makes a firmer pouch, while a larger hook creates a looser fabric and may increase the finished size.
What yarn can I substitute for the recommended acrylic?
You can substitute any smooth worsted weight yarn, weight 4, medium, with similar yardage. Cotton gives you a firmer pouch and suits frequent washing, while acrylic keeps the project light and easy to care for. Wool can work too, but untreated wool may felt, so wash it gently and avoid agitation.
What should I do if I find a mistake several rows later?
First, stop and count the stitches at the row ends. If the edges still line up, you may be able to leave a small interior error alone. If the mistake changes the shape, pull back one stitch at a time until you reach it, place your hook through the live loop, and continue without rushing.
Is Strawberry Heart Pouch suitable for a beginner?
Yes, it suits a confident beginner who knows chain, single crochet, and double crochet. The increases and decreases are repeated in a predictable way, but the top shaping needs careful counting. Use stitch markers if the edge stitches blend into the fabric, and pause whenever your hands feel tired.
How long does this crochet pouch take to make?
Most crocheters will need about 3 to 5 hours, depending on tension, experience, and how often they pause. You can make the two panels in one evening and finish the edging and strap later. The joining and leaf detail are a little fiddly, so give yourself time to sew neatly.
Does this pattern use US or UK crochet terms?
This pattern uses US crochet terms. That means sc is single crochet, hdc is half double crochet, and dc is double crochet. In UK terminology, the same words can describe different stitch heights, so check the abbreviations before beginning if you usually follow UK patterns.
Take the Time You Need
Let the pouch take the amount of time it takes. The useful part is not only the finished strawberry shape, but also the small return to the next stitch, the fabric growing warmer in your hands, and the quiet confidence that comes from fixing one little mistake and carrying on.
—META—
SEO Title: Strawberry Heart Pouch Crochet Pattern
Meta Description: Make a sweet Strawberry Heart Pouch with calm, clear steps, US terms, simple shaping, and gentle tips for a useful handmade gift.
Slug: strawberry-heart-pouch-crochet-pattern
Category: Crochet
Tags: crochet pouch, strawberry crochet, beginner crochet, crochet pattern, handmade gift
Image Alt Text: Close view of red crocheted Strawberry Heart Pouch with green leaf
Two flat crochet pouch panels beside red and green yarn and a hook
Finished strawberry pouch resting on a cozy living room chair
Pinterest Title: Strawberry Heart Pouch Crochet Pattern
Pinterest Description: Make a small strawberry pouch with simple shaping and a calm, steady rhythm. This gentle crochet project suits thoughtful gifts and quiet evenings.

Strawberry Heart Pouch
- Total Time: 300 minutes
Description
Create a small pouch that resembles a strawberry, perfect for storing earbuds, lip balm, or small treasures.
Materials
- Worsted weight yarn, weight 4, medium: 1 skein (about 150 yards) in red, pink, or strawberry red
- Small amount of green worsted weight yarn: about 10 yards for the leafy top and optional strap accent
- H-8 (5.0 mm) crochet hook
- Yarn needle
- Scissors
- 2 stitch markers (optional)
- Tape measure
Instructions
- Make a foundation chain of 12 chains.
- Row 1: Work 1 double crochet (dc) in the 4th chain from the hook, then work 1 dc in each chain across. You will have 10 dc.
- Row 2: Chain 3 for the turning chain, turn your work, and work 2 dc in the first stitch, 1 dc in each stitch across to the last stitch, and 2 dc in the last stitch. You will have 12 dc.
- Row 3: Chain 3 and turn. Work 2 dc in the first stitch, 1 dc in each stitch across, and 2 dc in the last stitch. You will have 14 dc.
- Row 4: Chain 3 and turn. Work 2 dc in the first stitch, 1 dc in each stitch across, and 2 dc in the last stitch. You will have 16 dc.
- Rows 5 through 10: Chain 3 and turn at the beginning of each row. Work 1 dc in every stitch across. You will have 16 dc at the end of every row.
- Row 11: Chain 3 and turn. Work 1 dc2tog over the first 2 stitches, then work 1 dc in each stitch across to the last 2 stitches, and work 1 dc2tog over the final 2 stitches. You will have 14 dc.
- Row 12: Chain 3 and turn. Work 1 dc2tog over the first 2 stitches, then 1 dc in each stitch across to the last 2 stitches, and 1 dc2tog over the final 2 stitches. You will have 12 dc.
- Row 13: Chain 3 and turn. Work 1 dc2tog over the first 2 stitches, then 1 dc in each stitch across to the last 2 stitches, and 1 dc2tog over the final 2 stitches. You will have 10 dc.
- Row 14: Chain 3 and turn. Work 1 dc2tog over the first 2 stitches, then 1 dc in each stitch across to the last 2 stitches, and 1 dc2tog over the final 2 stitches. You will have 8 dc.
- Row 15: Chain 3 and turn. Work 1 dc2tog over the first 2 stitches, then 1 dc in each stitch across to the last 2 stitches, and 1 dc2tog over the final 2 stitches. You will have 6 dc. Fasten off, leaving a yarn tail about 8 inches long for sewing.
- Make the second panel by repeating Rows 1 through 15. Check both panels before joining them.
- Lay the two panels together with the right sides facing outward.
- Join the panels with single crochet (sc) starting at the lower point, working 1 sc through both layers around the two long sides and the top.
- Make the leafy top with green yarn by attaching it near the center top dip, chaining 4, and then working 1 slip stitch in the 2nd chain from the hook, 1 sc in the next chain, and 1 half double crochet (hdc) in the last chain.
- Fasten off and repeat to make two more small leaves.
- Make the strap with red yarn by chaining 46 and working 1 sc in the 2nd chain from the hook and in each chain across. Fasten off.
- Sew the strap ends inside the pouch near the upper side edges with the yarn needle.
- Weave in the ends by passing the yarn needle through several stitches on the wrong side, changing direction once or twice.
Notes
This project is suitable for a confident beginner who can work chain, single crochet, and double crochet. Be sure to check your tension and adjust your hook size if necessary.