

As soft sunlight filters through swaying leaves, the gentle sounds of nature break the hush of the morning. With every whisper of the breeze, the world feels alive, brimming with creativity waiting to unfold. Imagine placing a lively wind chime made from painted craft sticks, beads, and twine in your outdoor space. As the chime dances in the wind, it adds vibrant colors and soothing sounds, inviting a sense of calm. This simple project is a delightful way to spend your weekend, creating something that can transform your outdoor oasis.
The Heart Behind This DIY
Creating a painted craft stick wind chime invites us to slow down and truly engage with our surroundings. It offers a moment to breathe, painting strokes of color, weaving threads of twine, and threading beads, each sensation bringing a sense of grounding. The process is not rushed; it flows gently like a stream, allowing creativity to emerge organically.
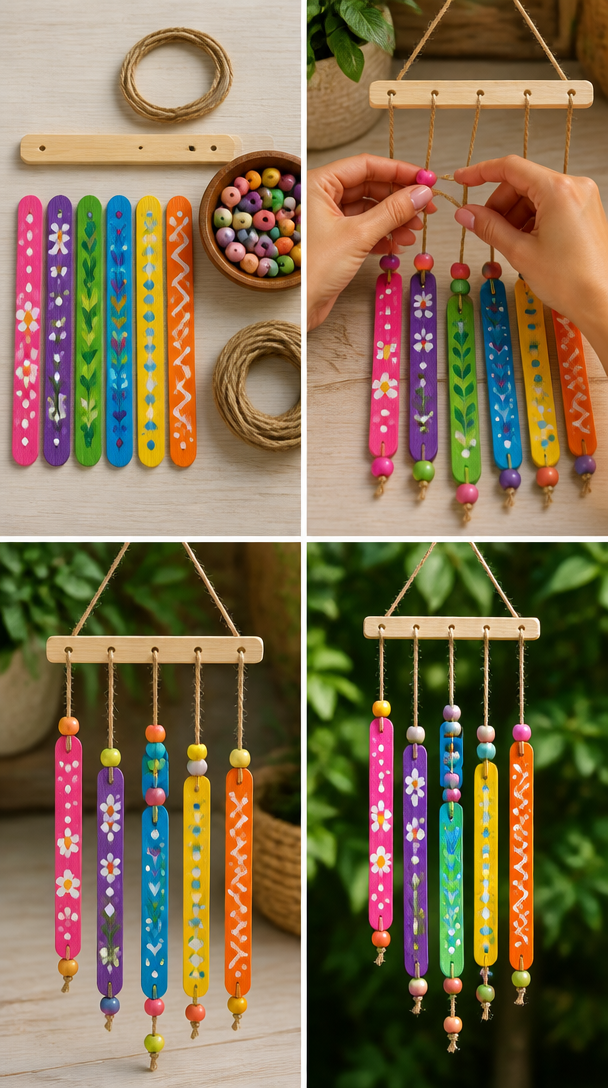
When our hands work with familiar materials, we settle into a rhythm. This task moves beyond mere crafting. It becomes an act of mindfulness, tapping into the creativity that resides within us all. The texture of the craft sticks sliding against our fingers, the smoothness of beads rolling in our palms, and the soft whisper of twine all foster a meditative state. As we focus on these sensations, our minds quiet, and worries drift away like leaves carried on a breeze.
A Gentle Look at the Process
This DIY unfolds beautifully in a sequence of simple steps. The journey begins with collecting your materials, opening the door to creativity and preparation. Imagine the excitement of painting, the playful mixing of colors, and the joyful anticipation of what your wind chime will look like once complete.
Each step adds texture to the overall experience. You will feel the rush of paint gliding onto wood and the gentle click of beads as they come together on a twine strand. As we assemble these components, we find a soothing rhythm, a dance between intention and freedom, leading us toward a cheerful wind chime full of personality.
Materials You’ll Need
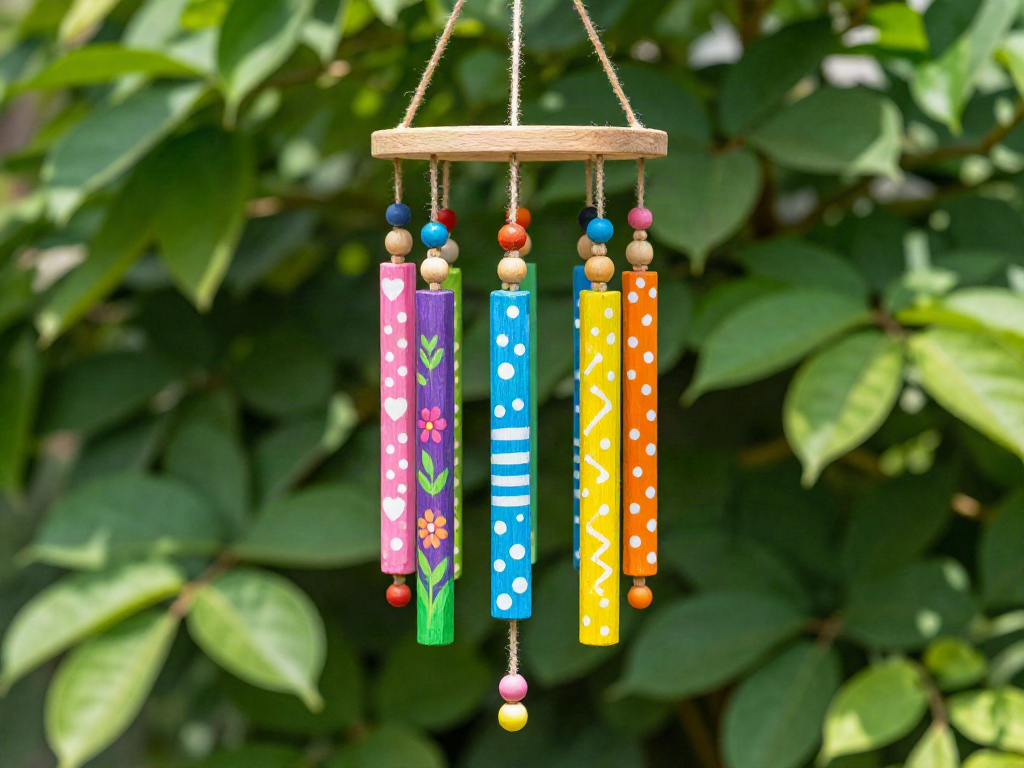
Gathering materials for your wind chime is a lovely part of the process. Here’s what you will need:
- Painted craft sticks (these can be easily found at most craft stores or online)
- Assorted beads (wooden or colorful; both bring charm)
- Twine or string (soft and sturdy for a gentle sway)
- Scissors (to cut the twine as needed)
- Paints (choose your favorite colors; water-based paints are gentle on the environment)
- Paintbrush (for smooth strokes and playful designs)
- Optional: protective sealant (to cherish the paint longer if left outdoors)
Once you have everything at hand, you’re ready to immerse yourself in the calming act of creation.
Step-by-Step Directions
-
Prepare Your Workspace
Find a quiet spot with natural light. Set up a comfortable workspace, perhaps on a table outdoors or by a window. Take a moment to appreciate the surroundings.
-
Paint the Craft Sticks
Pick up a paintbrush and choose your colors. Apply smooth strokes to the craft sticks, letting your creativity flow. Allow them to dry completely, feeling the gentle rhythm of the process. -
Select Your Beads
Sort through your beads, picking colors and textures that speak to you. The clinking sound of beads can be soothing, reminiscent of small treasures waiting to be part of your creation. -
Cut the Twine
Measure pieces of twine, cutting them to your desired lengths. The soft texture of the twine feels pleasing in your hands, adding a tactile element to your work. -
String the Beads
Thread your chosen beads onto the twine. Listen to the quiet sound of beads sliding onto the string, allowing the motion to calm you further. Alternate colors or create patterns that resonate with you. -
Attach the Beads to the Craft Sticks
Once the paint is dry, tie the bead strands to the ends of the craft sticks, securing them with gentle knots. Feel the satisfaction of creating a connection between each crafted element. -
Create a Top Loop for Hanging
Use additional twine to create a loop at the top of your wind chime, allowing it to hang gracefully. This final touch makes the chime ready to dance in the wind. -
Hang Your Wind Chime
Find a suitable spot outside where the wind can carry your creation. As you hang it, take a moment. Notice how it sways gently, a reflection of your creativity now alive and vibrant.
Enjoying the Finished Piece
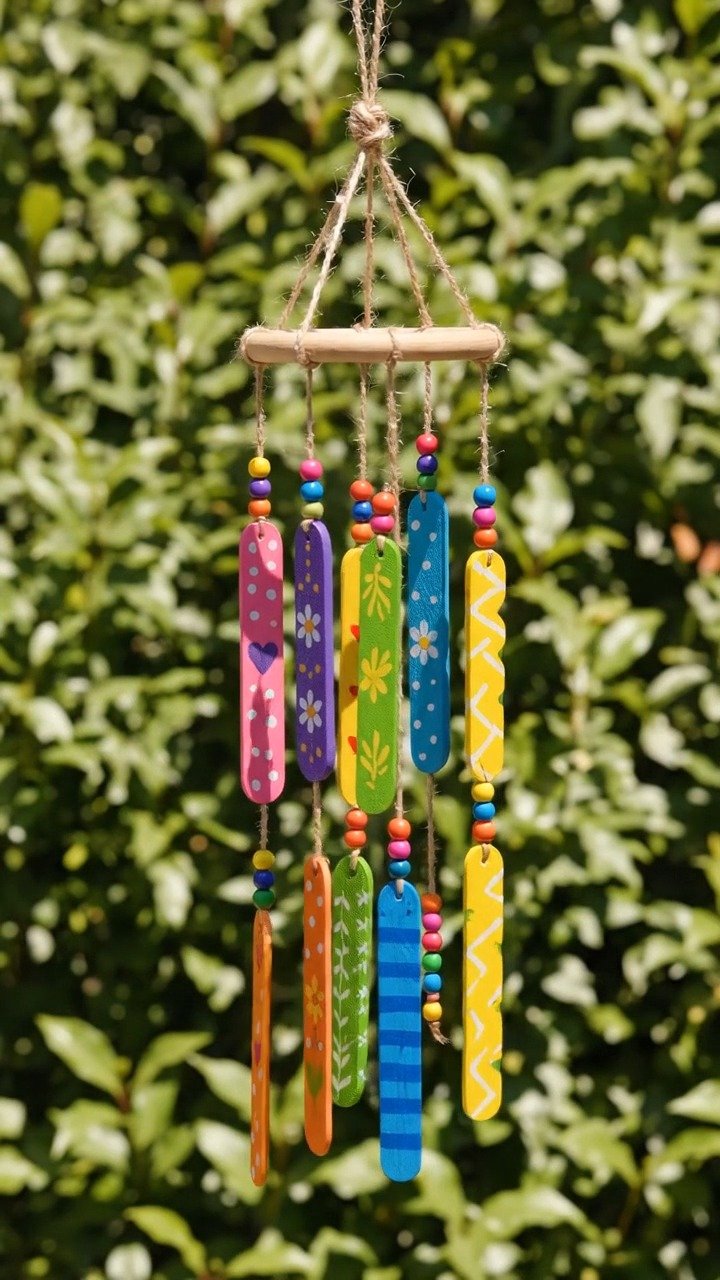
Once your charming wind chime finds its resting place, it transforms the environment around it. Bright colors dance in the light, and the sound of beads tapping together creates a soft melody that graces your outdoor space.
As you settle into the area, take a moment to breathe and truly listen. The chime sways gently with the wind, bringing a sense of peace to your surroundings. You might find yourself spending quiet moments nearby, listening to the lovely sounds that remind you of your creative journey.
The wind chime serves not only as a decoration but as a gentle reminder of the beauty of the making process. It invites you to be present, enjoying the simple joys of life and the world unfolding around you.
Caring for Your Finished DIY
With care, your wind chime can brighten your outdoor space for seasons to come. If you choose to keep it outdoors, consider applying a protective sealant on the paint after it has dried to ensure its vibrant hues endure.
Every now and then, take a moment to check the twine for wear. If any fraying occurs, gently replace it, allowing the chime to continue bringing joy.
When the seasons change and the weather turns cold, you can gently take the wind chime down. Store it in a cozy spot, wrapped softly in a cloth or placed in a box. This will keep it safe from the elements, while also allowing it to be a cherished part of your creative journey.
Gentle Tips & Variations
As you make this wind chime, consider ways to make it uniquely yours. Here are a few gentle invitations to explore:
- Experiment with Patterns: Try different bead arrangements or color combinations. This playful experimentation can lead to surprising outcomes that reflect your personal style.
- Add Natural Elements: Incorporate twigs, feathers, or small bells to create a unique sound and texture.
- Craft with Friends: Share this calm activity with a friend or loved one. The joy of making together can enhance the experience, creating memories alongside your creations.
- Personal Messages: Write small, gentle messages on the craft sticks with permanent markers before painting. Each time you hear your wind chime, let them serve as a reminder of what matters to you.
FAQs About Painted Craft Sticks, Beads, and Twine Wind Chimes
Can I use other materials?
Absolutely. You can substitute craft sticks with thin wooden dowels or even repurpose old utensils. The beauty of DIY is that it adapts to what you have on hand.
How long will it take to complete the project?
Including drying time, you may find that the whole process takes a few hours. Feel free to break it up into leisurely sessions, allowing for creativity to unfold.
Is this project suitable for children?
Yes, this project is perfect for kids with supervision. Encourage their creativity with paint and designs to make it a fun family activity.
What if it rains?
If your wind chime gets wet, it’s okay. As long as the materials are safe for outdoor use, just let it dry thoroughly afterward. Consider bringing it inside during harsh weather.
A Gentle Note Before You Go
As your wind chime sways softly, remember the journey of creation holds a magic all its own. Engage with each step of making, letting it become a moment of mindfulness and reflection. This lively craft, born from painted craft sticks, beads, and twine, is a tribute to your creativity, inviting movement and color into your space.
Whether placed amongst blooming flowers or hanging from a sturdy branch, each chime sings a quiet song, blending beauty with the rhythm of nature. May you continue to find moments of calm and inspiration in every craft you embrace.
Print
DIY Painted Craft Stick Wind Chime
- Total Time: 135 minutes
- Yield: 1 wind chime
- Diet: N/A
Description
A delightful DIY project to create a vibrant painted craft stick wind chime using simple materials.
Ingredients
- Painted craft sticks
- Assorted beads (wooden or colorful)
- Twine or string
- Scissors
- Water-based paints
- Paintbrush
- Optional: protective sealant
Instructions
- Prepare your workspace in a quiet area with natural light.
- Paint the craft sticks with your chosen colors and allow them to dry.
- Select beads that appeal to you, sorting by color and texture.
- Cut pieces of twine to your desired lengths.
- String the beads onto the twine, creating patterns if desired.
- Attach the bead strands to the ends of the craft sticks with knots.
- Create a top loop for hanging using additional twine.
- Hang your wind chime in a suitable outdoor spot.
Notes
Consider adding natural elements like twigs or feathers for unique designs.
- Prep Time: 15 minutes
- Cook Time: 120 minutes
- Category: Crafts
- Method: Crafting
- Cuisine: N/A