

As you sit quietly, perhaps with the soft rustle of the ocean breeze outside your window, imagine the delicate sound of seashells gently clinking together. Each shell carries the whispers of the sea, capturing memories of sunlit beaches and tranquil shores. Creating a Seashell Driftwood Wind Chime offers more than just a craft; it is a humble embrace of nature’s beauty, a way to bring the essence of the shore into your home. This process allows you to slow down, breathe deep, and feel grounded in the moment, connecting with the natural world as you gently assemble your piece.
Why Seashell Driftwood Wind Chime Feels Comforting to Create
Making a Seashell Driftwood Wind Chime feels like a gentle reminder of the simple joys in life. Each element you gather has its own story, the seashells echoing the ocean’s soft waves, the driftwood holding the weight of countless tides. This project urges you to slow down and integrate the tactile experiences of each material, inviting you to explore textures and forms.

As you string the shells and hang them from a piece of driftwood, you engage your senses fully. You’ll feel the warm sunlight filtering through your fingers as you work. The sound of the shells clicking brings a soothing rhythm to your space, almost like a whispered melody sung by the breeze. Creating this wind chime becomes a meditative act, each step fostering a connection to nature, reinforcing a sense of calm and contentment.
A Gentle Look at the Process
The journey of crafting a Seashell Driftwood Wind Chime unfolds gracefully, much like the gentle ebb and flow of the ocean. You will start by gathering all your materials, laying them out where they can catch your eye. Each shell, smooth and cool to the touch, holds the promise of a serene sound. The driftwood feels rich and textured, an organic piece that grounds your project.
As you begin, you will experience the satisfaction of creating, with each string you tie bringing the chime closer to life. The soothing rhythm of your movements sets the tone for a calming experience. Add the shells one by one, feeling their unique shapes and listening to the sounds they make. This process becomes a dance of imagination and intention, allowing you to lose yourself in creativity as you craft a piece that speaks of coastal serenity.
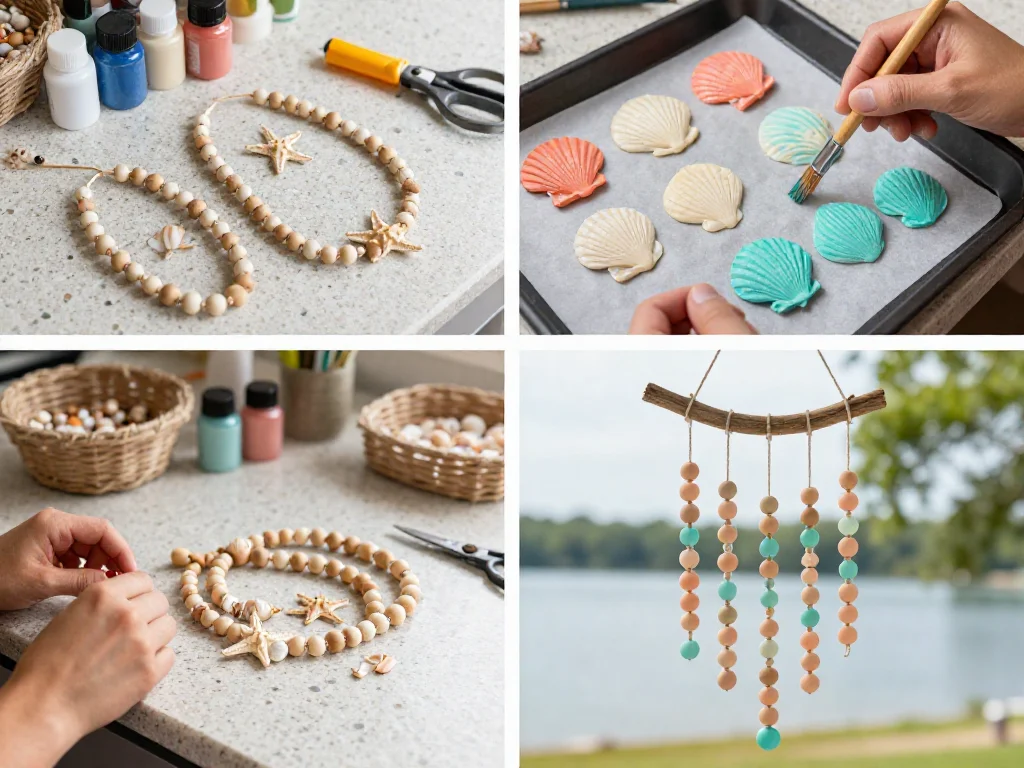

Materials You’ll Need
- Driftwood (a piece that feels comfortable to hold)
- Seashells (various sizes and shapes, collected or purchased)
- Strong twine or fishing line (simple, clear, and easy to work with)
- Scissors (to cut twine to length)
- A drill with a small bit (or a hammer and nails, if you prefer)
- OPTIONAL: beads or decorative elements (to add personal flair)
When you gather your materials, take a moment to appreciate each item. Each seashell’s colors and textures offer a unique story, and the driftwood’s natural shapes invite exploration. You can find many of these items easily at craft stores or on nature walks.
Step-by-Step Directions
-
Begin by choosing your piece of driftwood. Hold it in your hands and feel its weight. Consider how you want to hang your chime—allow this to guide your design.
-
Select seashells that catch your eye. Feel their smoothness. You may want to lay them out on a soft surface to see how they look together before starting.

-
Using your drill, create small holes at the top of each seashell. If you do not have a drill, you can gently tap a small nail through the top part of the shell to create a hole.
-
Cut lengths of your twine or fishing line. These should be around 12-18 inches long, depending on how long you wish your shells to hang.
-
Take one strand of twine and thread it through the hole in a seashell. Tie a secure knot to hold it in place.
-
If using beads, consider adding one above the shell for extra flair. This will also help separate the shells a bit, allowing for a gentle sound as they move.
-
Repeat the threading process for each of your chosen shells, arranging them in a way that pleases you.
-
Once all your shells are strung, decide how you want to attach them to the driftwood. Space them out evenly, allowing your creativity to guide their placements.
-
Secure the twine to the driftwood by tying strong knots. Check that everything is secure and adjusted to your liking.
-
Finally, find a lovely spot to hang your completed wind chime. Consider an area where the breeze can reach it, perhaps by a window or outside in your garden, where it can whisper to you softly.
Enjoying the Finished Piece
Once your Seashell Driftwood Wind Chime is complete, it becomes more than just a decoration; it transforms into a piece imbued with memories and tranquility. Hang it where it can catch the wind and watch as it dances gently. The sound of the seashells lightly clinking brings a sense of calm, evoking the sound of waves lapping at the shore.
Consider how your chime adds an element of nature to your space. It can serve as a reminder of serene moments spent at the beach or a token of your creative journey. Each time you hear it sway, it brings a new layer of peace to your surroundings, a gentle nudge to pause and breathe.
Making This DIY Last
To ensure the longevity of your seashell driftwood wind chime, consider its placement and general care. If you hang your wind chime outside, choose a spot that’s somewhat sheltered from the elements. While seashells and driftwood are naturally resilient, prolonged exposure to heavy rain or harsh sun can impact their beauty over time.
Bring your wind chime indoors during stormy weather or winter months to protect it. When dust gathers, a gentle wipe with a damp cloth can bring the brightness back to your shells. If you choose to store it, wrap it in a soft cloth to avoid scratches and ensure it remains intact until you wish to enjoy it again.
Small Ways to Make It Your Own
-
Personalize your Seashell Driftwood Wind Chime by adding colors. You could paint the driftwood in a calming hue or add metallic accents to your shells.
-
Incorporate different materials; consider adding small branches, feathers, or even beads from travels you’ve cherished to create a unique narrative.
-
Experiment with spacing. Changing the distances between shells can create different sounds and visual effects.
These suggestions are invitations to express your creativity, allowing you to make a wind chime that truly reflects your essence.
FAQs About Seashell Driftwood Wind Chime
Can I use other materials instead of seashells?
Yes, feel free to use other natural items, like stones or driftwood pieces, that resonate with you. Just ensure they can create the soft sounds you desire.
What if I don’t have driftwood?
You can use any sturdy branch or even a piece of cardboard to serve as a base. Your creativity can help you adapt the materials you have on hand.
How do I clean my wind chime?
A soft cloth lightly dampened will help remove any surface dust from the seashells without scratching them. Avoid using harsh chemicals that might damage the natural beauty.
Where is the best place to hang my wind chime?
Consider areas where it can sway gently in a breeze, like near windows, patios, or gardens. The soft sounds will enhance your peaceful environment.
Can I make a wind chime for different seasons?
Absolutely. Embrace the seasons by changing its decorations – think autumn leaves, winter-themed shells, or summer flowers. This keeps things fresh and inviting throughout the year.
A Gentle Note Before You Go
Creating a Seashell Driftwood Wind Chime is not just about the final product but about the entire experience. Take your time as you craft, allowing each step to unfurl organically. Embrace the quiet moments filled with the sounds of nature and your gentle movements.
As you hang your chime, allow yourself to cherish its beauty, and remember the tranquility it represents in your life. Whenever you hear the soft clinking of the shells, let it remind you of the ocean’s whispers and the calm that can always be found in the act of creating something with care.
Print
Seashell Driftwood Wind Chime
- Total Time: 20 minutes
- Yield: 1 wind chime
- Diet: None
Description
Create a soothing Seashell Driftwood Wind Chime that brings the beauty of the ocean into your home.
Ingredients
- Driftwood (a piece that feels comfortable to hold)
- Seashells (various sizes and shapes, collected or purchased)
- Strong twine or fishing line (simple, clear, and easy to work with)
- Scissors (to cut twine to length)
- A drill with a small bit (or a hammer and nails, if you prefer)
- OPTIONAL: beads or decorative elements (to add personal flair)
Instructions
- Begin by choosing your piece of driftwood and consider how you want to hang your chime.
- Select seashells that catch your eye and lay them out to see how they look together.
- Using your drill, create small holes at the top of each seashell.
- Cut lengths of the twine or fishing line, around 12-18 inches long.
- Thread a strand of twine through the hole in a seashell and tie a secure knot.
- Consider adding a bead above the shell for extra flair.
- Repeat the threading process for each of your chosen shells, arranging them as you like.
- Decide how to attach them to the driftwood, spacing them evenly.
- Secure the twine to the driftwood by tying strong knots.
- Hang your completed wind chime in a lovely spot where it can catch the breeze.
Notes
Consider protecting your wind chime from harsh weather conditions to ensure its longevity.
- Prep Time: 20 minutes
- Cook Time: 0 minutes
- Category: Craft
- Method: Crafting
- Cuisine: None