

When you stroll outside on a crisp morning, the world feels vibrant and alive. Each breath brings the scent of earth and dew-soaked grass, and the sunlight dapples through the leaves, creating a dance of light on the path. In this serene setting, a simple and soft idea emerges: serene DIY Swirl Painted Rocks. The cool, smooth stones lie waiting, inviting you to add your touch of color and creativity. Each stroke of paint becomes a gentle reminder of the moment, a way to connect with nature and embrace your own imaginative spirit.
The Heart Behind This DIY
DIY Swirl Painted Rocks carry more than just their visual charm; they embody the essence of calm creativity. The process of selecting stones and swirling colors creates a gentle rhythm, pulling you into a meditative state. Each color swirls and merges as you pour yourself into the act of making, letting any tension or haste drift away. This simple craft helps create a peaceful space in your mind, allowing you to slow down and appreciate the tactile beauty of your surroundings.
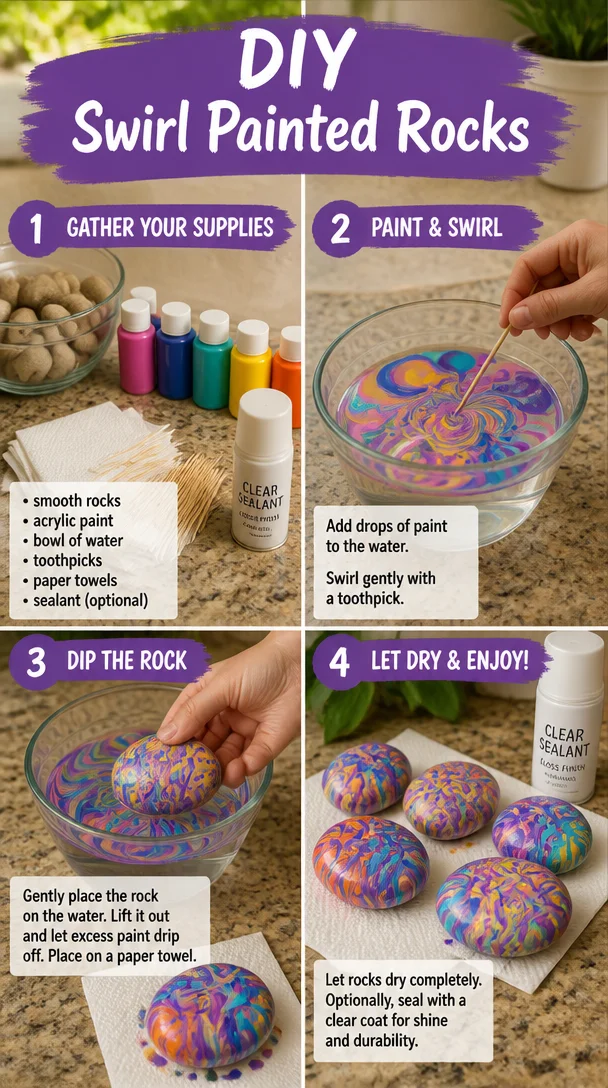
Taking time to engage with the physical act of painting nurtures a sense of mindfulness. The cool weight of the rock in your hand, the soft brush gliding over the surface, and the satisfying way colors interact all invite you to focus fully on the present moment. As you swirl and blend, you leave behind the clatter of daily life and enter a serene world of creativity, connection, and personal expression.
A Gentle Look at the Process
Creating DIY Swirl Painted Rocks is a beautifully fluid experience. Picture gathering your materials, feeling the smooth stones in your hands as you decide which ones to use. The sound of paint bottles opening becomes a familiar, comforting melody as you prepare to immerse yourself in color. Each brush stroke feels deliberate yet free, allowing the colors to merge in playful spontaneity.
The technique itself is simple yet captivating, offering room for exploration and creativity. You can let your imagination roam, creating patterns that shimmer and shine or blending hues for a gentle gradient. As you paint, the world becomes a little quieter, and your thoughts dance with the colors on the rocks.
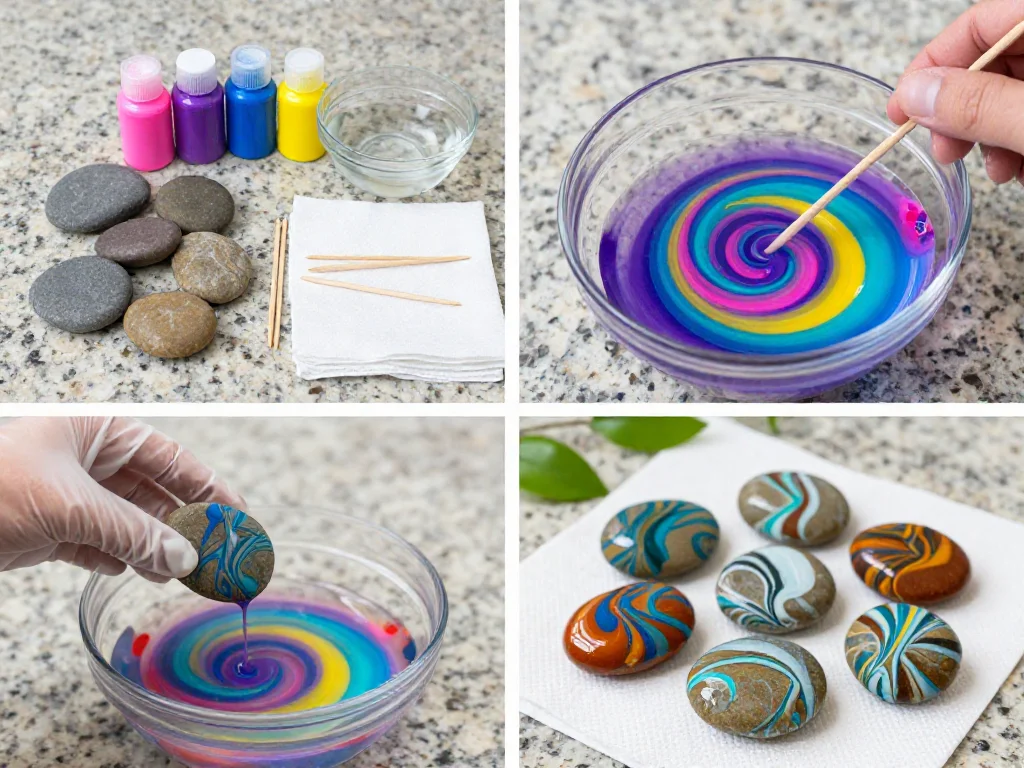
Materials You’ll Need
- Smooth, clean rocks (easy to find at craft stores or your outdoor space)
- Acrylic paints in your favorite colors (non-toxic options are widely available)
- Paintbrushes in various sizes (soft brushes work best for swirling)
- Paper plates or disposable cups (to use as palettes)
- Water and paper towels (for cleaning brushes between colors)
- Clear acrylic sealer (optional for longevity)
- Gloves (optional for easy cleanup)
Step-by-Step Directions
-
Begin by selecting your smooth rocks. Feel their coolness in your hands and pick the ones that spark joy.
-
Set up your workspace. Lay down some newspaper or a plastic mat to protect your surface.
-
Pour a small amount of acrylic paint onto your palette. You can choose 2-3 colors that speak to you today.

-
Dip your brush into the first color, allowing the bristles to soak up the paint. Gently touch the brush to the rock.
-
Start swirling the brush in circles, letting the paint flow over the rock. Watch how the colors blend together in a fluid dance.
-
As you paint, mix in other colors as you desire. Let the paint find its own path, creating surprising patterns.
-
When you feel satisfied with your design, set the rock aside to dry. Notice how the colors appear different in different lights.
-
Once dry, consider applying a clear acrylic sealer for extra protection, especially if you plan to place the rocks outdoors.
-
Clean your brushes with water and paper towels. Enjoy the colorful mess as part of the process.
Using DIY Swirl Painted Rocks in Everyday Life
Your finished DIY Swirl Painted Rocks can bring a delightful touch to everyday life. Whether you choose to display them in your home, use them in your garden, or gift them to friends, they infuse spaces with warmth and creativity. You might create a peaceful centerpiece on a coffee table or place a rock near a window to catch the light. Each swirl invites a moment of reflection, much like a tiny piece of art resonating with nature’s beauty.
They can also serve as gentle tokens of inspiration. You might carry one with you as a reminder of your creativity and calm moments, or place them along a path in your garden, creating a mini gallery for family and friends to admire. The colors can uplift your spirit and spark conversations about the stories behind each rock and its creation.
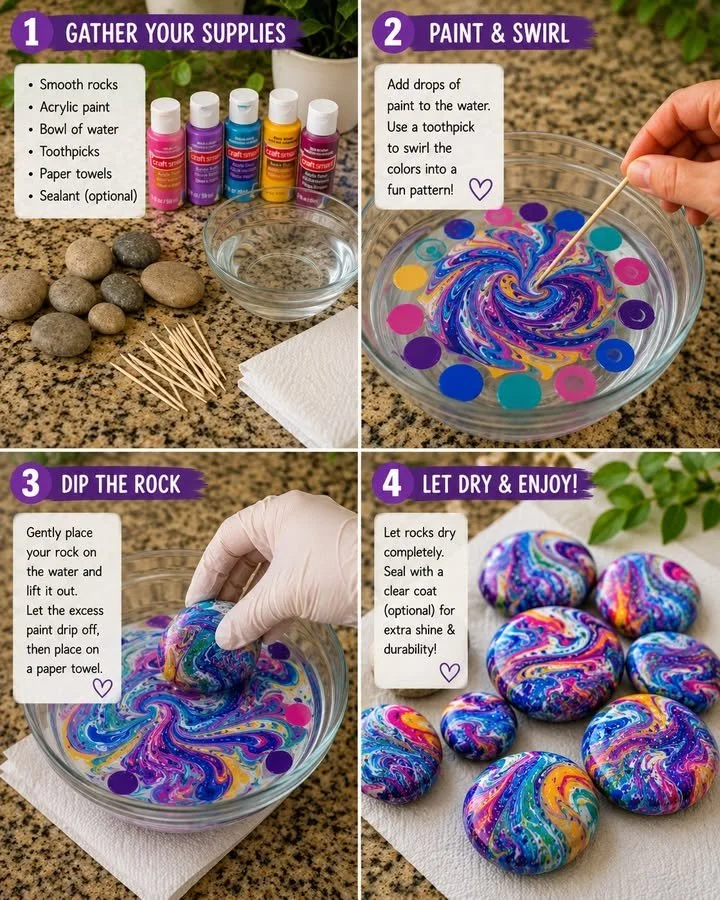
Caring for Your Finished DIY
Caring for your DIY Swirl Painted Rocks is simple. If you plan to keep them indoors, a gentle dusting now and then will suffice. For any outdoor placements, ensure they are safe from harsh weather. If you’ve used a clear acrylic sealer, your rocks will stand up well against rain and sun, but it’s always best to bring them inside during extreme weather conditions.
Should you decide to refresh the look of your rocks in the future, you can paint over them easily. This opportunity to reincarnate your art keeps the creative spirit alive, and you can continually explore new patterns and colors.
Gentle Tips & Variations
-
Experiment with layering colors. Start with a base coat and let it dry before you add swirls on top. This adds depth to your design.
-
Try different tools besides brushes. A sponge, comb, or even your fingers can create unique textures and patterns.
-
Dive into seasonal themes. For spring, soft pastels remind you of blooming flowers, while autumn might inspire you with rich oranges and reds.
-
Consider using glow-in-the-dark paint for a whimsical twist. Your rocks can light up your space, providing a gentle glow during the night.
-
If you’re feeling playful, invite friends to join you. Creating together can spark new ideas and deepen your connection.
FAQs About DIY Swirl Painted Rocks
Can I use any type of paint for this project?
Acrylic paint works best due to its vibrant colors and smooth finish. It dries quickly and is easily cleaned with water.
Do I need to seal my rocks?
Sealing is recommended if your rocks will be placed outdoors. It helps protect the paint from fading and weather conditions.
What if I don’t have smooth rocks?
You can use any clean, dry stone. Just remember that smoother surfaces will yield a more polished look.
How long do the rocks take to dry?
Acrylic paint usually dries in about 1-2 hours, but it’s best to allow them to cure for a full day before handling or sealing.
Can children join in this activity?
Yes, children can enjoy this craft too. Just supervise them with the paints and ensure they wear appropriate clothing or aprons to avoid stains.
A Gentle Note Before You Go
As you conclude your time with DIY Swirl Painted Rocks, take a moment to breathe deeply and soak in the experience. Each rock you’ve painted captures a moment of creativity, mindfulness, and connection to the natural world. The gentle colors and swirls you’ve created can serve as personal tokens, reminders of your calm and creative journey. As you incorporate these beautiful stones into your daily life, remember that the joy lies not only in the final piece, but in the serene moments spent crafting. Embrace the rhythm of your creativity, and allow your imagination to flow freely, time and time again.
Print
DIY Swirl Painted Rocks
- Total Time: 15 minutes
- Yield: Varies (as many stones as you wish to paint)
- Diet: N/A
Description
A serene and creative project that transforms smooth stones into colorful works of art through swirling paint techniques.
Ingredients
- Smooth, clean rocks
- Acrylic paints in various colors
- Paintbrushes in various sizes
- Paper plates or disposable cups
- Water and paper towels
- Clear acrylic sealer (optional)
- Gloves (optional)
Instructions
- Begin by selecting your smooth rocks. Feel their coolness in your hands and pick the ones that spark joy.
- Set up your workspace. Lay down some newspaper or a plastic mat to protect your surface.
- Pour a small amount of acrylic paint onto your palette. You can choose 2-3 colors that speak to you today.
- Dip your brush into the first color, allowing the bristles to soak up the paint. Gently touch the brush to the rock.
- Start swirling the brush in circles, letting the paint flow over the rock. Watch how the colors blend together in a fluid dance.
- As you paint, mix in other colors as you desire. Let the paint find its own path, creating surprising patterns.
- When you feel satisfied with your design, set the rock aside to dry. Notice how the colors appear different in different lights.
- Once dry, consider applying a clear acrylic sealer for extra protection, especially if you plan to place the rocks outdoors.
- Clean your brushes with water and paper towels. Enjoy the colorful mess as part of the process.
Notes
Consider exploring different tools and seasonal themes to enhance your painting experience.
- Prep Time: 15 minutes
- Cook Time: 0 minutes
- Category: Craft
- Method: Painting
- Cuisine: N/A