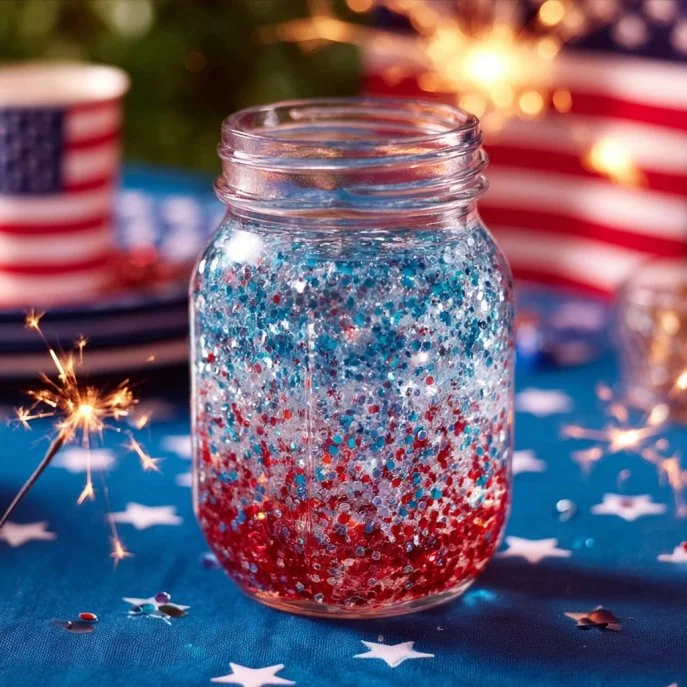
Celebrate Independence Day with a 4th of July Glitter Jar
As a child, the 4th of July was not just a day of fireworks and barbecues; it was a time for the family to gather, share stories, and create lasting memories. I vividly remember my grandmother filling her kitchen with the aromas of smoked meats and baked treats, all while we kids crafted decorations with red, white, and blue glitter. One of my favorite projects was making our very own fireworks in a jar, which became a centerpiece for every celebration. This year, I want to share that joy with you through my delightful 4th of July Glitter Jar.
This sparkling concoction not only captures the essence of the holiday but also serves as a fantastic activity for kids and adults alike. Filled with patriotic colors and shimmering beauty, this glitter jar is perfect for decorating your party table or giving as a heartfelt gift. Let’s dive in and create a masterpiece that embodies the spirit of celebration!
Why You’ll Love This 4th of July Glitter Jar
- Kid-Approved: Fun and exciting for children of all ages.
- Easy to Make: Requires minimal materials and some creativity.
- Customizable: Use different colors and decorations based on your style!
- Eye-Catching Decoration: A lovely centerpiece for your 4th of July table.
- Budget-Friendly: You can create it with materials you likely have at home.
Ingredients
- 1 mason jar (16 oz)
- 1 cup water
- 1 cup clear school glue
- Red glitter
- Blue glitter
- White glitter
- (Optional) Star-shaped sequins or confetti
Step-by-Step Instructions
Prepare the Base
- Mix Glue and Water: In a bowl, combine the clear school glue and water. Stir until well blended.
- Add Glitter: Add equal parts of red, white, and blue glitter to the mixture. Feel free to be generous—around 2 tablespoons of each color works well!
- Optional: If using, incorporate star-shaped sequins or confetti into the mix for an extra festive touch.
Assemble the Jar
- Fill the Jar: Carefully pour the glitter mixture into the mason jar, leaving some space at the top.
- Seal It Up: Screw on the lid tightly, ensuring it’s sealed well.
Shake and Enjoy
- Give it a Shake: Once sealed, give your glitter jar a good shake! Watch the colors swirl and twinkle, creating a dazzling display.
- Display: Place your glitter jar as a centerpiece for your Independence Day celebration or gift it to a loved one!
Tips & Variations
- Color Swaps: Change the glitter colors to match other holidays or occasions.
- Temperature: For a more liquid consistency, add less glue or more water.
- Decorate the Jar: Use ribbon or stickers to further personalize your glitter jar.
Storage Instructions
Store your glitter jar at room temperature. It can last for years if kept away from direct sunlight to prevent fading.
Nutritional Information
- Prep Time: 10 minutes
- Total Time: 10 minutes
- Calories per Serving: Not applicable (art project)
- Servings: 1 jar
Frequently Asked Questions
- Can I use a different type of glue?
- Yes! Just make sure it’s clear and suitable for crafting.
- What if I don’t have a mason jar?
- Any clear container with a tight seal will work perfectly.
- How do I clean up glitter spills?
- Use a damp cloth to wipe up the glitter, which helps to minimize mess.
- Can this be made ahead of time?
- Absolutely! Prepare it the day before and display it when you’re ready to celebrate.
Serving Suggestions or Pairings
Pair this glitter jar with a delicious BBQ feast or some festive red, white, and blue desserts to complete your Independence Day celebration. Consider serving refreshing lemonade or sparkling water for drinks!
Final Thoughts
This 4th of July Glitter Jar is not only a beautiful decoration but also a wonderful way to connect and create with your loved ones. I hope you enjoy making it as much as my grandmother and I did.
I’d love to see your versions—feel free to share your creations or leave a comment below! Happy Independence Day!

