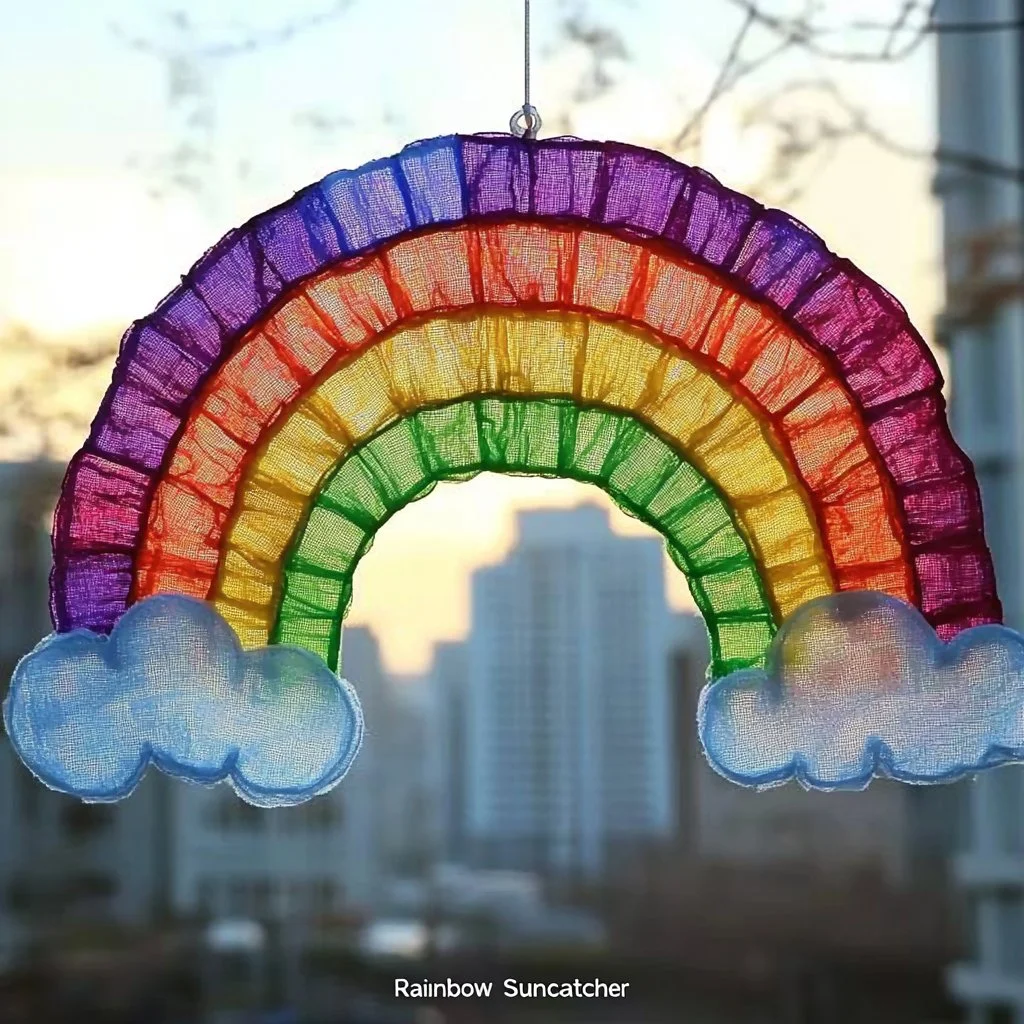
Rainbow Suncatcher Craft
As a child, Saturdays were filled with sunlight and creativity, thanks to my grandmother’s artful spirit. She had a knack for turning ordinary days into magical moments. Every spring, as the flowers began to bloom, she would gather us around the kitchen table to create colorful crafts that brought a splash of joy into our homes. One of my favorite memories is making Rainbow Suncatchers, where vibrant colors danced through the sunlight, filling our house with warmth and cheer.
This particular craft is not just a way to add a pop of color to your windows; it’s a delightful expression of creativity and imagination, perfect for kids and adults alike. With each suncatcher, we celebrate the changing seasons, and it’s a wonderful reminder to cherish those simple moments of togetherness. Get ready to bring a dose of sunshine into your life with this cheerful Rainbow Suncatcher Craft!
Why You’ll Love This Rainbow Suncatcher Craft
- Fun for All Ages: Perfect for children and grown-ups alike—great for family bonding.
- Easy and Mess-Free: Minimal materials and no complicated steps.
- Customizable: Endless possibilities with colors and shapes.
- Brightens Up Your Space: Amazing visual appeal that brightens any room.
- Recyclable Materials: A fantastic way to reuse plastic bags and keep the planet green.
Ingredients
- Transparent plastic sheets or wax paper (2 sheets)
- Clear glue (4 ounces)
- Food coloring or liquid watercolors (various colors)
- Twine or string (for hanging)
- Scissors
- Paintbrush or sponge
- A shallow dish or baking tray
Step-by-Step Instructions
Prepare Your Workspace
- Start by laying down some newspaper or a plastic tablecloth to protect your surface.
- Gather all your materials and organize them for easy access.
Mix the Glue and Color
- In a shallow dish, mix the clear glue with drops of food coloring.
- Stir until you achieve your desired color intensity.
Create the Suncatchers
- Place one transparent plastic sheet or wax paper on your workspace.
- Using a paintbrush or sponge, apply the colored glue mixture onto the plastic, spreading it out evenly.
Add Layers of Color
- Repeat the same for different colors, creating swirls and layers.
- Allow the glue to spread and settle naturally for beautiful effects.
Seal and Dry
- Once satisfied with your design, place the second sheet of plastic on top, pressing gently to seal the edges.
- Let your suncatcher dry for at least 24 hours until completely hardened.
Final Touch
- After drying, carefully peel off the suncatcher from the plastic and trim any uneven edges.
- Attach a piece of twine or string at the top for hanging.
Tips & Variations
- Color Choices: Experiment with different colors and hues to match your decor.
- Add Glitter: Sprinkle some glitter into the glue mix for added sparkle.
- Shape It Up: Cut the suncatcher into fun shapes—stars, hearts, or flowers!
Storage Instructions
- Store any leftover glue mixture in a sealed container for future crafts.
- Keep finished suncatchers in a cool, dry place to maintain color vibrancy.
Nutritional Information
- Prep time: 15 minutes
- Cook time: 24 hours (drying)
- Total time: 24 hours 15 minutes
- Calories per serving: N/A (Craft)
- Servings: 1 Suncatcher
Frequently Asked Questions
-
Can I use other types of glue?
Yes! Just ensure it’s clear-drying and non-toxic for best results. -
What if I want to make a larger suncatcher?
Simply use a larger piece of plastic and increase the amount of glue mixture accordingly. -
How do I clean up any spills?
Use a damp cloth or paper towel to wipe glue before it dries. -
Can these suncatchers last through rain?
While they’re made for indoor use, they can handle some moisture—best to keep them dry!
Serving Suggestions or Pairings
Pair this craft session with a refreshing lemonade or iced tea for a sunny afternoon indoors. You could also play some cheerful tunes to keep the energy up while crafting!
Final Thoughts
Creating these Rainbow Suncatchers is a delightful way to channel your inner artist and embrace the spirit of spring. I encourage you to gather your loved ones, unleash your creativity, and maybe even share your own unique suncatcher designs in the comments below. Happy crafting!

