Introduction
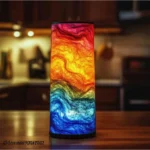
Creating your own DIY lava lamp is not just a fun craft; it’s a captivating way to blend science and creativity. This project transforms simple, household materials into a mesmerizing display reminiscent of the classic 70s decor. Perfect for all ages, it’s an engaging activity that fosters curiosity about chemistry and aesthetics. Whether you’re looking for a fun weekend project with the kids, a unique party decoration, or simply a quirky item to add to your home décor, this DIY lava lamp ticks all the boxes. You’ll delight in watching colorful bubbles rise, fall, and dance, making it a delightful experience for both makers and viewers. Let’s dive in!
Why You’ll Love This DIY Lava Lamp:
- Simple Ingredients: Uses easily accessible materials, making it budget-friendly.
- Engaging Experience: Fun for both kids and adults, sparking interest in science.
- Customizable Styles: Make it personal with different colors and container choices.
- Instant Gratification: Enjoy the results in just a few minutes.
- Educational: A great way to explain density and immiscibility in liquids.
Materials
- A clear plastic or glass bottle (with a lid)
- Vegetable oil
- Water
- Food coloring (your choice of colors)
- Alka-Seltzer tablets (or similar effervescent tablets)
- Optional: Glitter or small decorative items for added visual interest
Full Step-by-Step
1. Prepare Your Bottle
- Start with a clean, empty bottle. A water or soda bottle works perfectly.
- Leave some space (about 1 inch) at the top for the reaction.
2. Add the Liquids
- Fill the bottle with water until it’s roughly one-quarter full.
- Next, pour vegetable oil into the bottle, filling it to about three-quarters full.
- Observe how the oil does not mix with the water and floats on top—this is key!
3. Add Color
- Add several drops of food coloring into the bottle. Watch the colorful droplets sink and mix with the water.
4. Create the Lava Effect
- Break an Alka-Seltzer tablet into quarters. Drop one quarter into the bottle.
- Watch as colorful bubbles begin to rise and fall, creating a lava lamp effect!
5. Enjoy Your Creation
- Replace the lid (if using one) and enjoy your DIY lava lamp.
- For continued fun, simply add more Alka-Seltzer to restart the reaction.
Tips & Variations
- Customize Colors: Experiment with different food coloring combinations for unique looks.
- Use Different Containers: Try a mason jar, a fish tank, or even a glass vase for varied effects.
- Add Glitter: Include glitter or small decorative beads for an added sparkle.
- Glow Effect: Use phosphorescent paint or a glow stick for a nighttime glow.
Frequently Asked Questions
Q1: Can I use a different type of tablet besides Alka-Seltzer?
A1: Yes, any effervescent tablet will work, but Alka-Seltzer is highly recommended for its effectiveness.
Q2: What happens if I shake the bottle?
A2: Shaking the bottle can mix the water and oil, but the lava lamp effect may take time to reestablish.
Q3: Can I use different oils?
A3: While vegetable oil is best, any clear oil (like canola or mineral oil) can work, though the reaction may vary.
Q4: Is it safe to use this with younger children?
A4: Yes, as long as kids are supervised to prevent ingestion or spilling of materials.
Suggestions
- Host a "lava lamp party" where guests can create their own custom versions.
- Make a scientifically themed night by explaining the concepts of density and chemical reactions after crafting.
- Incorporate art by having kids decorate their bottles before adding the liquids.
Final Thoughts
Creating a DIY lava lamp is not just a crafting activity; it’s an invitation to discover the wonders of science and color. Whether you use it as a calming nightlight or a centerpiece for your next gathering, the joy and fascination it brings are undeniable. We’d love to see your creations! Share your versions or leave a comment below with your experience or any creative twists you added!
Print
DIY Lava Lamp
- Total Time: 5 minutes
- Yield: 1 lava lamp
- Diet: N/A
Description
A fun, educational project to create your own mesmerizing lava lamp using household materials.
Ingredients
- A clear plastic or glass bottle (with a lid)
- Vegetable oil
- Water
- Food coloring (your choice of colors)
- Alka-Seltzer tablets (or similar effervescent tablets)
- Optional: Glitter or small decorative items
Instructions
- Prepare a clean, empty bottle, leaving about 1 inch at the top for the reaction.
- Fill the bottle with water until it’s roughly one-quarter full, then pour in vegetable oil, filling it to about three-quarters full.
- Add several drops of food coloring into the bottle.
- Break an Alka-Seltzer tablet into quarters and drop one quarter into the bottle.
- Replace the lid (if using one) and enjoy your DIY lava lamp.
Notes
For continued fun, simply add more Alka-Seltzer to restart the reaction. Experiment with different food coloring combinations for unique looks.
- Prep Time: 5 minutes
- Cook Time: 0 minutes
- Category: Craft
- Method: DIY
- Cuisine: N/A
Nutrition
- Serving Size: 1 lamp
- Calories: 20
- Sugar: 0g
- Sodium: 20mg
- Fat: 0g
- Saturated Fat: 0g
- Unsaturated Fat: 0g
- Trans Fat: 0g
- Carbohydrates: 5g
- Fiber: 0g
- Protein: 0g
- Cholesterol: 0mg

