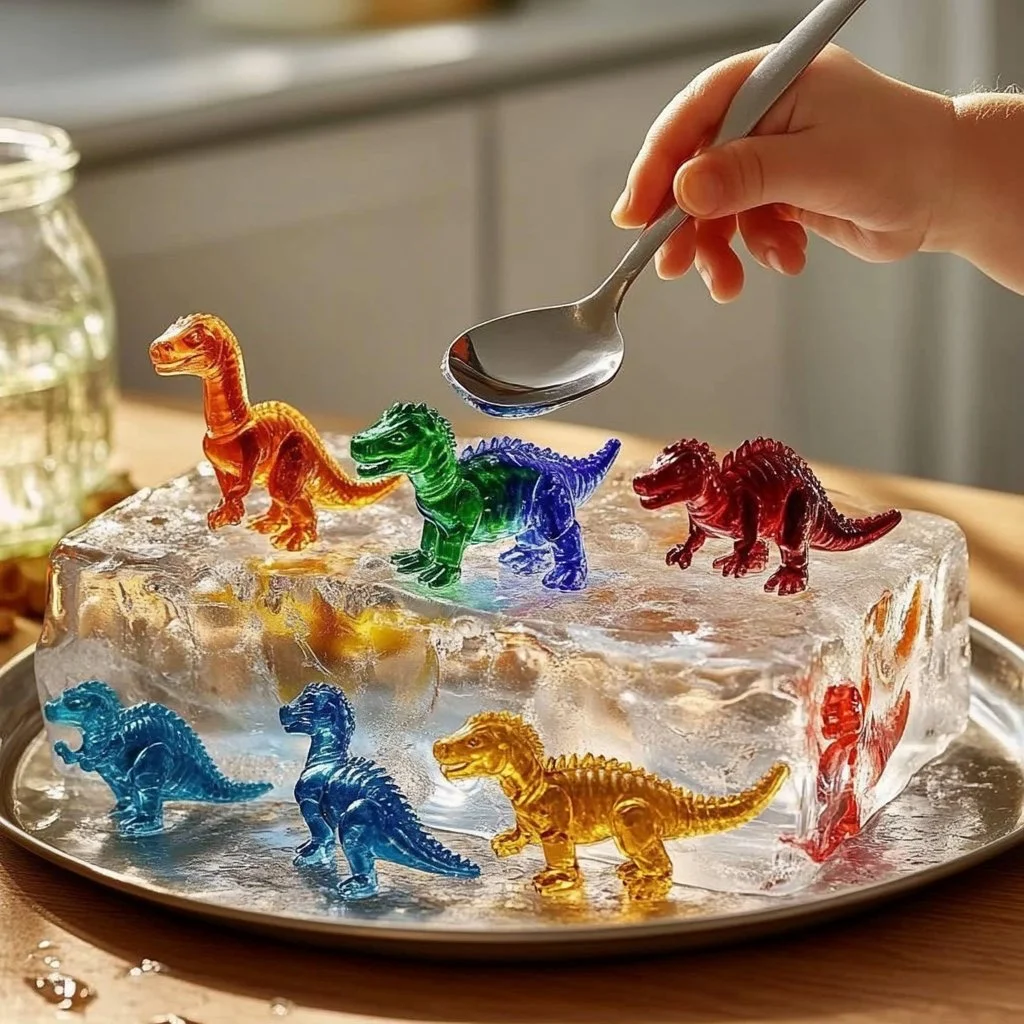
Ice excavation is a thrilling and engaging craft that combines creativity with a fun, hands-on experience. Perfect for children and adults alike, this activity encourages exploration and curiosity. Whether you’re looking for a captivating weekend project, an educational science lesson, or just a unique way to beat the heat, ice excavation delivers on all fronts. As you chip away at the ice, you’ll not only enjoy the sensory experience of the cold and the satisfying sound of tools in action, but you’ll also witness a fascinating transformation as hidden treasures and colors come to life. This craft is ideal for classrooms, birthday parties, or a cozy home activity. So grab your tools and prepare for an icy adventure filled with discovery and delight!
Why You’ll Love This Ice Excavation:
- Sensory Experience: Enjoy the cold, textures, and sounds as you excavate.
- Educational Value: Perfect for teaching concepts like melting, freezing, and exploration.
- Creative Play: Combine art and science for an engaging craft.
- Customizable: Use various materials and themes for endless possibilities.
- Family-Friendly: Suitable for all ages, making it a great group activity.
Materials:
- Ice cubes or a large block of ice
- Small toys or treasures (e.g., plastic dinosaurs, gems)
- Salt (to help speed up melting)
- Water (for freezing)
- Paintbrushes (optional, for detailed excavation)
- Safety goggles (for eye protection)
- Old containers (for ice formation)
Full Step-by-Step:
1. Prepare Your Ice
- Fill containers with water and place small toys or treasures inside.
- Freeze overnight or until fully solid.
2. Set Up the Excavation Area
- Choose a safe, appropriate workspace with good lighting.
- Lay down a protective covering on the surface to catch any spills.
3. Start Excavating
- Put on safety goggles to protect your eyes.
- Use your tools (e.g., hammers, spoons) to gently tap and chip away at the ice.
- Observe how the ice melts and see the treasures come into view.
4. Enhance the Experience
- Sprinkle salt on the surface to speed up melting.
- Use paintbrushes to dust away ice shards for a more delicate touch.
- Take notes on how the ice changes and the treasures revealed.
Tips & Variations:
- Customize Treasure: Replace toys with seasonal themes (e.g., sea creatures for summer, snowflakes for winter).
- Add Color: Freeze colored water to make the ice more visually appealing.
- Exploration Add-On: Integrate magnifying glasses or cameras to capture the excavation process.
- Themed Activities: Combine ice excavation with a hot cocoa station or snowy story time for a complete event.
Frequently Asked Questions:
Q1: What if I don’t have a large block of ice?
A: You can use ice cubes instead; just be aware the excavation process may take longer.
Q2: Can I use food coloring in the ice?
A: Yes! Food coloring can add a vibrant touch to the ice and make the excavation even more exciting.
Q3: What tools are safe for children to use?
A: Small spoons, soft brushes, and plastic hammers are great for kids. Always supervise their use.
Q4: How can I store leftover ice?
A: Store any excess ice in an airtight container in the freezer for future play.
Suggestions:
- Host an Ice Excavation Day with friends or family, making it a memorable experience.
- Follow this craft with an ice-themed snack, such as snow cones or ice cream.
- Create a scavenger hunt by hiding specific toys within the ice and providing clues.
Final Thoughts
Ice excavation offers a unique blend of excitement, learning, and creative fun. It’s a wonderful way to foster curiosity while enjoying a hands-on activity. We’d love to see your versions of this craft! Feel free to share your experiences in the comments or let us know how you customized your ice excavation adventure. Happy excavating!
Print
Ice Excavation Craft
- Total Time: 725 minutes
- Yield: 1 activity session
- Diet: N/A
Description
An engaging craft combining creativity, education, and fun, perfect for both children and adults.
Ingredients
- Ice cubes or a large block of ice
- Small toys or treasures (e.g., plastic dinosaurs, gems)
- Salt (to help speed up melting)
- Water (for freezing)
- Paintbrushes (optional, for detailed excavation)
- Safety goggles (for eye protection)
- Old containers (for ice formation)
Instructions
- Prepare Your Ice: Fill containers with water and place small toys or treasures inside. Freeze overnight or until fully solid.
- Set Up the Excavation Area: Choose a safe workspace with good lighting and lay down a protective covering on the surface.
- Start Excavating: Wear safety goggles and use tools to tap and chip away at the ice, revealing treasures.
- Enhance the Experience: Sprinkle salt to speed up melting and use paintbrushes for delicate dusting of ice shards. Take notes on the changes.
Notes
Customize the treasure with seasonal themes, and consider freezing colored water for a visual treat. Incorporate magnifying glasses for an exploration add-on.
- Prep Time: 5 minutes
- Cook Time: 720 minutes
- Category: Craft
- Method: Hands-on
- Cuisine: N/A
Nutrition
- Serving Size: 1 session
- Calories: 0
- Sugar: 0g
- Sodium: 0mg
- Fat: 0g
- Saturated Fat: 0g
- Unsaturated Fat: 0g
- Trans Fat: 0g
- Carbohydrates: 0g
- Fiber: 0g
- Protein: 0g
- Cholesterol: 0mg

