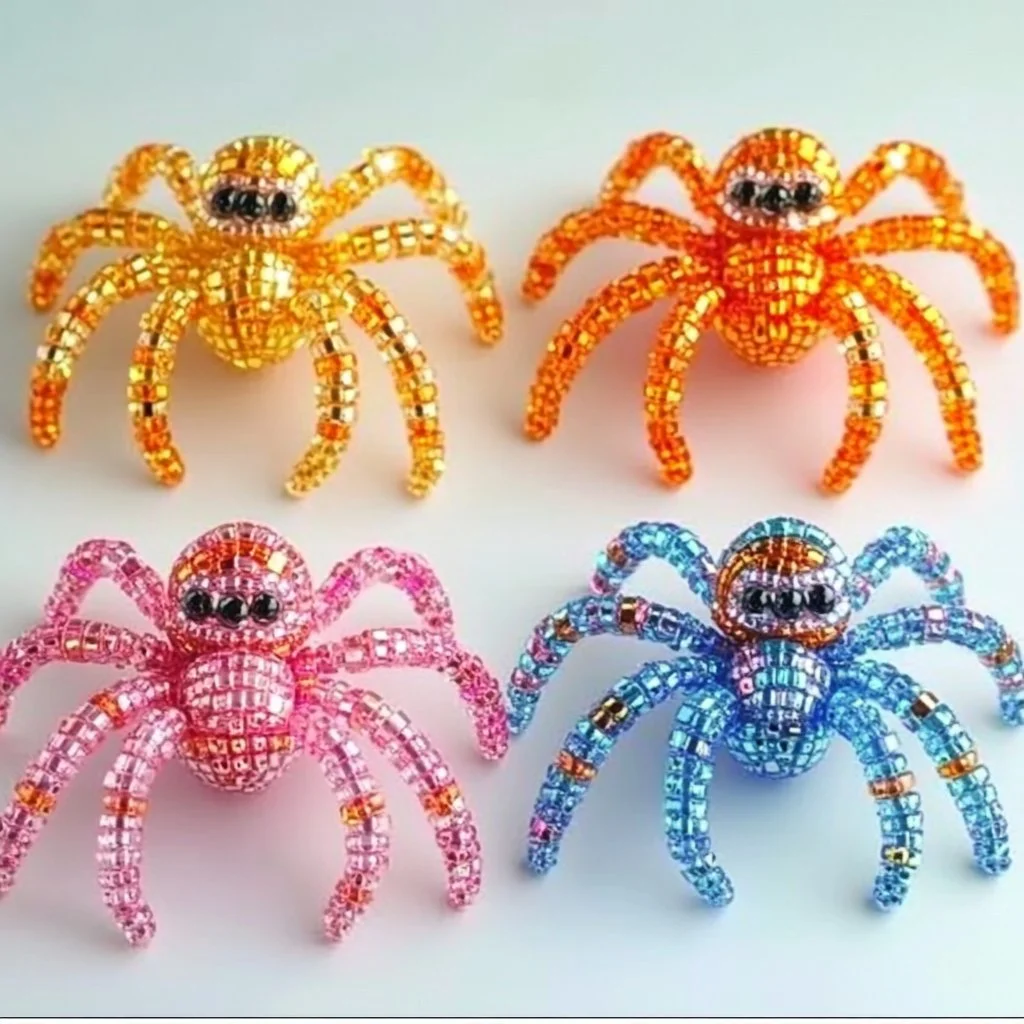
Crafting enchanting beaded spiders is a delightful way to express creativity, especially around spooky seasons like Halloween. This project is not only simple but also a fantastic way to introduce children to the art of crafting. You’ll appreciate how quickly you can bring these charming creatures to life with just a handful of materials, making them a perfect addition to your seasonal decorations or a thoughtful gift for friends and family. Plus, the soothing nature of beading can serve as a fun and calming activity for all ages. Ready to weave some magic with beads? Let’s get started!
Why You’ll Love This Beaded Spider Craft:
- Fun and Engaging: A great way to engage children and adults alike in a hands-on activity.
- Customizable: Create spiders in various colors, sizes, and designs to match your style.
- Skill Development: Helps develop fine motor skills and encourages creative expression.
- Seasonal Decor: Perfect for Halloween decorations or to add a quirky touch to home decor.
- Great for Gifts: Handmade gifts always carry a special charm; these spiders are perfect for gifting!
Materials:
- Black beads (variety of sizes)
- Colored beads (optional for accents)
- Thin craft wire or string
- Scissors
- Wire cutters (if using wire)
- Small googly eyes (optional)
Full Step-by-Step:
1. Prepare Your Workspace
- Set up a clean, flat surface where you can comfortably work on your spider.
- Gather all your materials for easy access.
2. Cut the Wire/String
- Cut a piece of wire or string at least 30 inches long. This will be the body and legs of your spider.
3. Create the Body
- String the Body: Start by threading a large black bead onto the center of the wire/string. This bead will serve as the spider’s abdomen.
4. Form the Legs
- Add Legs: On each side of the body, string several beads to form legs. A typical spider has 8 legs, so divide the bead count accordingly (4 on each side).
- Secure the Legs: Once enough beads are added, twist the wire or double-knot the string to secure the legs in place.
5. Final Touches
- Add Eyes: If using googly eyes, place them securely on the front of the body bead with glue.
- Adjust Legs: Bend the legs into shape—giving them a curled or splayed look adds character!
Tips & Variations:
- Color Choices: Swap black beads for other colors to create themed spiders for various holidays.
- Leg Length: Experiment with the length of the legs by adding or removing beads.
- Add Sparkle: Consider using glittery or glow-in-the-dark beads for fun night-time spider decorations.
Frequently Asked Questions:
Q1: What if I don’t have thin wire?
A1: You can substitute with a strong string or thread, but be mindful of the weight of the beads.
Q2: Can I make larger spiders?
A2: Absolutely! Just increase the size of the body bead and adjust the number of leg beads accordingly.
Q3: How can I ensure the beads stay in place?
A3: If you’re using wire, twist it tightly to secure the beads. If using string, double knot it at the ends.
Q4: Are there any safety considerations for children?
A4: Always supervise young children when using scissors and small beads to prevent choking hazards.
Suggestions:
- Consider using these beaded spiders as part of a larger Halloween craft project, such as a spooky wreath or table centerpiece.
- Host a beading party where guests can create their own spider designs and showcase their work.
Final Thoughts
This beaded spider craft is a fun, creative, and educational activity for all ages. Whether you make them for decoration, as gifts, or just for fun, the possibilities are endless. We’d love to see your versions! Feel free to share your creations or leave a comment below with tips and variations you’ve tried. Happy crafting!
Print
Beaded Spider Craft
- Total Time: 15 minutes
- Yield: 1 spider
- Diet: N/A
Description
Create charming beaded spiders that are perfect for Halloween decorations or gifts with this fun and simple craft project.
Ingredients
- Black beads (variety of sizes)
- Colored beads (optional for accents)
- Thin craft wire or string
- Scissors
- Wire cutters (if using wire)
- Small googly eyes (optional)
Instructions
- Prepare Your Workspace: Set up a clean, flat surface and gather all materials.
- Cut the Wire/String: Cut a piece at least 30 inches long for the spider’s body and legs.
- Create the Body: Thread a large black bead onto the center for the spider’s abdomen.
- Form the Legs: String beads on both sides for legs; secure them by twisting the wire or double-knotting the string.
- Final Touches: Add googly eyes with glue and adjust the legs for character.
Notes
Consider using glittery or glow-in-the-dark beads for themed variations. Supervise children while crafting.
- Prep Time: 15 minutes
- Cook Time: 0 minutes
- Category: Craft
- Method: Handcrafting
- Cuisine: N/A
Nutrition
- Serving Size: 1 spider
- Calories: 0
- Sugar: 0g
- Sodium: 0mg
- Fat: 0g
- Saturated Fat: 0g
- Unsaturated Fat: 0g
- Trans Fat: 0g
- Carbohydrates: 0g
- Fiber: 0g
- Protein: 0g
- Cholesterol: 0mg

