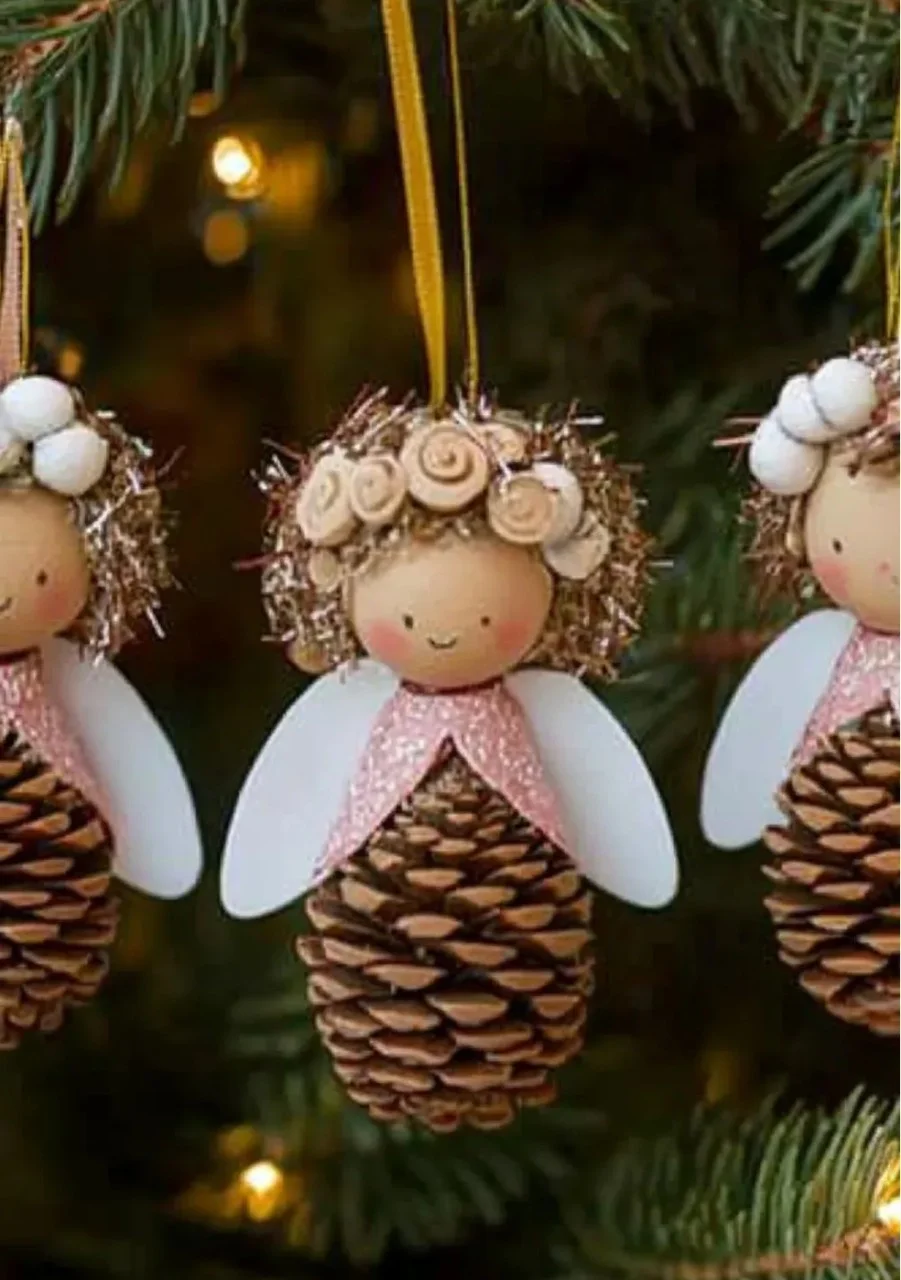
Creating festive decorations can enhance the holiday spirit, and what better way to celebrate than with adorable Pine Cone Angel Ornaments? Not only do these charming angels make perfect additions to your Christmas tree, but they also add a personal touch to your home decor. This project is a great way to bond with family and friends, as crafting together can create lasting memories. Plus, utilizing natural materials like pine cones makes this craft both eco-friendly and accessible. Whether you’re a seasoned crafter or a beginner, you’ll find joy in transforming simple pine cones into delightful angels that can brighten your holidays for years to come.
Why You’ll Love This Pine Cone Angel Ornaments:
- Easy to Make: Simple steps make it perfect for all crafting skill levels.
- Natural Materials: Pine cones are often easy to find in your backyard or local park.
- Customizable: Personalize with different colors, fabrics, and embellishments.
- Great for All Ages: Fun for kids, teens, and adults alike, making it a perfect family activity.
- A Meaningful Gift: Handmade gifts are always cherished, and these angels make thoughtful presents.
Materials:
- Pine cones (medium-sized)
- White paint (optional)
- 2 wooden beads (for the head)
- Lace or fabric (for wings and dress)
- Craft glue or hot glue gun
- Ribbon (for hanging)
- Googly eyes (optional)
- Glitter (optional)
Full Step-by-Step:
1. Prepare the Pine Cone
- Start by cleaning your pine cones. Remove any debris and allow them to dry completely.
- If desired, apply a light coat of white paint to give the pine cone an angelic look. Let it dry.
2. Create the Head
- Glue a wooden bead on top of the pine cone. This will serve as the angel’s head.
- If you’d like, add googly eyes to the bead for a playful touch.
3. Make the Wings
- Cut a piece of lace or fabric into a wing shape.
- Attach the wings to the back of the pine cone using craft glue.
4. Dress the Angel
- Wrap a strip of fabric around the pine cone to create the body dress, gluing it in place.
- Feel free to add glitter for a magical touch.
5. Add a Hanging Ribbon
- Cut a piece of ribbon and attach it to the top of the head, creating a loop for hanging.
Tips & Variations:
- Swap Materials: Use different types of beads or fabric scraps to customize each angel.
- Paint Techniques: Try painting the wings with metallic paint or using natural dyes for a rustic feel.
- Add Details: Use sequins or small buttons to embellish the dress or wings.
Frequently Asked Questions:
Q1: Can I use bigger or smaller pine cones?
A1: Absolutely! Larger pine cones will create a more dramatic angel, while smaller ones can be adorable ornaments.
Q2: What if I don’t have wooden beads?
A2: You can use any round object, such as a painted ball, or skip the head for a more minimalist look.
Q3: How do I store these ornaments after the holidays?
A3: Wrap them in tissue paper and store them in a sturdy box to keep them safe until next year.
Q4: Can kids participate in this craft?
A4: Yes! Just ensure younger children are supervised, especially when using hot glue guns.
Suggestions:
- Host a crafting party with friends to create a whole angel family.
- Use different colors and styles to match your home decor.
- Consider making them as class gifts or for a local charity fundraiser during the holiday season.
Final Thoughts
Pine Cone Angel Ornaments are not just a delightful craft; they embody the spirit of creativity and togetherness. Share your finished versions or any variations in the comments below! We’d love to hear how your angels turned out and any additional tips you might have! Happy crafting!
Print
Pine Cone Angel Ornaments
- Total Time: 15 minutes
- Yield: 4 ornaments 1x
- Diet: N/A
Description
Create delightful Pine Cone Angel Ornaments that enhance your holiday decorations and provide a fun crafting experience for all ages.
Ingredients
- Pine cones (medium-sized)
- White paint (optional)
- 2 wooden beads (for the head)
- Lace or fabric (for wings and dress)
- Craft glue or hot glue gun
- Ribbon (for hanging)
- Googly eyes (optional)
- Glitter (optional)
Instructions
- Prepare the Pine Cone: Clean the pine cones and let them dry. Apply white paint if desired and let it dry.
- Create the Head: Glue a wooden bead on top of the pine cone for the head and add googly eyes if desired.
- Make the Wings: Cut lace or fabric into wing shapes and attach them with craft glue.
- Dress the Angel: Wrap a fabric strip around the pine cone to form a dress and glue it in place, optionally adding glitter.
- Add a Hanging Ribbon: Attach a ribbon loop to the top of the head for hanging.
Notes
Consider varying the materials and paint techniques to make each angel unique. Supervise younger children while crafting.
- Prep Time: 15 minutes
- Cook Time: 0 minutes
- Category: Crafts
- Method: Crafting
- Cuisine: N/A
Nutrition
- Serving Size: 1 ornament
- Calories: 0
- Sugar: 0g
- Sodium: 0mg
- Fat: 0g
- Saturated Fat: 0g
- Unsaturated Fat: 0g
- Trans Fat: 0g
- Carbohydrates: 0g
- Fiber: 0g
- Protein: 0g
- Cholesterol: 0mg

