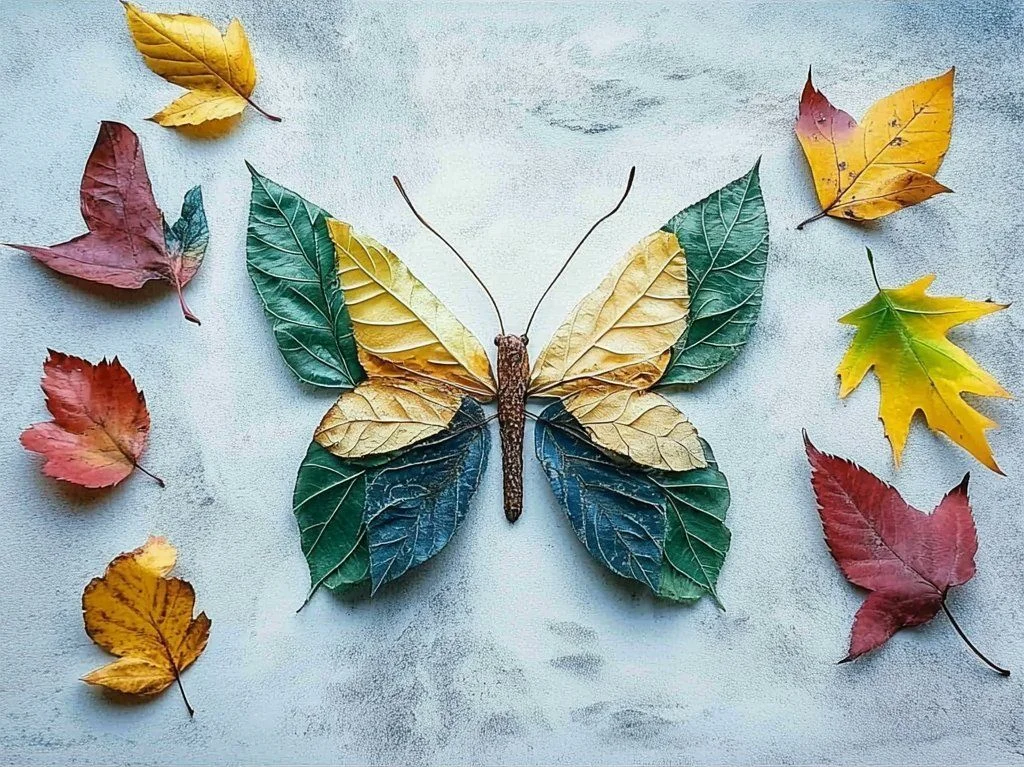
Creating leaf art can be a delightful and therapeutic process, allowing you to connect with nature while expressing your creativity. Among the many artistic projects, crafting leaf art butterflies stands out as a fun and engaging activity that combines both artistry and a sense of accomplishment. This DIY project not only enhances your artistic skills but also serves as a beautiful decoration or gift. Easy enough for kids and satisfying for adults, leaf art butterflies can be made from materials you likely have at home, making them an eco-friendly option for artistic expression. Whether you intend to decorate your home, create a unique card, or craft a memorable gift, this project will inspire you to see the beauty in one of nature’s most delicate creations—leaves!
Why You’ll Love This Leaf Art Butterfly
- Creative outlet: Express your artistic side while working with natural materials.
- Eco-friendly: Utilize materials from your surroundings, reducing waste.
- Simple and fun: Easy enough for children, yet engaging for adults.
- Customizable: Modify colors and sizes based on your personal style.
- Perfect for all occasions: Use your butterflies for decorations, gifts, or greetings.
- Enhances fine motor skills: A wonderful way for kids to refine their crafting abilities.
Materials
- Fresh leaves (various shapes and sizes)
- Scissors
- Craft glue or glue stick
- Colored paper or cardstock
- Markers or colored pencils
- Optional: glitter, stickers, or additional decorations
Step-by-Step Instructions
1. Prepare Your Leaves
- Select leaves: Choose clean, undamaged leaves in different shapes and sizes.
- Press leaves: If desired, press leaves under a heavy book for a flat, crisp finish.
2. Create the Butterfly Body
- Cut the body: Use colored paper or cardstock to cut out a butterfly shape. A classic butterfly has a wide body and pronounced wings.
- Color it: Feel free to use markers, colored pencils, or decorative accents to add personality.
3. Arrange the Leaves
- Display and design: Lay out your leaves on a flat surface to experiment with their arrangement. Consider the balance of color and shape.
- Secure leaves: Once satisfied with the layout, use craft glue to attach the leaves to the butterfly body.
4. Customize the Butterfly
- Add details: Use markers or colored pencils to enhance the butterfly with antennae or patterns on the wings.
- Include embellishments: Consider adding glitter or stickers for extra flair.
5. Let It Dry
- Allow the complete butterfly to dry for at least 30 minutes before displaying or using.
Tips & Variations
- Leaf Selection: Experiment with different leaf types (maple, oak, or curved leaves) for unique shapes.
- Color Combinations: Use colored paper that complements the hues of your leaves for a more vibrant butterfly.
- Texture Play: Mix textured materials like fabric or lace with leaves for added depth.
- 3D Effect: Use foam tape to lift some leaves for a 3D look.
Frequently Asked Questions
1. Can I use artificial leaves instead of real ones?
Yes, artificial leaves work well too, but they may not give the same organic touch.
2. What if I don’t have colored paper?
You can use old magazines, newspapers, or even recycled cardboard in bright colors.
3. How can I preserve my butterfly once it’s made?
Consider laminating it or framing it to prevent damage and wear.
4. What other decorations can I add?
Feel free to use beads, buttons, or other craft materials that enhance your butterfly’s look!
Serving Suggestions or Pairings
- Display Options: Place your butterfly art on a windowsill, in a scrapbook, or as part of a nature-themed wall collage.
- Complementary Decor: Pair with other nature arts, like flower arrangements or pressed leaf frames.
- Gift Ideas: Attach your butterflies to handmade cards or gift packages for a personal touch.
Final Thoughts
Creating leaf art butterflies is not only a delightful way to engage with nature but also a wonderful opportunity for creativity and self-expression. We hope you enjoy this project and make it your own by incorporating unique styles and materials. Don’t forget to share your versions or leave a comment below—you might inspire someone else with your ideas! Happy crafting!
Print
Leaf Art Butterflies
- Total Time: 45 minutes
- Yield: 1 butterfly
- Diet: N/A
Description
Craft beautiful butterfly art using fresh leaves, perfect for all ages and occasions.
Ingredients
- Fresh leaves (various shapes and sizes)
- Scissors
- Craft glue or glue stick
- Colored paper or cardstock
- Markers or colored pencils
- Optional: glitter, stickers, or additional decorations
Instructions
- Prepare Your Leaves: Choose clean, undamaged leaves in different shapes and sizes. Press leaves under a heavy book if desired.
- Create the Butterfly Body: Use colored paper to cut out a butterfly shape. Color it with markers or colored pencils.
- Arrange the Leaves: Lay out your leaves to experiment with their arrangement. Use craft glue to attach them to the butterfly body.
- Customize the Butterfly: Add details with markers or colored pencils and include embellishments for extra flair.
- Let It Dry: Allow the complete butterfly to dry for at least 30 minutes before using or displaying.
Notes
Experiment with different leaf types for unique shapes and textures. Consider using recycled materials for a vibrant look.
- Prep Time: 15 minutes
- Cook Time: 30 minutes
- Category: Craft
- Method: Crafting
- Cuisine: Artisan
Nutrition
- Serving Size: 1 butterfly
- Calories: 0
- Sugar: 0g
- Sodium: 0mg
- Fat: 0g
- Saturated Fat: 0g
- Unsaturated Fat: 0g
- Trans Fat: 0g
- Carbohydrates: 0g
- Fiber: 0g
- Protein: 0g
- Cholesterol: 0mg

