Description
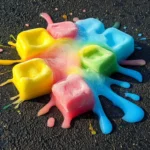
A fun DIY project to make colorful, non-toxic ice chalk for artistic outdoor play.
Ingredients
Scale
- 1 cup water
- 1 cup corn starch
- 1 cup non-toxic food coloring
- Ice cube trays or silicone molds
- Plastic mixing bowl
- Spoon or whisk
Instructions
- In a plastic mixing bowl, combine 1 cup of corn starch with 1 cup of water.
- Use a spoon or whisk to mix until smooth, ensuring there are no lumps.
- Decide on the food coloring shades you want to use.
- Stir in the non-toxic food coloring until you reach your desired hue.
- Carefully pour your colorful mixture into ice cube trays or silicone molds.
- Place the trays in the freezer, allowing them to set for at least 5-6 hours, or until solid.
- Once frozen, gently remove the ice chalk from the trays.
- Use your colorful ice chalk to draw on sidewalks or driveways.
Notes
Try adding essential oils for fragrance or glow-in-the-dark paint for a fun twist.
- Prep Time: 10 minutes
- Cook Time: 360 minutes
- Category: DIY
- Method: Freezing
- Cuisine: N/A
Nutrition
- Serving Size: N/A
- Calories: 50
- Sugar: 0g
- Sodium: 0mg
- Fat: 0g
- Saturated Fat: 0g
- Unsaturated Fat: 0g
- Trans Fat: 0g
- Carbohydrates: 13g
- Fiber: 0g
- Protein: 0g
- Cholesterol: 0mg
