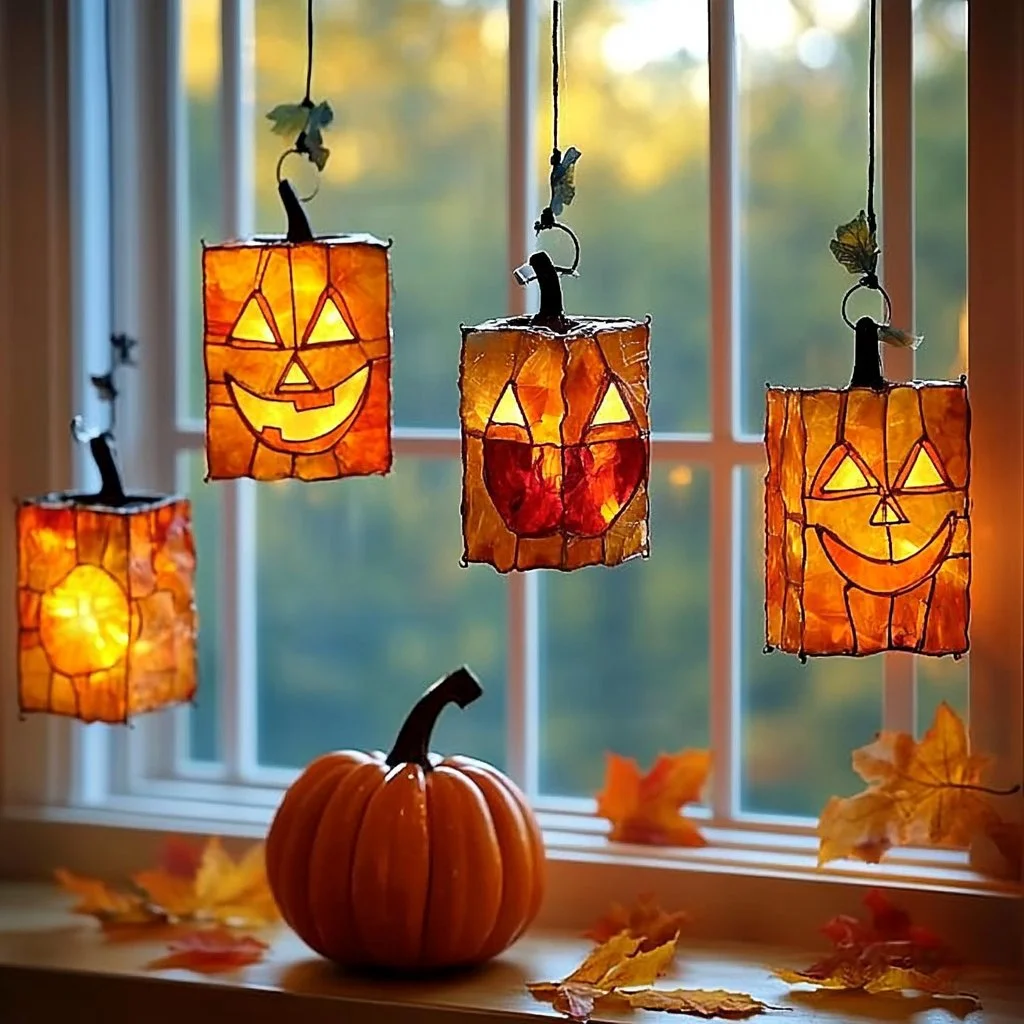
As the fall season rolls in, it brings a vibrant palette of colors, cooler weather, and, of course, the iconic pumpkin. This glowing pumpkin suncatcher DIY project captures the spirit of autumn in a unique and creative way. It’s perfect for children and adults alike, making it an ideal activity to enjoy on crisp afternoons.
Not only do these suncatchers add a warm glow to your home, but they are also a fantastic way to engage in some creativity and spend quality time with loved ones. This project is simple, requires minimal materials, and offers delightful results that can brighten any window. Get ready to transform your space with these cheerful pumpkin crafts that glow beautifully when the sun shines through them!
Why You’ll Love This Glowing Pumpkin Suncatchers
- Easy and Fun: This project is straightforward and enjoyable for all ages.
- Brightens Up Your Home: The glowing effect adds warmth and festive cheer.
- Creative Expression: Personalize each suncatcher to suit your style with colors and patterns.
- Great for Groups: Perfect for family activities, parties, or classroom projects.
- Seasonal Decor: A beautiful touch to your autumn decorations.
Materials
- Orange tissue paper
- Clear contact paper or laminating sheets
- Black construction paper
- Scissors
- Pencil
- Craft glue
- String or yarn (for hanging)
- Optional: LED tea light (for added glow)
Step-by-Step Instructions
Prepare the Base
-
Cut Tissue Paper:
- Cut the orange tissue paper into various shapes, such as squares or triangles, to resemble pumpkin patches.
-
Create the Pumpkin Shape:
- On the black construction paper, draw a pumpkin shape that you desire.
- Cut it out as the main silhouette for the suncatcher.
Assemble the Suncatcher
-
Apply Contact Paper:
- Lay down a sheet of clear contact paper (sticky side up) on a flat surface.
- Carefully place the orange tissue paper pieces on it, covering the entire surface.
-
Seal It Up:
- Once you’re satisfied with the design, cover it with another piece of clear contact paper, pressing down securely to seal everything in place.
Finishing Touches
-
Attach the Pumpkin Shape:
- Cut around your pumpkin silhouette from the black construction paper.
- Glue the pumpkin cutout onto the contact paper, ensuring it aligns nicely over the colorful tissue pieces.
-
Add Hanging Element:
- Use string or yarn to create a loop for hanging at the top of your suncatcher.
-
Optional — Add Glow:
- For extra glow, place an LED tea light behind the suncatcher when displayed at night.
Tips & Variations
- Color Variations: Swap out the orange tissue paper for yellow, white, or green for a unique take on the pumpkin.
- Texture: Experiment with different types of materials for texture, such as glitter paper or metallic foils.
- Shapes: Instead of pumpkins, create other fall-themed designs like leaves or ghosts.
- Layering: Use multiple pieces of contact paper for a thicker effect for durability.
Frequently Asked Questions
Q: Can I use regular paper instead of tissue paper?
A: While you can use paper, tissue paper provides a translucent effect that enhances the glowing quality.
Q: How do I hang the suncatcher?
A: You can loop string or yarn through the top and hang it from a window or in a doorway.
Q: What if I don’t have clear contact paper?
A: You can use laminating sheets or even water-based glue to attach the tissue paper, though it may not be as transparent.
Q: Can this project be done outdoors?
A: Yes, but make sure to hang it in a sheltered area to protect it from the elements.
Serving Suggestions or Pairings
- Warm Apple Cider: Enjoy with the cozy flavor of spiced apple cider.
- Pumpkin Spice Cookies: Pair your suncatcher with a delicious, homemade pumpkin treat.
- Craft Cocktails: Serve festive drinks that match the fall vibe for gatherings.
Final Thoughts
Creating glowing pumpkin suncatchers is a delightful way to celebrate the beauty of autumn. Not only will you have a beautiful decoration to brighten up your home, but you’ll also create cherished memories during the crafting process. We encourage you to share your creative versions or leave a comment about your experience! Happy crafting!
Print
Glowing Pumpkin Suncatchers
- Total Time: 15 minutes
- Yield: 1 suncatcher
- Diet: N/A
Description
A fun and creative DIY project to make glowing pumpkin suncatchers, perfect for celebrating autumn.
Ingredients
- Orange tissue paper
- Clear contact paper or laminating sheets
- Black construction paper
- Scissors
- Pencil
- Craft glue
- String or yarn (for hanging)
- Optional: LED tea light (for added glow)
Instructions
- Cut the orange tissue paper into various shapes, such as squares or triangles.
- On the black construction paper, draw and cut out your desired pumpkin shape.
- Lay down a sheet of clear contact paper (sticky side up) on a flat surface.
- Place the orange tissue paper pieces on the contact paper, covering the entire surface.
- Cover the design with another piece of clear contact paper and press down securely to seal.
- Glue the pumpkin silhouette onto the contact paper, aligning it with the colorful tissue pieces.
- Create a loop with string or yarn at the top for hanging.
- For extra glow, place an LED tea light behind the suncatcher.
Notes
Experiment with different colors, materials, and shapes to personalize your suncatcher.
- Prep Time: 15 minutes
- Cook Time: 0 minutes
- Category: Crafts
- Method: Crafting
- Cuisine: N/A
Nutrition
- Serving Size: 1 suncatcher
- Calories: 0
- Sugar: 0g
- Sodium: 0mg
- Fat: 0g
- Saturated Fat: 0g
- Unsaturated Fat: 0g
- Trans Fat: 0g
- Carbohydrates: 0g
- Fiber: 0g
- Protein: 0g
- Cholesterol: 0mg

