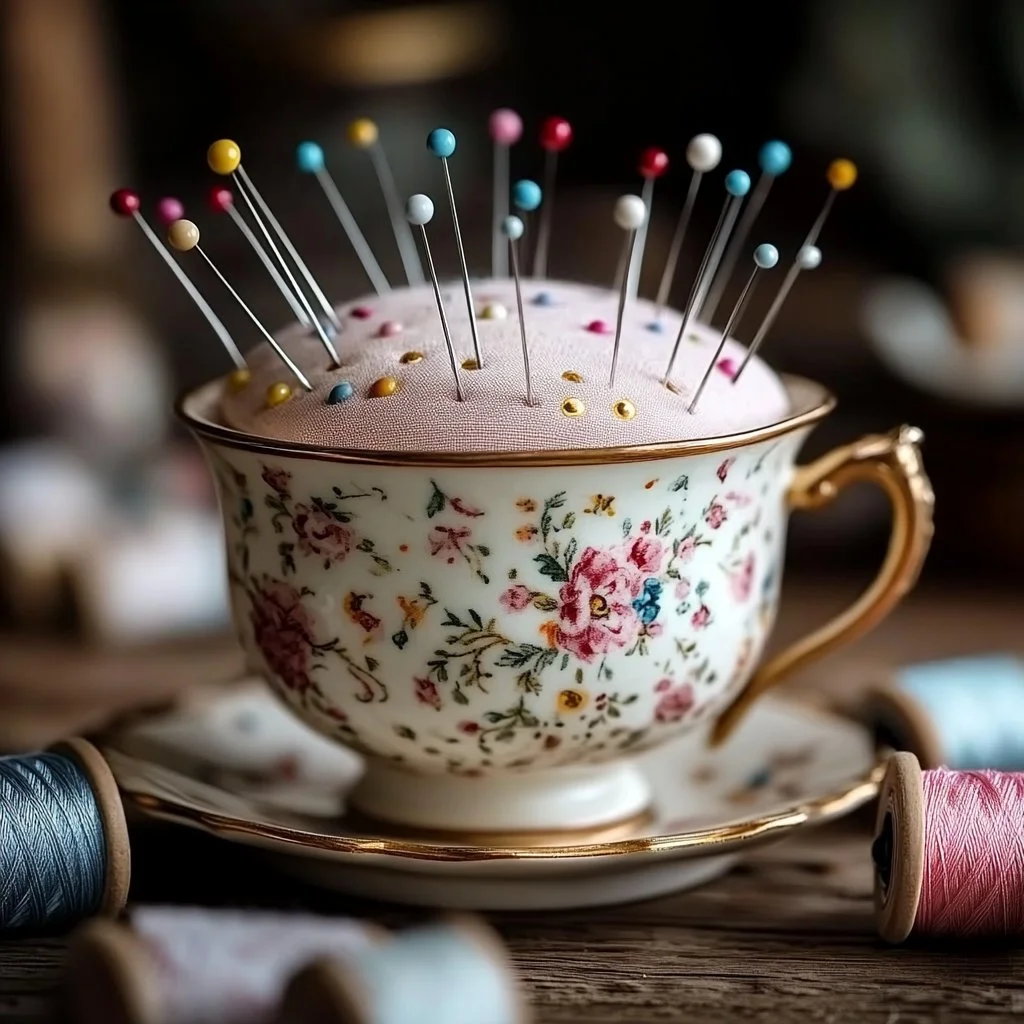
Creating your own vintage teacup pincushion is a charming and practical DIY project that combines functionality with a touch of nostalgia. Perfect for sewing enthusiasts and crafters alike, this project transforms an ordinary teacup into a delightful pincushion that adds a whimsical touch to your workspace. Not only will you have a handy place to store your pins, but you’ll also create a unique piece of decor that showcases your style. The beauty of making your own pincushion lies in the ability to personalize it according to your taste, making each piece truly one-of-a-kind.
Gather your materials, roll up your sleeves, and let’s dive into the delightful world of crafting with this simple yet creative endeavor!
Why You’ll Love This DIY Vintage Teacup Pincushion
- Charming Decor: Adds a vintage flair to your sewing area.
- Functional: Keeps your pins organized and within reach.
- Customizable: Tailor it to your color scheme and style preferences.
- Eco-Friendly: Repurposes old teacups that may otherwise go unused.
- Simple Craft: Quick and easy project suitable for all skill levels.
- Great Gift: Perfect handmade present for sewing friends and family.
Materials
- Vintage teacup (with a matching saucer if desired)
- Fabric for the pincushion top (cotton or felt)
- Stuffing (polyester fiberfill or wool)
- Hot glue gun and glue sticks
- Scissors
- Needle and thread (optional for extra stability)
- Decorative embellishments (like lace, buttons, or ribbons)
Step-by-Step Instructions
Prepare the Teacup
- Choose your favorite vintage teacup and ensure it’s clean.
- Inspect the cup for chips or cracks to ensure it’s safe for use.
Create the Pincushion Top
- Cut a circle of fabric approximately 1-2 inches larger than the diameter of the teacup’s opening.
- Place the fabric flat and gather the edges together to form a pouch.
Stuff the Pincushion
- Fill the gathered pouch with stuffing until it’s firm but soft to the touch.
- Pull the drawstring tight and secure it, ensuring the stuffing stays in place.
Fix the Pincushion to the Teacup
- Apply a generous amount of hot glue around the rim of the teacup.
- Carefully place the stuffed pouch on the glue, pressing down gently to secure it.
- Add a few drops of glue to the bottom of the pincushion to ensure it stays put.
Add Decorative Touches
- Embellish the pincushion with lace, ribbons, or buttons for a personal touch.
- Consider gluing the matching saucer to the base for additional stability and style.
Tips & Variations
- Fabric Choices: Experiment with different fabric textures like velvet or denim for a unique look.
- Color Coordination: Match the fabric to the teacup’s patterns for a cohesive design.
- Size Matters: Use a larger teacup for a more substantial pincushion or a smaller one for a dainty addition.
- Add a Pin Holder: For extra utility, attach a small pin holder or magnetic strip on the saucer.
Frequently Asked Questions
Q1: Can I use a regular cup instead of a teacup?
A1: Absolutely! Any cup or small container can be transformed into a pincushion, just ensure it’s stable.
Q2: What if I don’t have a hot glue gun?
A2: You can sew the fabric directly onto the teacup or use fabric glue as an alternative.
Q3: How do I clean the pincushion?
A3: Gently spot clean with a damp cloth; avoid soaking, especially if you used glue.
Q4: Can I use different types of stuffing?
A4: Yes! Experiment with different materials like rice, sand, or wool for varied textures.
Serving Suggestions or Pairings
Pair your pincushion with a cozy sewing nook setup, including a hot cup of tea or coffee to enjoy while you craft. Consider adding a small side of flavored water with fresh herbs or lemon slices to refresh you during those creative bursts.
Final Thoughts
Creating a vintage teacup pincushion is a joyful exercise in creativity and functionality. Not only do you get to enjoy a beautiful piece of decor, but you also enhance your crafting experience with practical storage for your pins. We would love to see your versions of this project! Feel free to share your creations or leave a comment about your experience crafting your own pincushion. Happy sewing!
Print
DIY Vintage Teacup Pincushion
- Total Time: 15 minutes
- Yield: 1 pincushion
- Diet: N/A
Description
A charming and practical DIY project that transforms a vintage teacup into a whimsical pincushion, perfect for sewing enthusiasts.
Ingredients
- Vintage teacup (with a matching saucer if desired)
- Fabric for the pincushion top (cotton or felt)
- Stuffing (polyester fiberfill or wool)
- Hot glue gun and glue sticks
- Scissors
- Needle and thread (optional for extra stability)
- Decorative embellishments (like lace, buttons, or ribbons)
Instructions
- Choose your favorite vintage teacup and ensure it’s clean.
- Inspect the cup for chips or cracks to ensure it’s safe for use.
- Cut a circle of fabric approximately 1-2 inches larger than the diameter of the teacup’s opening.
- Place the fabric flat and gather the edges together to form a pouch.
- Fill the gathered pouch with stuffing until it’s firm but soft to the touch.
- Pull the drawstring tight and secure it, ensuring the stuffing stays in place.
- Apply a generous amount of hot glue around the rim of the teacup.
- Carefully place the stuffed pouch on the glue, pressing down gently to secure it.
- Add a few drops of glue to the bottom of the pincushion to ensure it stays put.
- Embellish the pincushion with lace, ribbons, or buttons for a personal touch.
- Consider gluing the matching saucer to the base for additional stability and style.
Notes
Consider using various fabric textures for a unique look and coordinate colors with the teacup patterns.
- Prep Time: 15 minutes
- Cook Time: 0 minutes
- Category: Crafts
- Method: Crafting
- Cuisine: N/A
Nutrition
- Serving Size: 1 pincushion
- Calories: 0
- Sugar: 0g
- Sodium: 0mg
- Fat: 0g
- Saturated Fat: 0g
- Unsaturated Fat: 0g
- Trans Fat: 0g
- Carbohydrates: 0g
- Fiber: 0g
- Protein: 0g
- Cholesterol: 0mg

