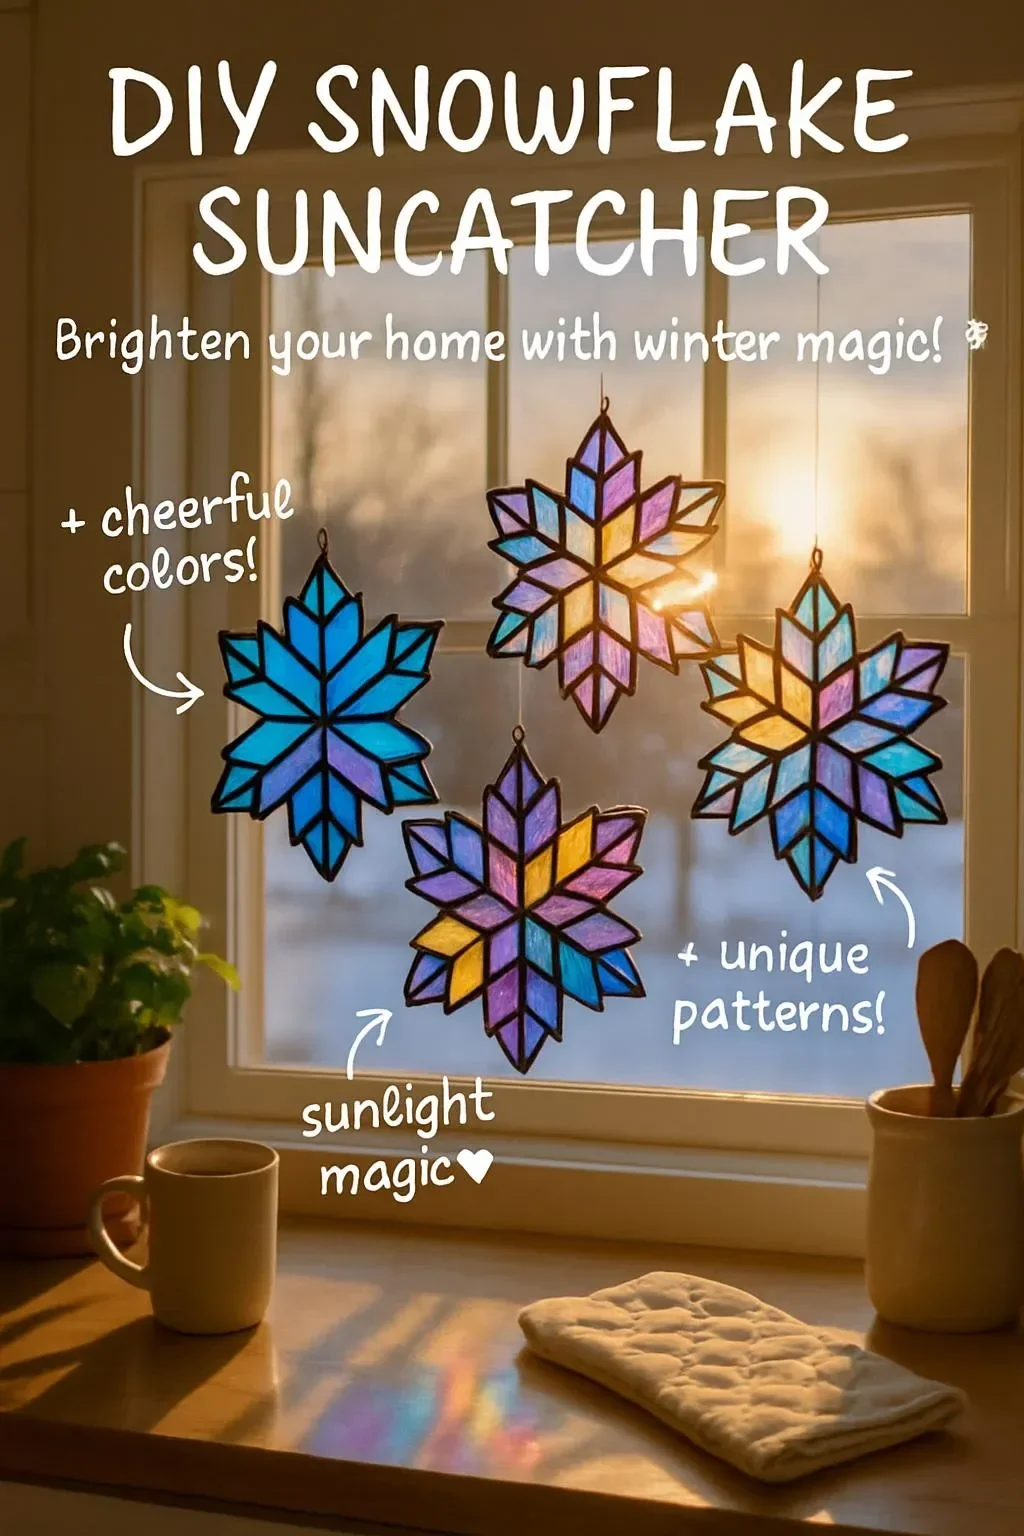
Creating a DIY snowflake suncatcher is a delightful way to embrace the beauty of winter while adding a touch of art to your home. This craft is perfect for all ages, making it an excellent project for families, classrooms, or solo artisans. By combining simple materials and a few steps, you can craft colorful snowflakes that will dazzle in the sunlight. Hang them in your windows, and watch as they shimmer and sparkle, transforming your space with whimsy and warmth. Plus, this activity offers an opportunity to explore creativity and learn about colors and shapes. So gather your supplies and get ready to brighten your winter days with a wonderful, homemade decoration!
Why You’ll Love This DIY Snowflake Suncatcher:
- Simple and Fun: Easy for all ages, making it a fantastic family activity.
- Colorful Creations: Use various colors to match your home decor or festive themes.
- Sensory Experience: Enjoy tactile fun with glue, glitter, and a range of materials.
- Great Gift Idea: Creates thoughtful, handmade gifts for friends and family.
- Winter Vibes: Perfect for capturing the essence of the snowy season indoors.
Materials:
- Clear contact paper
- Scissors
- Craft or tissue paper (various colors)
- A pencil
- Glitter (optional)
- String or ribbon for hanging
- Hole punch (if needed)
Full Step-by-Step:
Prepare Your Workspace
- Clear a flat surface and gather all your materials.
- Make sure your contact paper is ready; it will serve as the base for your suncatcher.
Cut the Contact Paper
- Cut a piece of clear contact paper into a desired shape (square or rectangle) about 12 inches wide.
- Peel off the backing and place it sticky side up.
Create Your Snowflake Design
- Using a pencil, lightly draw a snowflake pattern on the sticky side of the contact paper if you want guidance.
- Cut your craft or tissue paper into small shapes, such as squares or triangles.
Assemble Your Suncatcher
- Position the colored paper pieces on the sticky contact paper, filling in the snowflake design.
- Add glitter to enhance your snowflake (optional).
- Ensure everything is well adhered by pressing down gently.
Final Touch
- Once satisfied, cover your design with another piece of contact paper (sticky side down) to seal it.
- Trim any excess contact paper around the edges.
Hang Your Creation
- Use a hole punch to create a hole at the top of your suncatcher and attach string or ribbon for hanging.
- Find a sunny window where it can catch the light beautifully.
Tips & Variations:
- Color Themes: Choose colors based on holidays (red and green for Christmas, pastels for spring).
- Shape Variations: Try different snowflake shapes or even other winter-themed designs.
- Layering: Layer different colors of tissue paper for a more intricate effect.
- Use Different Adhesives: Substitute mod podge or fabric glue for contact paper if preferred.
Frequently Asked Questions:
Q: Can I use regular paper instead of tissue paper?
A: Yes, regular colored paper works, but it might be less translucent than tissue paper.
Q: How do I ensure the suncatcher sticks well?
A: Press firmly while assembling, and consider using additional glue for loose edges.
Q: Can I make this craft outdoors?
A: While you can work outside, it’s best to finish indoors to reduce wind interference.
Q: What is the best way to clean my suncatcher?
A: Use a soft, damp cloth to gently wipe off dust and dirt without damaging the design.
Suggestions:
- Personalize with Initials: Add family members’ initials to each snowflake for a custom touch.
- Create a Mobile: Make several suncatchers and hang them together to form a beautiful mobile.
- Seasonal Themes: Change designs with the seasons, using flowers for spring or leaves for autumn.
Final Thoughts
Creating your own DIY snowflake suncatcher can brighten up your home and put a smile on your face. We invite you to share photos of your versions or leave comments with your experiences! Your imaginative creations could inspire others—happy crafting!
Print
DIY Snowflake Suncatcher
- Total Time: 15 minutes
- Yield: 1 suncatcher
- Diet: N/A
Description
Create colorful snowflake suncatchers to bring a touch of winter art into your home. Perfect for all ages and a great family activity!
Ingredients
- Clear contact paper
- Scissors
- Craft or tissue paper (various colors)
- A pencil
- Glitter (optional)
- String or ribbon for hanging
- Hole punch (if needed)
Instructions
- Prepare Your Workspace: Clear a flat surface and gather all your materials.
- Cut the Contact Paper: Cut a piece of clear contact paper into a desired shape about 12 inches wide.
- Create Your Snowflake Design: Lightly draw a snowflake pattern on the sticky side of the contact paper. Cut colored paper into small shapes.
- Assemble Your Suncatcher: Position the colored paper pieces on the sticky contact paper, filling in the snowflake design. Add glitter if desired.
- Final Touch: Cover the design with another piece of contact paper to seal it. Trim any excess around the edges.
- Hang Your Creation: Use a hole punch to create a hole at the top and attach string or ribbon for hanging.
Notes
Consider color themes based on holidays and try different shapes for your snowflakes. Use fabric glue for secure adhesion if preferred.
- Prep Time: 15 minutes
- Cook Time: 0 minutes
- Category: Craft
- Method: Crafting
- Cuisine: N/A
Nutrition
- Serving Size: 1 suncatcher
- Calories: 0
- Sugar: 0g
- Sodium: 0mg
- Fat: 0g
- Saturated Fat: 0g
- Unsaturated Fat: 0g
- Trans Fat: 0g
- Carbohydrates: 0g
- Fiber: 0g
- Protein: 0g
- Cholesterol: 0mg

