- Introduction
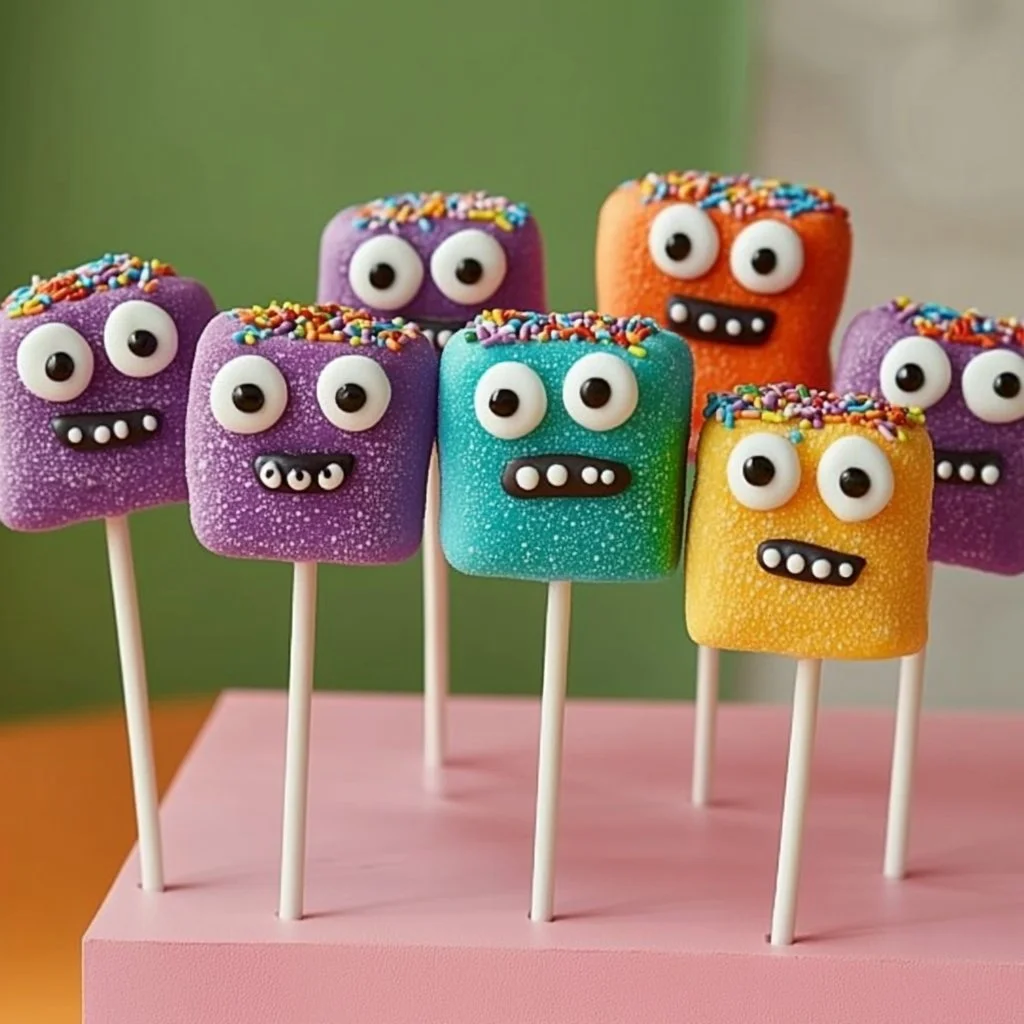
Who doesn’t love a sweet, gooey treat that brings a smile to your face? These DIY Marshmallow Monster Pops are the perfect combination of fun and creativity, making them an excellent choice for parties, Halloween, or just a delightful afternoon activity with the kids. With a few simple ingredients and a little imagination, you can transform ordinary marshmallows into delightful monster creations that are both tasty and whimsical. These pops are not only delicious but also provide an excellent opportunity for family bonding, as everyone can join in on the decorating fun. Get ready to unleash your inner monster!
- Why You’ll Love This DIY Marshmallow Monster Pops
- Fun for All Ages: Perfect for kids and adults alike, making it a great family activity.
- Creative Expression: Let your imagination run wild with colorful decorations and designs.
- Easy to Make: Simple steps that require minimal cooking skills.
- Customizable: Use various candy toppings to create unique monster looks.
- Perfect for Parties: A fun treat that will delight guests and make your party memorable.
- Materials
- Large marshmallows
- Lollipop sticks or skewers
- Melted chocolate or candy melts (any color)
- Assorted candy for decoration (eyes, gummies, sprinkles, etc.)
- Styrofoam block or a decorative foam base (for standing the pops)
- Wax paper (for cooling)
- Step-by-Step Instructions
Prepare the Marshmallows
- Assemble Your Materials: Gather all necessary supplies in one place.
- Insert the Sticks: Carefully push lollipop sticks into the center of each marshmallow.
Dip and Decorate
- Melt the Chocolate: In a microwave-safe bowl, melt your chocolate or candy melts, stirring until smooth.
- Dip the Marshmallows: Dip each marshmallow pop into the melted chocolate, allowing any excess to drip off.
- Place on Wax Paper: Set the pops on a piece of wax paper to cool and harden.
Add the Monster Features
-
Decorate Your Monsters: While the chocolate is still soft, add your candy toppings to create eyes, mouths, and other fun features.
-
Let Them Set: Allow the pops to harden completely, using the foam block to keep them upright.
-
Tips & Variations
- Flavor Play: Use different flavored chocolate or colored melts for added flavor.
- Candy Alternatives: Swap out decorations for healthier options like dried fruits or nuts.
- Themed Pops: Create seasonal variations, like spooky monsters for Halloween or cute critters for birthday parties.
- Nut-Free Options: Use nut-free candies to cater to allergy concerns.
- Frequently Asked Questions
Q1: Can I use different types of marshmallows?
A1: Absolutely! Mini marshmallows can work for smaller pops, though large marshmallows provide a sturdier base.
Q2: How do I store the finished pops?
A2: Store them in an airtight container at room temperature for up to a week. Refrigeration may cause the chocolate to sweat.
Q3: Can I make these in advance?
A3: Yes, you can prepare and decorate them a day or two ahead of time. Just ensure they are stored properly.
Q4: What if I don’t have candy melts?
A4: You can substitute melted chocolate chips or even white chocolate for a similar effect.
-
Serving Suggestions or Pairings
Consider serving these Marshmallow Monster Pops with a spooky-themed drink, like a dark fruit punch or a fizzy soda. They can also be paired with fun Halloween-themed cupcakes or a bowl of popcorn for a complete festive treat table. -
Final Thoughts
DIY Marshmallow Monster Pops are not just sweets; they’re a fun activity that brings people together. Encouraging creativity in the kitchen allows everyone to express themselves with these delightful monsters. We’d love to see your versions! Share your creations or leave a comment below with your thoughts and variations! Enjoy your monster-making adventure!

DIY Marshmallow Monster Pops
- Total Time: 25 minutes
- Yield: 12 pops
- Diet: Vegetarian
Description
Transform ordinary marshmallows into delightful monster creations that are both tasty and whimsical, perfect for parties or fun family activities.
Ingredients
- Large marshmallows
- Lollipop sticks or skewers
- Melted chocolate or candy melts (any color)
- Assorted candy for decoration (eyes, gummies, sprinkles, etc.)
- Styrofoam block or a decorative foam base (for standing the pops)
- Wax paper (for cooling)
Instructions
- Assemble Your Materials: Gather all necessary supplies in one place.
- Insert the Sticks: Carefully push lollipop sticks into the center of each marshmallow.
- Melt the Chocolate: In a microwave-safe bowl, melt your chocolate or candy melts, stirring until smooth.
- Dip the Marshmallows: Dip each marshmallow pop into the melted chocolate, allowing any excess to drip off.
- Place on Wax Paper: Set the pops on a piece of wax paper to cool and harden.
- Decorate Your Monsters: While the chocolate is still soft, add your candy toppings to create eyes, mouths, and other fun features.
- Let Them Set: Allow the pops to harden completely, using the foam block to keep them upright.
Notes
Use different flavored chocolate or colored melts for added flavor. Mini marshmallows can be used for smaller pops.
- Prep Time: 15 minutes
- Cook Time: 10 minutes
- Category: Dessert
- Method: No Cook
- Cuisine: American
Nutrition
- Serving Size: 1 pop
- Calories: 120
- Sugar: 20g
- Sodium: 30mg
- Fat: 5g
- Saturated Fat: 3g
- Unsaturated Fat: 2g
- Trans Fat: 0g
- Carbohydrates: 18g
- Fiber: 0g
- Protein: 1g
- Cholesterol: 0mg

