Description
A fun and engaging DIY project for kids to create charming lanterns using common materials, fostering creativity and fine motor skills.
Ingredients
- Clear plastic bottles (1-liter or larger)
- LED tea lights or fairy lights
- Acrylic paints or markers
- Paintbrushes
- Decorative materials (glitter, stickers, colored paper)
- Scissors
- Craft glue
- Hole punch (for added decorations)
Instructions
- Prepare the Bottle: Clean & dry the plastic bottle before starting.
- Cut the Bottle: Carefully cut around the upper part of the bottle to create an opening for the lights.
- Decorate: Let your child decorate the outside with acrylic paints or markers, using vibrant colors and patterns. After the paint dries, glue on glitter, stickers, or other decorative elements.
- Insert Lights: Place an LED tea light or fairy lights inside the bottle through the opening.
- Secure the Top (Optional): Cut a smaller piece of the bottle’s top and secure it around the light with glue to give it a finished look.
- Turn On the Lights: Switch on the lights and enjoy the beautiful illumination!
Notes
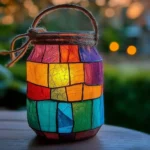
Consider using mason jars for a different look, and experiment with glow-in-the-dark paint for nighttime effects.
- Prep Time: 15 minutes
- Cook Time: 0 minutes
- Category: Craft
- Method: Crafting
- Cuisine: Creative
Nutrition
- Serving Size: 1 lantern
- Calories: 0
- Sugar: 0g
- Sodium: 0mg
- Fat: 0g
- Saturated Fat: 0g
- Unsaturated Fat: 0g
- Trans Fat: 0g
- Carbohydrates: 0g
- Fiber: 0g
- Protein: 0g
- Cholesterol: 0mg