Description
Create your own stunning glitter tube bracelets with minimal supplies and endless customization options. Perfect for all ages!
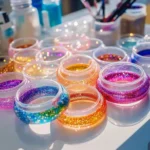
Ingredients
- Clear plastic tubes
- Fine glitter (various colors)
- Small beads (optional)
- Strong adhesive (e.g., glue or epoxy)
- Jewelry string or elastic cord
- Scissors
- Funnel (optional)
- Tweezers (for bead placement)
Instructions
- Prepare your tubes by cleaning and drying them, removing any labels.
- Using a funnel, pour fine glitter into the tubes.
- If desired, add beads using tweezers.
- Seal the tubes by applying a strong adhesive to one end and cap it securely.
- Create the bracelet by cutting a length of jewelry string or elastic cord, then thread the glitter tube onto the string, adding more beads if desired.
- Tie the ends securely and trim any excess cord.
Notes
Experiment with different colors and sizes of tubes for unique designs. Adult supervision is recommended for younger children due to small parts.
- Prep Time: 15 minutes
- Cook Time: 0 minutes
- Category: Crafts
- Method: DIY
- Cuisine: N/A
Nutrition
- Serving Size: 1 bracelet
- Calories: 0
- Sugar: 0g
- Sodium: 0mg
- Fat: 0g
- Saturated Fat: 0g
- Unsaturated Fat: 0g
- Trans Fat: 0g
- Carbohydrates: 0g
- Fiber: 0g
- Protein: 0g
- Cholesterol: 0mg