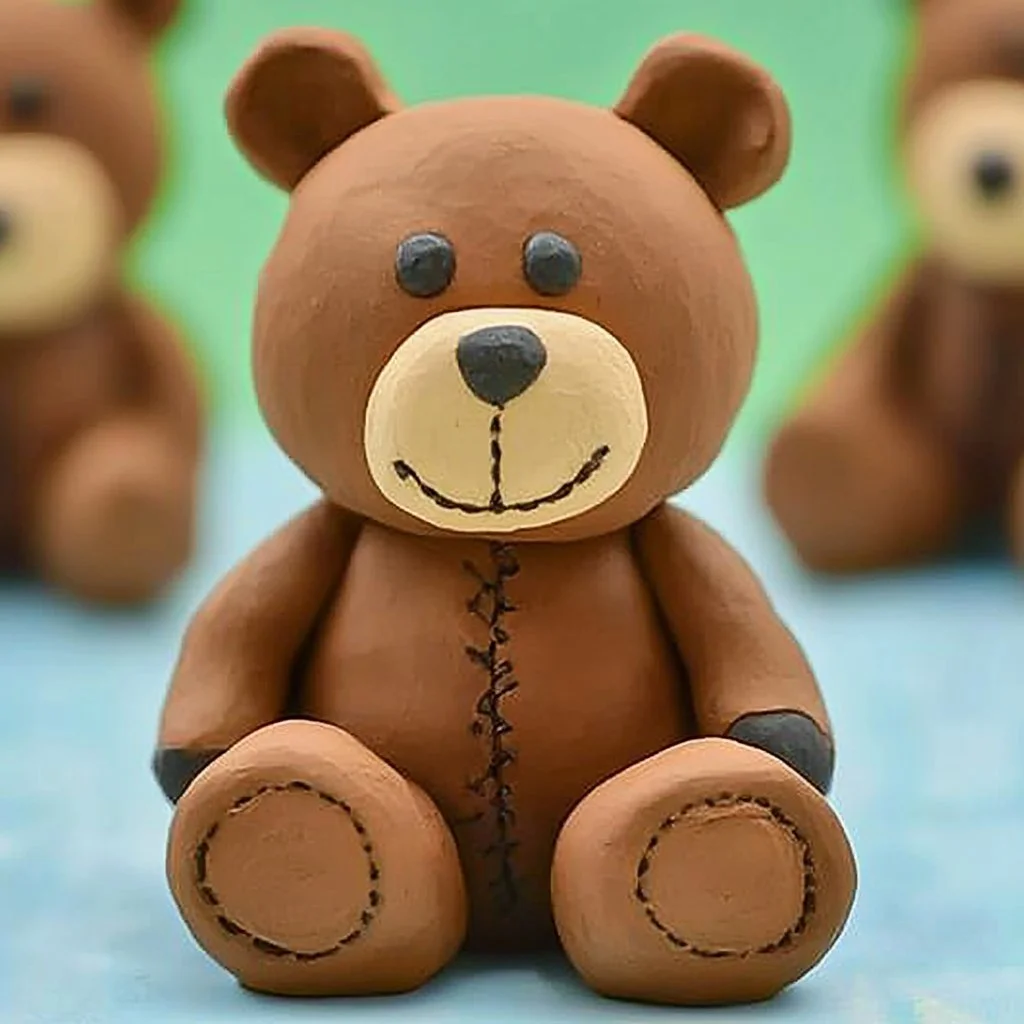
Creating a charming clay bear craft is a delightful project that anyone can enjoy, regardless of age or skill level. This hands-on DIY activity not only provides an opportunity for creativity but also allows you to develop fine motor skills as you mold and manipulate the clay. Using simple materials that are often found at home, you can create a lovable bear figure that serves as both a charming decoration and a playful companion. The process of crafting can be therapeutic, allowing you to unwind while expressing your artistic side. Whether you’re spending time with kids or engaging in a solo activity, this clay bear craft is perfect for anyone looking to add a touch of whimsy to their day. Let’s dive into why you’ll love making this adorable bear and how to get started on your very own masterpiece!
Why You’ll Love This Clay Bear Craft
- Easy to Make: Simple steps make it accessible for all skill levels.
- Stress Relief: Engaging with clay can be therapeutic and relaxing.
- Creative Expression: Personalize each bear with unique designs.
- Quality Time: Perfect for family bonding or a fun group activity.
- Cute Decor: Handmade bears add a touch of charm to any space.
- Gift Option: Makes a thoughtful gift for friends and family.
Materials
- Air-dry clay or polymer clay
- Acrylic paint (brown, black, white)
- Paintbrushes
- Sculpting tool (optional)
- Water for smoothening
- Protective covering for the work surface
- Permanent markers (optional for detailing)
Step-by-Step Instructions
Preparing the Clay
- Knead the Clay: Start by kneading the clay in your hands for a few minutes until it’s soft and pliable. This will help prevent cracks when molded.
Shaping the Body
- Create the Body: Form a large oval shape for the bear’s body. This will be the main structure.
- Add Legs: Roll four smaller ovals for the legs. Attach two to the bottom of the body, ensuring they are secure but still movable.
Crafting the Head
- Shape the Head: Roll another oval for the head, and gently compress one end to create a snout.
- Attach Ears: Roll out two small circles for ears. Flatten them slightly and attach them to the top of the head.
Detail Work
- Facial Features: Use a sculpting tool or your fingers to form eye sockets and a nose on the snout. Insert small pieces of black clay or draw with markers for eyes.
- Add Textures: Use the sculpting tool to create fur textures on the body and face for a lifelike effect.
Final Touches
- Dry the Bear: If using air-dry clay, let your bear sit for several hours or according to the package instructions. If using polymer clay, bake it as directed.
- Paint: Once dried, paint the bear with your chosen colors. Use brown for the body, black for the nose, and white for the eyes.
Tips & Variations
- Color Variations: Experiment with different colors to create unique bear designs, like pastel shades or more vibrant tones.
- Add Accessories: Create hats, scarves, or even little bows to personalize your bear further.
- Texture Enhancements: Incorporate additional items like fabric or small beads for texture and decoration.
- Different Animals: Use this technique to create other animal shapes, such as bunnies or cats, by altering shapes and features.
Frequently Asked Questions
1. Can I use air-dry clay instead of polymer clay?
Yes, air-dry clay is a great alternative. Just ensure to let your bear dry completely before painting.
2. What if I don’t have sculpting tools?
You can use household items like toothpicks, spoons, or even your fingers to shape the clay.
3. How long does it take for the bear to dry?
Drying time can vary, but most air-dry clays need about 24 hours to fully set. Check the package for specifics.
4. What paint should I use?
Acrylic paint works best for clay crafts due to its vibrant colors and quick drying time.
Serving Suggestions or Pairings
Enjoy your crafting session with a cozy cup of tea or coffee. If you’re working with kids, consider pairing your crafting time with some fun snacks like cookies or fruit slices to keep the energy up!
Final Thoughts
Making a clay bear is not just a fun craft but also a wonderful way to express creativity and imagination. Once you’ve completed your charming bear, don’t forget to showcase it proudly! We’d love to hear about your creations, so feel free to share your versions or leave a comment below! Happy crafting!
Print
Charming Clay Bear Craft
- Total Time: 135 minutes
- Yield: 1 clay bear
- Diet: N/A
Description
Create a lovable clay bear figure that serves as both a charming decoration and a playful companion.
Ingredients
- Air-dry clay or polymer clay
- Acrylic paint (brown, black, white)
- Paintbrushes
- Sculpting tool (optional)
- Water for smoothening
- Protective covering for the work surface
- Permanent markers (optional for detailing)
Instructions
- Knead the clay in your hands until soft and pliable.
- Form a large oval shape for the bear’s body.
- Roll four smaller ovals for the legs and attach two to the bottom of the body.
- Roll another oval for the head, compress one end to create a snout.
- Roll two small circles for ears, flatten them, and attach to the head.
- Use a sculpting tool to form eye sockets and a nose, insert black clay for eyes.
- Create fur textures on the bear using the sculpting tool.
- Let the bear dry or bake according to clay type.
- Paint the bear with chosen colors after drying.
Notes
Experiment with different colors and materials for unique designs.
- Prep Time: 15 minutes
- Cook Time: 120 minutes
- Category: Craft
- Method: Sculpting
- Cuisine: N/A
Nutrition
- Serving Size: 1 craft
- Calories: 0
- Sugar: 0g
- Sodium: 0mg
- Fat: 0g
- Saturated Fat: 0g
- Unsaturated Fat: 0g
- Trans Fat: 0g
- Carbohydrates: 0g
- Fiber: 0g
- Protein: 0g
- Cholesterol: 0mg

