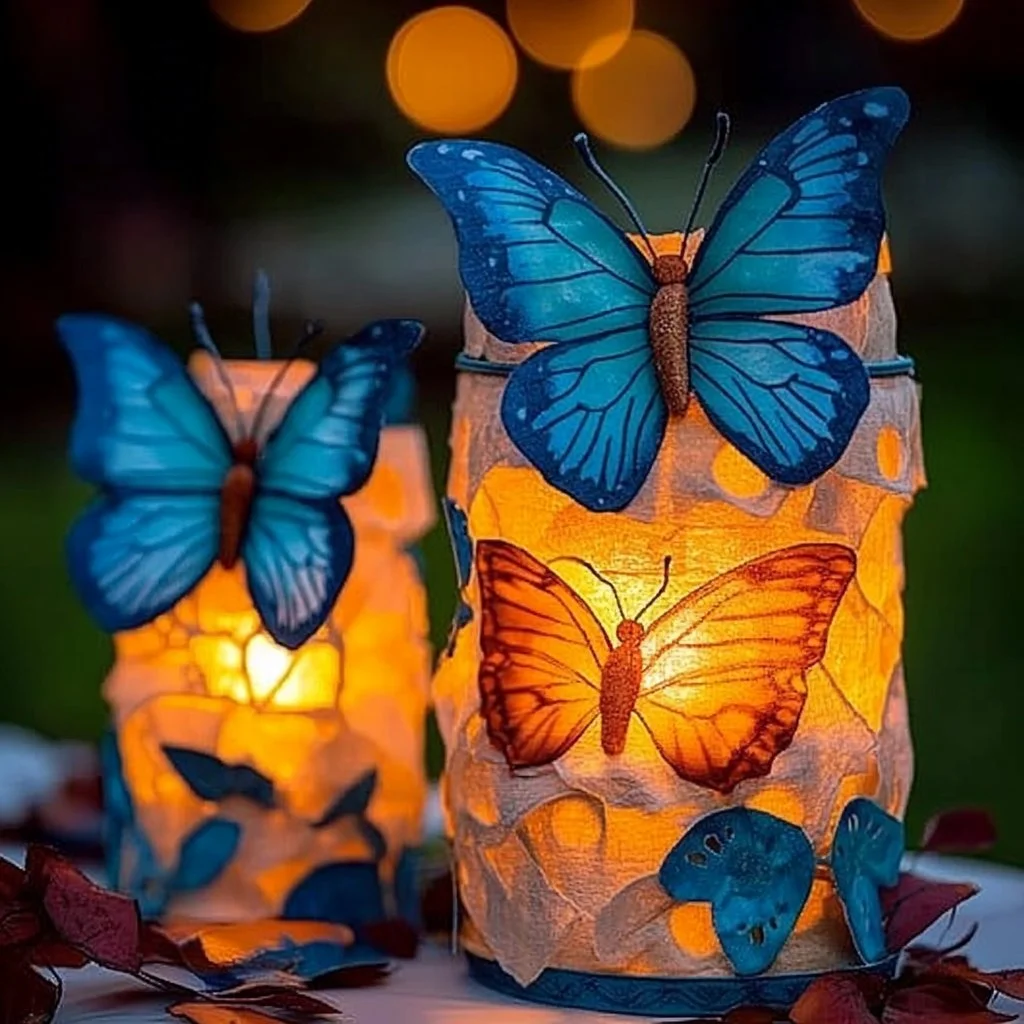
Creating your own DIY decorative LED tealight candle holders is a delightful way to add warmth and charm to your home. These elegant candle holders not only elevate your decor but also provide a safe ambiance without the worry of open flames. Perfect for any occasion, these tealight holders can be customized to match your personal style, making them a versatile addition to your home. Whether it’s a cozy night in, a festive gathering, or a calm evening on the patio, these candle holders will enhance your environment with soft, flickering light. Plus, this simple project is a great way to spend quality time with family or friends, as you can let your creativity flow and try out different designs and materials. Let’s dive into why you’ll love making these delightful DIY creations!
Why You’ll Love This DIY Decorative LED Tealight Candle Holders
- Safe Ambiance: Enjoy the look of flickering candlelight without the risk of fire.
- Customizable Designs: Tailor the colors and styles to suit any theme or occasion.
- Eco-Friendly Option: Choose recyclable materials for a sustainable crafting project.
- Budget-Friendly: Create stunning decor without breaking the bank.
- Great for All Skill Levels: Simple enough for beginners but allows for advanced creativity.
- Perfect for Gifting: Handmade gifts that showcase your thoughtfulness.
Materials
- LED tealight candles
- Glass jars or containers (various sizes)
- Acrylic paints or spray paint
- Paintbrushes or spray nozzles
- Decorative elements (e.g., ribbons, twine, dried flowers)
- Wax paper or parchment paper
- Hot glue gun and glue sticks
- Optional: Glitter, stickers, or gemstones for added flair
Step-by-Step Instructions
Prepare Your Workspace
- Choose a well-ventilated area and cover your surface with wax or parchment paper. This protects your workspace and makes cleanup easier.
Select Your Containers
- Gather your glass jars or containers. Wash and dry them thoroughly to ensure paint adheres properly.
Painting the Jars
- Base Coat: Use acrylic paint or spray paint to cover the outside of the jar. Choose colors that complement your decor.
- Texture and Creativity: Consider adding patterns or textures with sponges or brushes for a unique look. Allow paint to dry completely.
Adding Decorative Elements
- Customize: Use a hot glue gun to attach ribbons, twine, or dried flowers around the neck of the jar.
- Embellishments: For a sparkling touch, apply glitter or stick on gemstones for an eye-catching finish.
Insert LED Tealight Candles
- Place the LED tealight candle inside the painted container. Ensure it is stable and centered for the best glow.
Display Your Creations
- Arrange your tealight holders in groups for a stunning centerpiece or place them throughout your home for a cozy atmosphere.
Tips & Variations
- Material Swaps: Try using tin cans, wooden boxes, or even recycled bottles as alternative holders.
- Seasonal Designs: Use seasonal colors and themes (e.g., pastels for spring or warm tones for fall) to keep your decor fresh.
- Themed Decor: Create themed groups (e.g., vintage chic, modern minimalism) by varying colors and embellishments accordingly.
- Light Up for Events: Use battery-operated LED lights for larger displays at parties or events.
Frequently Asked Questions
1. Can I use real candles instead of LED tealights?
While you can use real candles, LED tealights are safer for decorative use, especially if used in homes with children or pets.
2. How do I clean the jars before painting?
Wash them with warm soap water and ensure they are free from any grease or residue before painting for better adhesion.
3. Can I use outdoor materials for these holders?
Yes, just ensure they are waterproof or treated for outdoor use, especially if they will be exposed to the elements.
4. What if my paint doesn’t dry properly?
Check the temperature and humidity of your workspace—these factors can slow drying. If needed, apply a thin coat of paint to avoid drips.
Serving Suggestions or Pairings
Pair your DIY tealight holders with a cozy drink like herbal tea or mulled cider during chilly evenings. For a festive touch, complement them with scented treats like gingerbread cookies or pumpkin spice cake. Create a romantic atmosphere by adding soft music and arranging flowers nearby.
Final Thoughts
Making DIY decorative LED tealight candle holders is a rewarding project that combines creativity with functionality. Not only do they brighten your space, but they also reflect your personal style. We hope you enjoyed crafting these lovely candle holders and that they bring a warm glow to your home. We’d love to hear about your creations! Share your results or tips in the comments below!
Print
DIY Decorative LED Tealight Candle Holders
- Total Time: 15 minutes
- Yield: 3-5 candle holders
- Diet: N/A
Description
Create charming and safe LED tealight candle holders to enhance your home decor.
Ingredients
- LED tealight candles
- Glass jars or containers (various sizes)
- Acrylic paints or spray paint
- Paintbrushes or spray nozzles
- Decorative elements (ribbons, twine, dried flowers)
- Wax paper or parchment paper
- Hot glue gun and glue sticks
- Optional: Glitter, stickers, or gemstones for embellishment
Instructions
- Prepare Your Workspace: Choose a well-ventilated area and cover your surface with wax or parchment paper.
- Select Your Containers: Gather and wash glass jars or containers thoroughly.
- Painting the Jars: Apply acrylic or spray paint to the outside of the jar and allow it to dry completely.
- Adding Decorative Elements: Use a hot glue gun to attach ribbons or dried flowers around the neck of the jar.
- Insert LED Tealight Candles: Place a tealight candle inside each painted container.
- Display Your Creations: Arrange the tealight holders for a stunning centerpiece or decorative spread.
Notes
Experiment with various materials and seasonal themes for unique designs.
- Prep Time: 15 minutes
- Cook Time: 0 minutes
- Category: Craft
- Method: Crafting
- Cuisine: N/A
Nutrition
- Serving Size: 1 holder
- Calories: None
- Sugar: 0g
- Sodium: 0mg
- Fat: 0g
- Saturated Fat: 0g
- Unsaturated Fat: 0g
- Trans Fat: 0g
- Carbohydrates: 0g
- Fiber: 0g
- Protein: 0g
- Cholesterol: 0mg

