

This post contains Amazon affiliate links. As an Amazon Associate I earn from qualifying purchases.
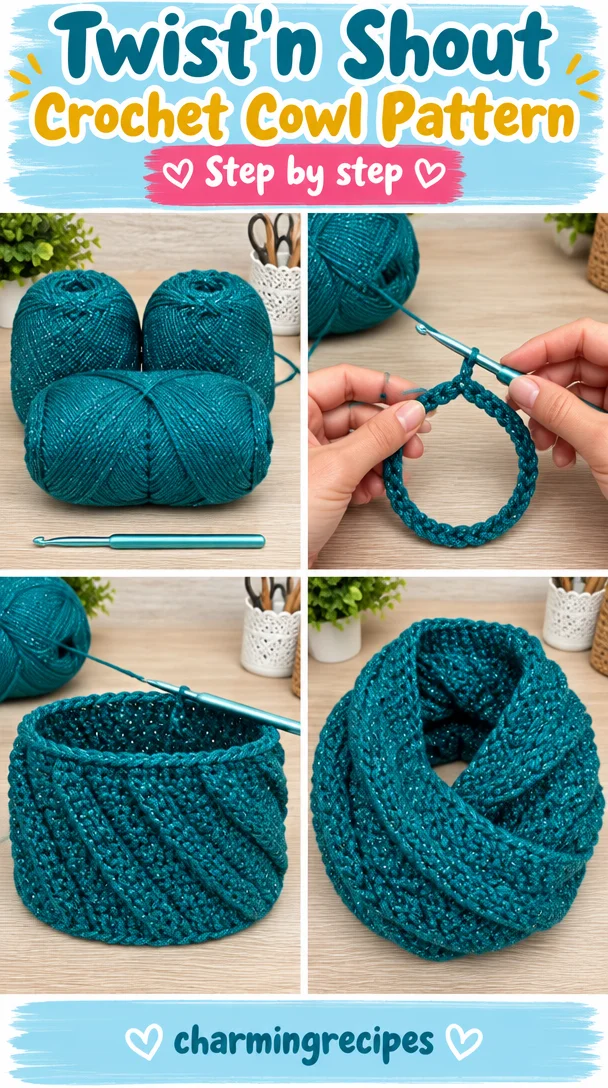
The Twist’n Shout Cowl is a cozy, circular crochet accessory with a bold, shifting ribbed texture. Its raised front-post and back-post stitches gradually trade places to create a spiraling effect around the fabric. The construction is worked in joined rounds, so you can watch the pattern develop as you crochet. It’s a satisfying project for crocheters ready to practice post stitches, and it makes a thoughtful handmade gift for cool-weather days.
Why you’ll love this pattern
The appeal of this crochet cowl is in its texture: the alternating ridges create movement without needing color changes or complicated shaping. The gradual shift between front-post and back-post double crochet produces a twist-like look while keeping the stitch sequence consistent from round to round.
This is a useful pattern for learning how post stitches affect the surface of crochet fabric. Once you understand where to place the hook around the post, the repeated groups are straightforward to work. The cowl is also made in one piece, with no panels to sew together; after the final round, you fasten off and finish the ends.
The original yarn choice, Caron Simply Soft Party in Teal Sparkle, adds a subtle shimmer that suits the raised texture. You can wear the cowl as a warm accessory or give it as a handmade winter present. The pattern is worked in the round and uses a repeating sequence, making it an enjoyable project to return to between other tasks.
“I enjoyed seeing the ridges shift as I worked each round. Once I got comfortable with the front-post and back-post stitches, the repeat was easy to follow, and the finished cowl has lovely texture.”
How this crochet pattern comes together
You’ll begin with a chain of 90 stitches, join it into a ring, and work one round of single crochet into the chain. This foundation establishes the cowl’s circular shape. Take a moment to check that the chain is not twisted before you join it; a twist in the foundation will remain in the finished piece.
The textured fabric is built with double crochet stitches worked around the posts of stitches from the previous round. In a front-post double crochet, the hook goes around the post from the front of the fabric. In a back-post double crochet, it goes around the post from the back. These placements make some stitches stand out and others recede, creating the ribbed surface.
Across rounds 2–10, the number of front-post stitches in each repeated group increases while the number of back-post stitches decreases. Round 11 is worked entirely in front-post double crochet. Rounds 12–20 reverse the balance, increasing the back-post stitches and decreasing the front-post stitches. Round 21 is worked entirely in back-post double crochet. You then repeat rounds 2–21 once more.
The pattern has 90 stitches around after the foundation round. Each textured repeat is worked nine times around the cowl. The pattern does not provide a finished size or gauge, so use the original yarn and recommended hook as a starting point, and check the fabric’s fit and drape as you work. Familiarity with double crochet is helpful; beginners can try this project if they are ready to learn front-post and back-post stitches. The time needed will depend on your crochet speed and experience with post stitches.
Materials you’ll need
- Yarn: Caron® Simply Soft® Party™ (3.5 oz / 85 g; 164 yds / 150 m), Teal Sparkle (PAR0004) — 3 balls
- Crochet hook: U.S. H/8 (5 mm), or the size needed to obtain gauge
The sparkle yarn gives the cowl a little sheen while keeping the focus on its raised stitches. If you choose another yarn, look for a similar thickness and a comfortable, flexible fabric. A much heavier yarn can make the cowl bulkier and change its drape; a lighter yarn may make it smaller or less substantial. Changing yarn can also affect how much you need, so check your progress and keep enough yarn available to complete the second repeat.
The instructions do not specify a gauge, so there is no stated measurement to match. Before committing to a different hook or yarn, crochet a small sample of the post-stitch texture. Check that it feels comfortable and that the fabric is neither stiff nor overly loose.
Step-by-step instructions
Abbreviations and stitch notes
- ch: chain
- sl st: slip stitch
- sc: single crochet
- dc: double crochet
- dcfp: double crochet worked around the front post
- dcbp: double crochet worked around the back post
- rnd: round
For a front-post double crochet, yarn over, insert the hook from front to back around the post of the stitch, then bring it back to the front. Complete the double crochet as usual. For a back-post double crochet, insert the hook from back to front around the post, then bring it to the back again before completing the stitch. In both cases, work around the post rather than into the top loops.
The ch 3 at the start of each textured round is part of the pattern’s joining sequence. Join each round where instructed, and take care not to add an extra stitch when working near the beginning of a round.
-
Make the foundation ring. Chain 90. Lay the chain flat and check that it is not twisted. Join with a slip stitch into the first chain.
-
Work the first round. Chain 1. Work 1 single crochet into each chain around. Join with a slip stitch to the first single crochet. You should have 90 single crochet stitches.
-
Work round 2. Chain 3. Repeat the following sequence 9 times: work 1 front-post double crochet around the next single crochet, then 1 back-post double crochet around each of the next 9 single crochets. Join with a slip stitch to the first front-post double crochet.
-
Work round 3. Chain 3. Repeat 9 times: work 1 front-post double crochet around each of the next 2 stitches, then 1 back-post double crochet around each of the next 8 stitches. Join with a slip stitch to the first front-post double crochet.
-
Work round 4. Chain 3. Repeat 9 times: work 1 front-post double crochet around each of the next 3 stitches, then 1 back-post double crochet around each of the next 7 stitches. Join with a slip stitch to the first front-post double crochet.
-
Work round 5. Chain 3. Repeat 9 times: work 1 front-post double crochet around each of the next 4 stitches, then 1 back-post double crochet around each of the next 6 stitches. Join with a slip stitch to the first front-post double crochet.
-
Work round 6. Chain 3. Repeat 9 times: work 1 front-post double crochet around each of the next 5 stitches, then 1 back-post double crochet around each of the next 5 stitches. Join with a slip stitch to the first front-post double crochet.
-
Work round 7. Chain 3. Repeat 9 times: work 1 front-post double crochet around each of the next 6 stitches, then 1 back-post double crochet around each of the next 4 stitches. Join with a slip stitch to the first front-post double crochet.
-
Work round 8. Chain 3. Repeat 9 times: work 1 front-post double crochet around each of the next 7 stitches, then 1 back-post double crochet around each of the next 3 stitches. Join with a slip stitch to the first front-post double crochet.
-
Work round 9. Chain 3. Repeat 9 times: work 1 front-post double crochet around each of the next 8 stitches, then 1 back-post double crochet around each of the next 2 stitches. Join with a slip stitch to the first front-post double crochet.
-
Work round 10. Chain 3. Repeat 9 times: work 1 front-post double crochet around each of the next 9 stitches, then 1 back-post double crochet around the next stitch. Join with a slip stitch to the first front-post double crochet.
-
Work round 11. Chain 3. Work 1 front-post double crochet around each stitch around. Join with a slip stitch to the first front-post double crochet.
-
Work round 12. Chain 3. Repeat 9 times: work 1 back-post double crochet around the next stitch, then 1 front-post double crochet around each of the next 9 stitches. Join with a slip stitch to the first back-post double crochet.
-
Work round 13. Chain 3. Repeat 9 times: work 1 back-post double crochet around each of the next 2 stitches, then 1 front-post double crochet around each of the next 8 stitches. Join with a slip stitch to the first back-post double crochet.
-
Work round 14. Chain 3. Repeat 9 times: work 1 back-post double crochet around each of the next 3 stitches, then 1 front-post double crochet around each of the next 7 stitches. Join with a slip stitch to the first back-post double crochet.
-
Work round 15. Chain 3. Repeat 9 times: work 1 back-post double crochet around each of the next 4 stitches, then 1 front-post double crochet around each of the next 6 stitches. Join with a slip stitch to the first back-post double crochet.
-
Work round 16. Chain 3. Repeat 9 times: work 1 back-post double crochet around each of the next 5 stitches, then 1 front-post double crochet around each of the next 5 stitches. Join with a slip stitch to the first back-post double crochet.
-
Work round 17. Chain 3. Repeat 9 times: work 1 back-post double crochet around each of the next 6 stitches, then 1 front-post double crochet around each of the next 4 stitches. Join with a slip stitch to the first back-post double crochet.
-
Work round 18. Chain 3. Repeat 9 times: work 1 back-post double crochet around each of the next 7 stitches, then 1 front-post double crochet around each of the next 3 stitches. Join with a slip stitch to the first back-post double crochet.
-
Work round 19. Chain 3. Repeat 9 times: work 1 back-post double crochet around each of the next 8 stitches, then 1 front-post double crochet around each of the next 2 stitches. Join with a slip stitch to the first back-post double crochet.
-
Work round 20. Chain 3. Repeat 9 times: work 1 back-post double crochet around each of the next 9 stitches, then 1 front-post double crochet around the next stitch. Join with a slip stitch to the first back-post double crochet.
-
Work round 21. Chain 3. Work 1 back-post double crochet around each stitch around. Join with a slip stitch to the first back-post double crochet.
-
Repeat the texture sequence. Repeat rounds 2–21 once more, following the same stitch placement and round joins.
-
Finish. Fasten off. Secure and weave in the yarn end neatly so it is hidden in the fabric without pulling the edge out of shape.
Ways to wear and gift your finished cowl
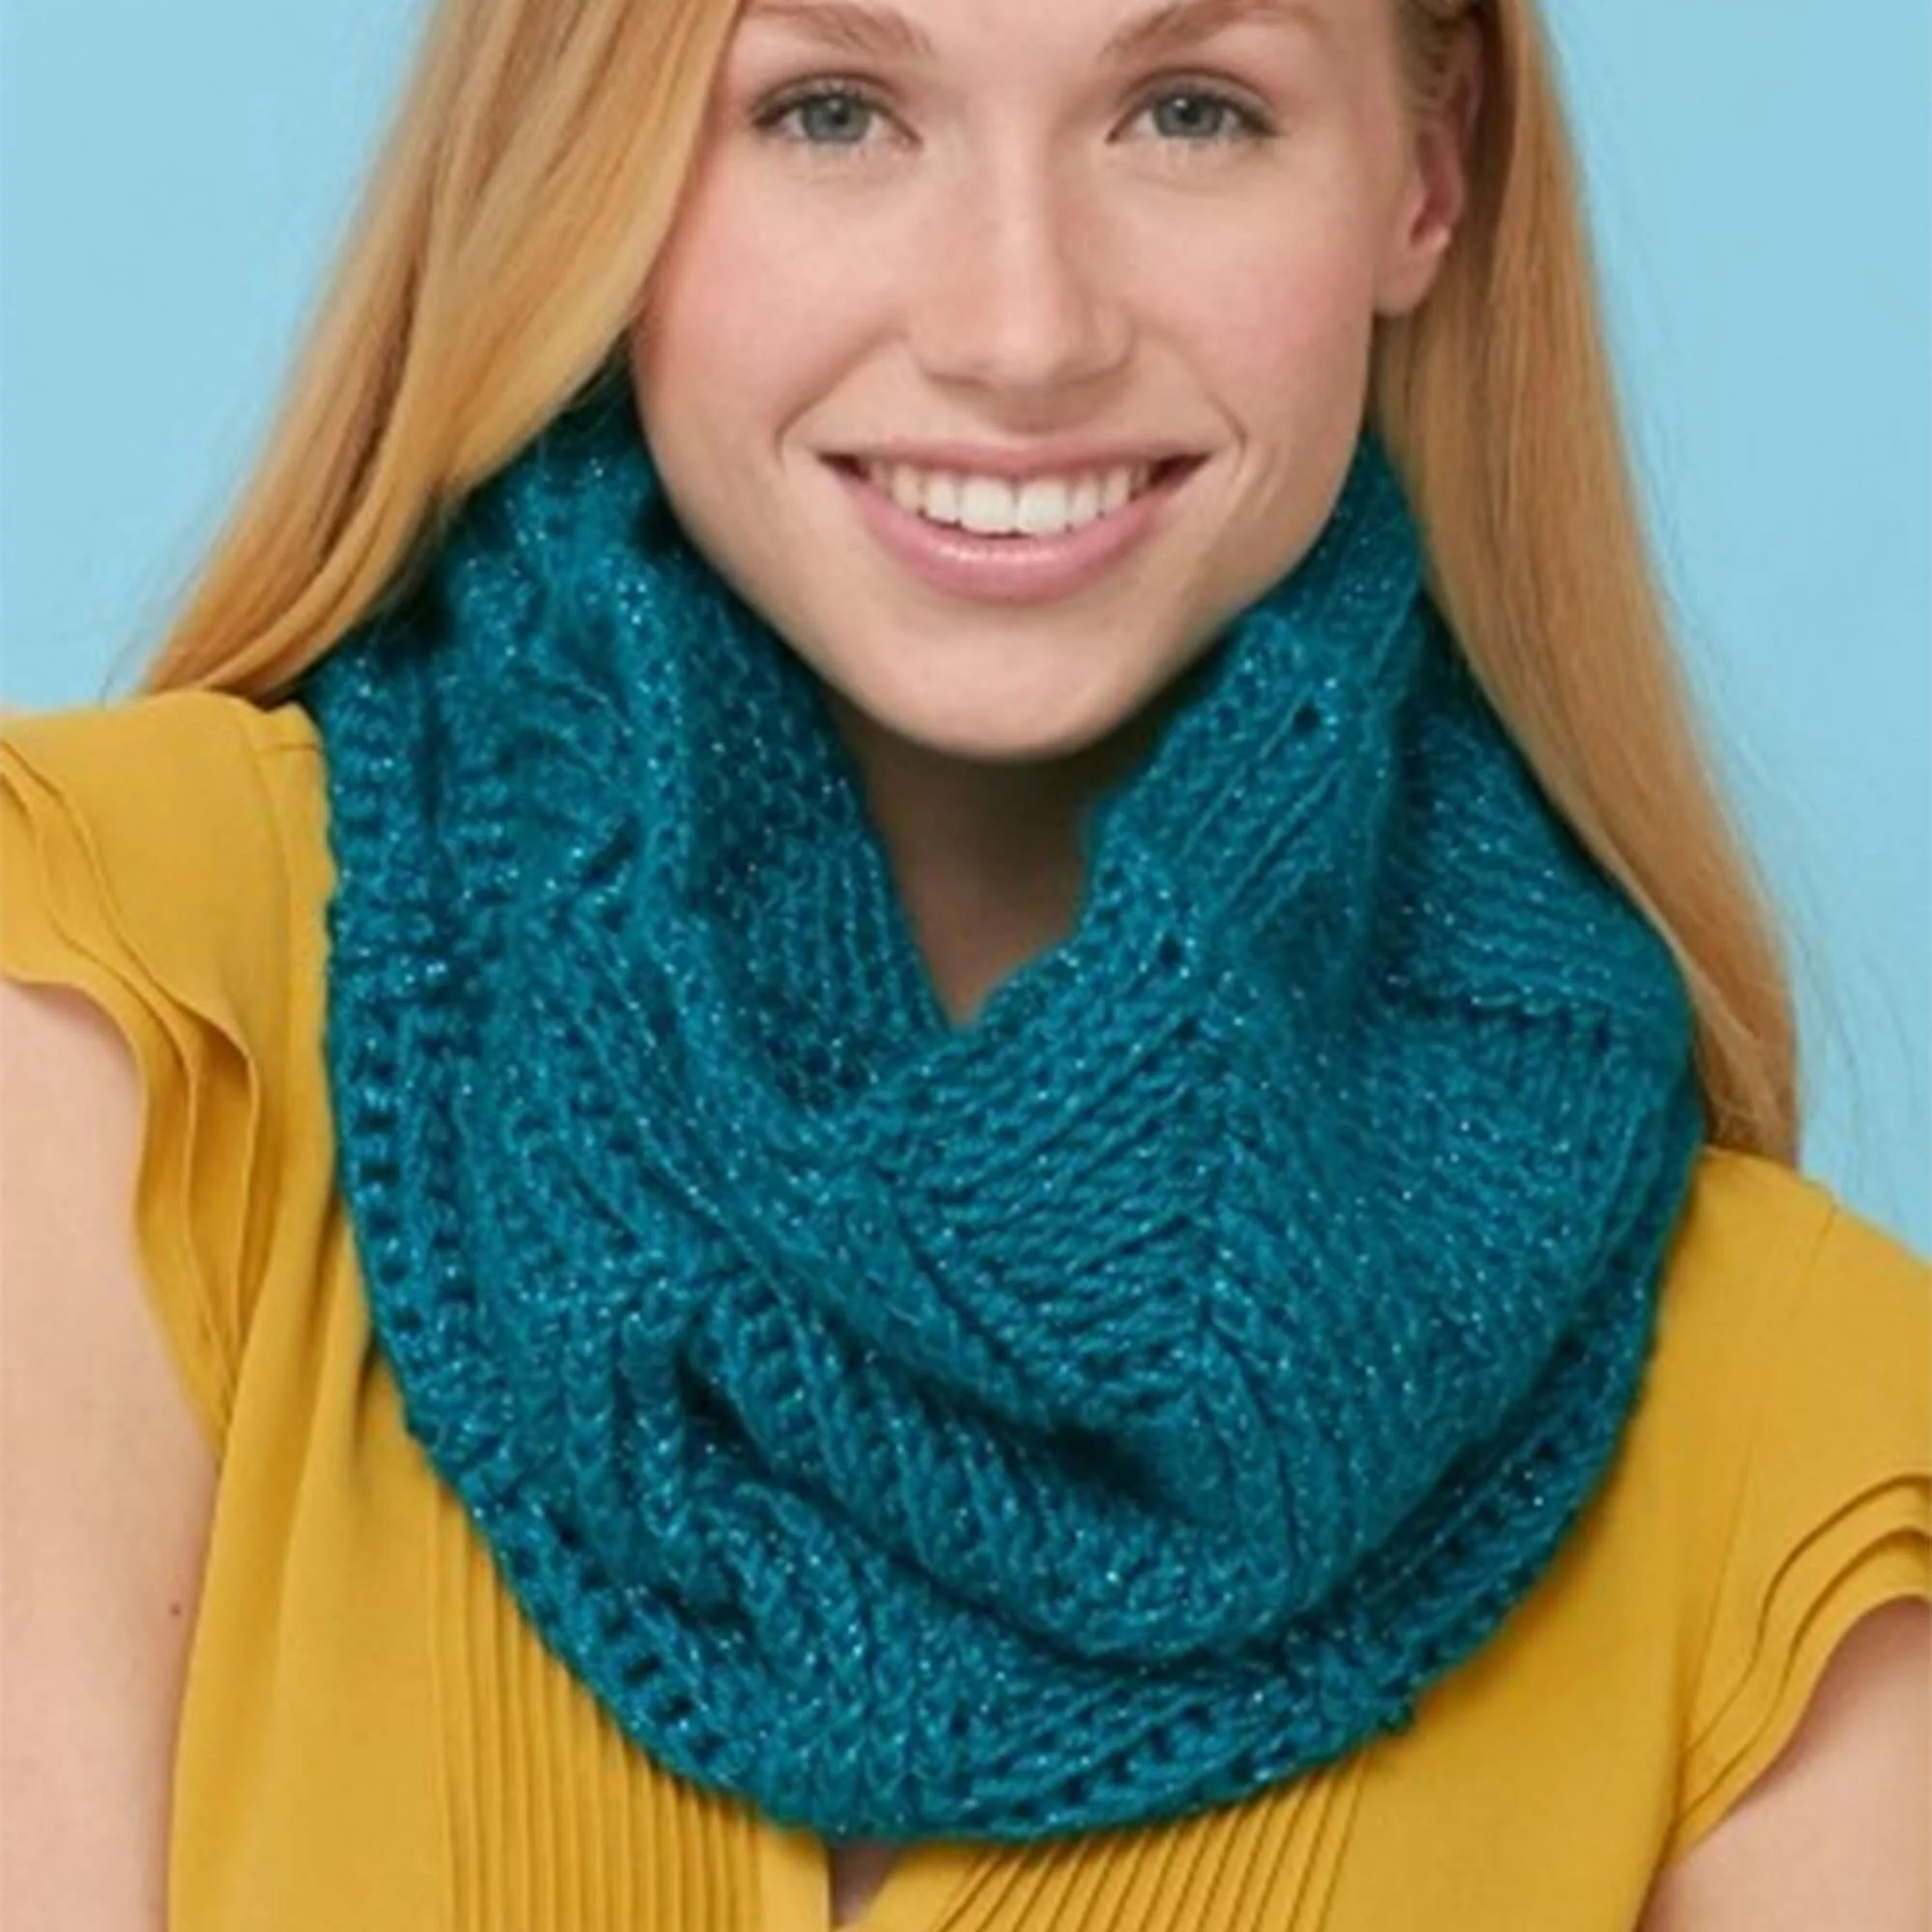
Wear the cowl looped around your neck as a textured layer over a coat or sweater. Because the pattern is worked as a continuous ring, it is simple to put on and has no loose ends or ties to arrange. The raised stitches give it visual interest, so it pairs easily with plain outerwear.
The original Teal Sparkle color makes a festive choice for winter birthdays, holiday gifts, or anyone who enjoys a subtle shimmer. For a more everyday look, a solid color can show off the ridges clearly without the sparkle. If you are making the cowl as a gift, consider choosing a shade that works with the recipient’s usual coat or winter accessories.
You could also make a coordinating set with a hat or fingerless mitts using the same yarn color, though those additional items would require their own patterns and yarn. A matching set is a practical handmade present, while a single cowl is a useful project for a gift exchange or a small winter wardrobe refresh.
How to care for your crochet project
Caron Simply Soft Party is an acrylic yarn, but yarn lines and care recommendations can vary. Check the label on your skeins and follow its washing instructions, especially if you have substituted a different yarn. Gentle handling helps preserve the cowl’s shape and the texture of its raised stitches.
If the yarn label allows machine washing, place the cowl in a mesh laundry bag and use a gentle cycle with cool or lukewarm water. Avoid hot water and harsh agitation. If you prefer hand washing, gently swish the cowl in cool water with a mild detergent, then rinse without twisting or wringing it.
Press excess water out between clean towels. Lay the cowl flat to dry and arrange it into a neat ring, smoothing the edges without stretching the fabric. Avoid hanging it while wet, as the weight of the water can pull the stitches longer. Blocking is not usually necessary for a cowl like this; if you do need to even out the fabric, use gentle shaping and follow the yarn label’s recommendations. Store it clean and dry, folded or loosely placed rather than compressed under heavy items.
Tips for a neat, comfortable cowl
- Check for twists before joining the chain. Spread the 90 chains on a flat surface and make sure the foundation lies in one direction all the way around. This is the best time to correct a twist.
- Use a marker for the beginning of each round. Place one in the first stitch or near the join. It can be especially helpful while you learn the pattern’s repeated groups.
- Count each group as you work. Rounds 2–10 and 12–20 each use nine repeated groups. Counting the front-post and back-post stitches within a group helps keep the texture aligned.
- Work around the post, not into the stitch top. The hook placement is what creates the raised ribbing. Inserting into the top loops instead will change the surface and can make it harder to follow the next round.
- Keep the repeated sections easy to see. You can count the groups aloud or place temporary markers at a few points around the round. Remove any markers before working into those stitches.
- Watch the joins. Join to the stitch specified for each round. The joining point shifts between a front-post and a back-post stitch as the sequence changes, so check the instructions rather than joining automatically to the same stitch type every time.
- Avoid adding stitches at the start of a round. Follow the pattern’s joining instruction and do not work into the starting chain unless the pattern specifically tells you to. Extra stitches can make the edge flare.
- Try the fabric around your neck as you progress. No finished measurements are specified, so checking comfort and drape while you work is more useful than assuming a particular size. Handle the fabric gently so the stitches do not stretch.
- Leave a tidy finishing tail. Weave it through the back of several stitches without tightening so much that the edge puckers.
Creative ways to customize your cowl
Choose a different color. A solid shade lets the raised texture stand out; a heathered or lightly sparkled yarn can add visual variation. A self-striping yarn may introduce stripes that intersect with the pattern’s spiraling ribs, so the finished look will depend on how often the color changes.
Use a contrasting color at the beginning or end. The supplied instructions do not include a contrasting border, so adding one would be a design change. A simple edging in another shade may finish the edges, but it can alter the cowl’s appearance and could make them firmer. Try the edging on a small section first before committing around the full opening.
Adjust the circumference cautiously. The pattern begins with 90 chains, and the stitch sequence repeats in groups of 10 stitches around the round. If you change the starting count, keep it divisible by 10 so the nine-part texture repeat can fit evenly. A different foundation count will change the cowl’s circumference, and a smaller count may feel snug while a larger one may sit looser. This changes the original pattern, so check the fit as you work.
Change the yarn or hook for a different drape. A thicker yarn or smaller hook can make the fabric heavier or stiffer; a lighter yarn or larger hook may produce a more open fabric. Either change can affect the final size and the amount of yarn needed. Make a sample first, and do not assume the original three-ball quantity will be enough when using a different yarn.
Try a seasonal palette. Deep green, berry, or metallic shades can suit winter gifting, while a soft neutral can be worn through more of the year. If you want stripes, you will need to plan when to change colors, as the written pattern uses one continuous color and does not include color-change instructions.
Frequently asked questions
Is this crochet cowl suitable for beginners?
It can be a good learning project for a crocheter who already knows how to make chains, single crochet, double crochet, slip stitches, and joined rounds. The main new technique may be working double crochet around the front and back posts. Beginners may want to practice those stitches on a small swatch before starting the full cowl.
What yarn and hook does the pattern call for?
The pattern calls for 3 balls of Caron® Simply Soft® Party™ in Teal Sparkle (PAR0004), with each ball listed as 3.5 oz / 85 g and 164 yds / 150 m. Use a U.S. H/8 (5 mm) crochet hook, or adjust the hook size to obtain gauge. No numerical gauge is supplied in the instructions, so check that your fabric has a comfortable feel and drape.
How much yarn do I need?
The specified amount is 3 balls of the listed Caron Simply Soft Party yarn. If you substitute another yarn, the required yardage may change because of differences in thickness, fiber, and how tightly you crochet. It is wise to buy enough from the same dye lot to complete the project.
Can I use a different hook size?
Yes, but the hook size affects the fabric. A smaller hook usually produces denser stitches, and a larger hook usually produces a looser fabric. Since the pattern does not give a gauge measurement, make a sample with your yarn and assess whether the post stitches are comfortable to work and the fabric drapes well.
How can I make the cowl wider or narrower?
The foundation chain controls the circumference. The texture is organized into nine repeats of 10 stitches, so a changed stitch count should remain divisible by 10 to maintain the repeat evenly. Adjusting the foundation count will change the finished fit; test the chain around your neck before joining, while making sure it is not too tight or excessively loose.
Why does the texture look different from one round to the next?
That change is intentional. The pattern gradually increases the number of front-post stitches, works a round entirely in front-post stitches, then shifts toward back-post stitches before working a round entirely in back-post stitches. The sequence creates the cowl’s twisting, ribbed effect. Check that you are working around the posts and following the correct stitch counts for each round.
What should I do if the foundation round is twisted?
If you notice a twist before joining, lay the chain flat and turn it so all the chain stitches face the same way around the ring. If the foundation is already joined and worked into, a twist generally cannot be removed neatly; you may need to undo the work to the foundation and join it correctly.
Can I sell finished cowls made from this pattern?
The instructions provided do not state the designer’s terms for selling finished items. Check the original designer’s usage terms before listing or selling a cowl made from the pattern.
How should I wash and dry the finished cowl?
Follow the care instructions on your yarn label. For gentle care, use cool or lukewarm water and mild detergent, avoid wringing, and reshape the cowl before laying it flat to dry. Do not hang it while wet, since that can stretch the fabric.
Print
Twist’n Shout Cowl
Description
A cozy, circular crochet accessory with a bold, shifting ribbed texture, perfect for cool-weather days.
Materials
- Yarn: Caron® Simply Soft® Party™ (3.5 oz / 85 g; 164 yds / 150 m), Teal Sparkle (PAR0004) — 3 balls
- Crochet hook: U.S. H/8 (5 mm), or the size needed to obtain gauge
Instructions
- Make the foundation ring. Chain 90. Lay the chain flat and check that it is not twisted. Join with a slip stitch into the first chain.
- Work the first round. Chain 1. Work 1 single crochet into each chain around. Join with a slip stitch to the first single crochet. You should have 90 single crochet stitches.
- Work round 2. Chain 3. Repeat the following sequence 9 times: work 1 front-post double crochet around the next single crochet, then 1 back-post double crochet around each of the next 9 single crochets. Join with a slip stitch to the first front-post double crochet.
- Work round 3. Chain 3. Repeat 9 times: work 1 front-post double crochet around each of the next 2 stitches, then 1 back-post double crochet around each of the next 8 stitches. Join with a slip stitch to the first front-post double crochet.
- Work round 4. Chain 3. Repeat 9 times: work 1 front-post double crochet around each of the next 3 stitches, then 1 back-post double crochet around each of the next 7 stitches. Join with a slip stitch to the first front-post double crochet.
- Work round 5. Chain 3. Repeat 9 times: work 1 front-post double crochet around each of the next 4 stitches, then 1 back-post double crochet around each of the next 6 stitches. Join with a slip stitch to the first front-post double crochet.
- Work round 6. Chain 3. Repeat 9 times: work 1 front-post double crochet around each of the next 5 stitches, then 1 back-post double crochet around each of the next 5 stitches. Join with a slip stitch to the first front-post double crochet.
- Work round 7. Chain 3. Repeat 9 times: work 1 front-post double crochet around each of the next 6 stitches, then 1 back-post double crochet around each of the next 4 stitches. Join with a slip stitch to the first front-post double crochet.
- Work round 8. Chain 3. Repeat 9 times: work 1 front-post double crochet around each of the next 7 stitches, then 1 back-post double crochet around each of the next 3 stitches. Join with a slip stitch to the first front-post double crochet.
- Work round 9. Chain 3. Repeat 9 times: work 1 front-post double crochet around each of the next 8 stitches, then 1 back-post double crochet around each of the next 2 stitches. Join with a slip stitch to the first front-post double crochet.
- Work round 10. Chain 3. Repeat 9 times: work 1 front-post double crochet around each of the next 9 stitches, then 1 back-post double crochet around the next stitch. Join with a slip stitch to the first front-post double crochet.
- Work round 11. Chain 3. Work 1 front-post double crochet around each stitch around. Join with a slip stitch to the first front-post double crochet.
- Work round 12. Chain 3. Repeat 9 times: work 1 back-post double crochet around the next stitch, then 1 front-post double crochet around each of the next 9 stitches. Join with a slip stitch to the first back-post double crochet.
- Work round 13. Chain 3. Repeat 9 times: work 1 back-post double crochet around each of the next 2 stitches, then 1 front-post double crochet around each of the next 8 stitches. Join with a slip stitch to the first back-post double crochet.
- Work round 14. Chain 3. Repeat 9 times: work 1 back-post double crochet around each of the next 3 stitches, then 1 front-post double crochet around each of the next 7 stitches. Join with a slip stitch to the first back-post double crochet.
- Work round 15. Chain 3. Repeat 9 times: work 1 back-post double crochet around each of the next 4 stitches, then 1 front-post double crochet around each of the next 6 stitches. Join with a slip stitch to the first back-post double crochet.
- Work round 16. Chain 3. Repeat 9 times: work 1 back-post double crochet around each of the next 5 stitches, then 1 front-post double crochet around each of the next 5 stitches. Join with a slip stitch to the first back-post double crochet.
- Work round 17. Chain 3. Repeat 9 times: work 1 back-post double crochet around each of the next 6 stitches, then 1 front-post double crochet around each of the next 4 stitches. Join with a slip stitch to the first back-post double crochet.
- Work round 18. Chain 3. Repeat 9 times: work 1 back-post double crochet around each of the next 7 stitches, then 1 front-post double crochet around each of the next 3 stitches. Join with a slip stitch to the first back-post double crochet.
- Work round 19. Chain 3. Repeat 9 times: work 1 back-post double crochet around each of the next 8 stitches, then 1 front-post double crochet around each of the next 2 stitches. Join with a slip stitch to the first back-post double crochet.
- Work round 20. Chain 3. Repeat 9 times: work 1 back-post double crochet around each of the next 9 stitches, then 1 front-post double crochet around the next stitch. Join with a slip stitch to the first back-post double crochet.
- Work round 21. Chain 3. Work 1 back-post double crochet around each stitch around. Join with a slip stitch to the first back-post double crochet.
- Repeat rounds 2–21 once more, following the same stitch placement and round joins.
- Finish. Fasten off. Secure and weave in the yarn end neatly so it is hidden in the fabric without pulling the edge out of shape.