

This post contains Amazon affiliate links. As an Amazon Associate I earn from qualifying purchases.
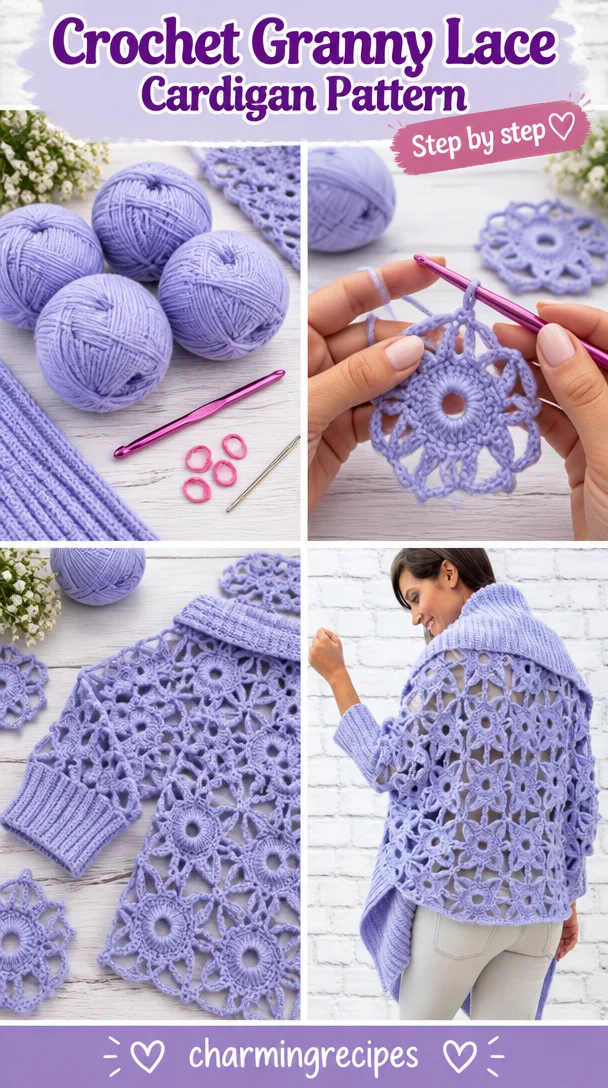
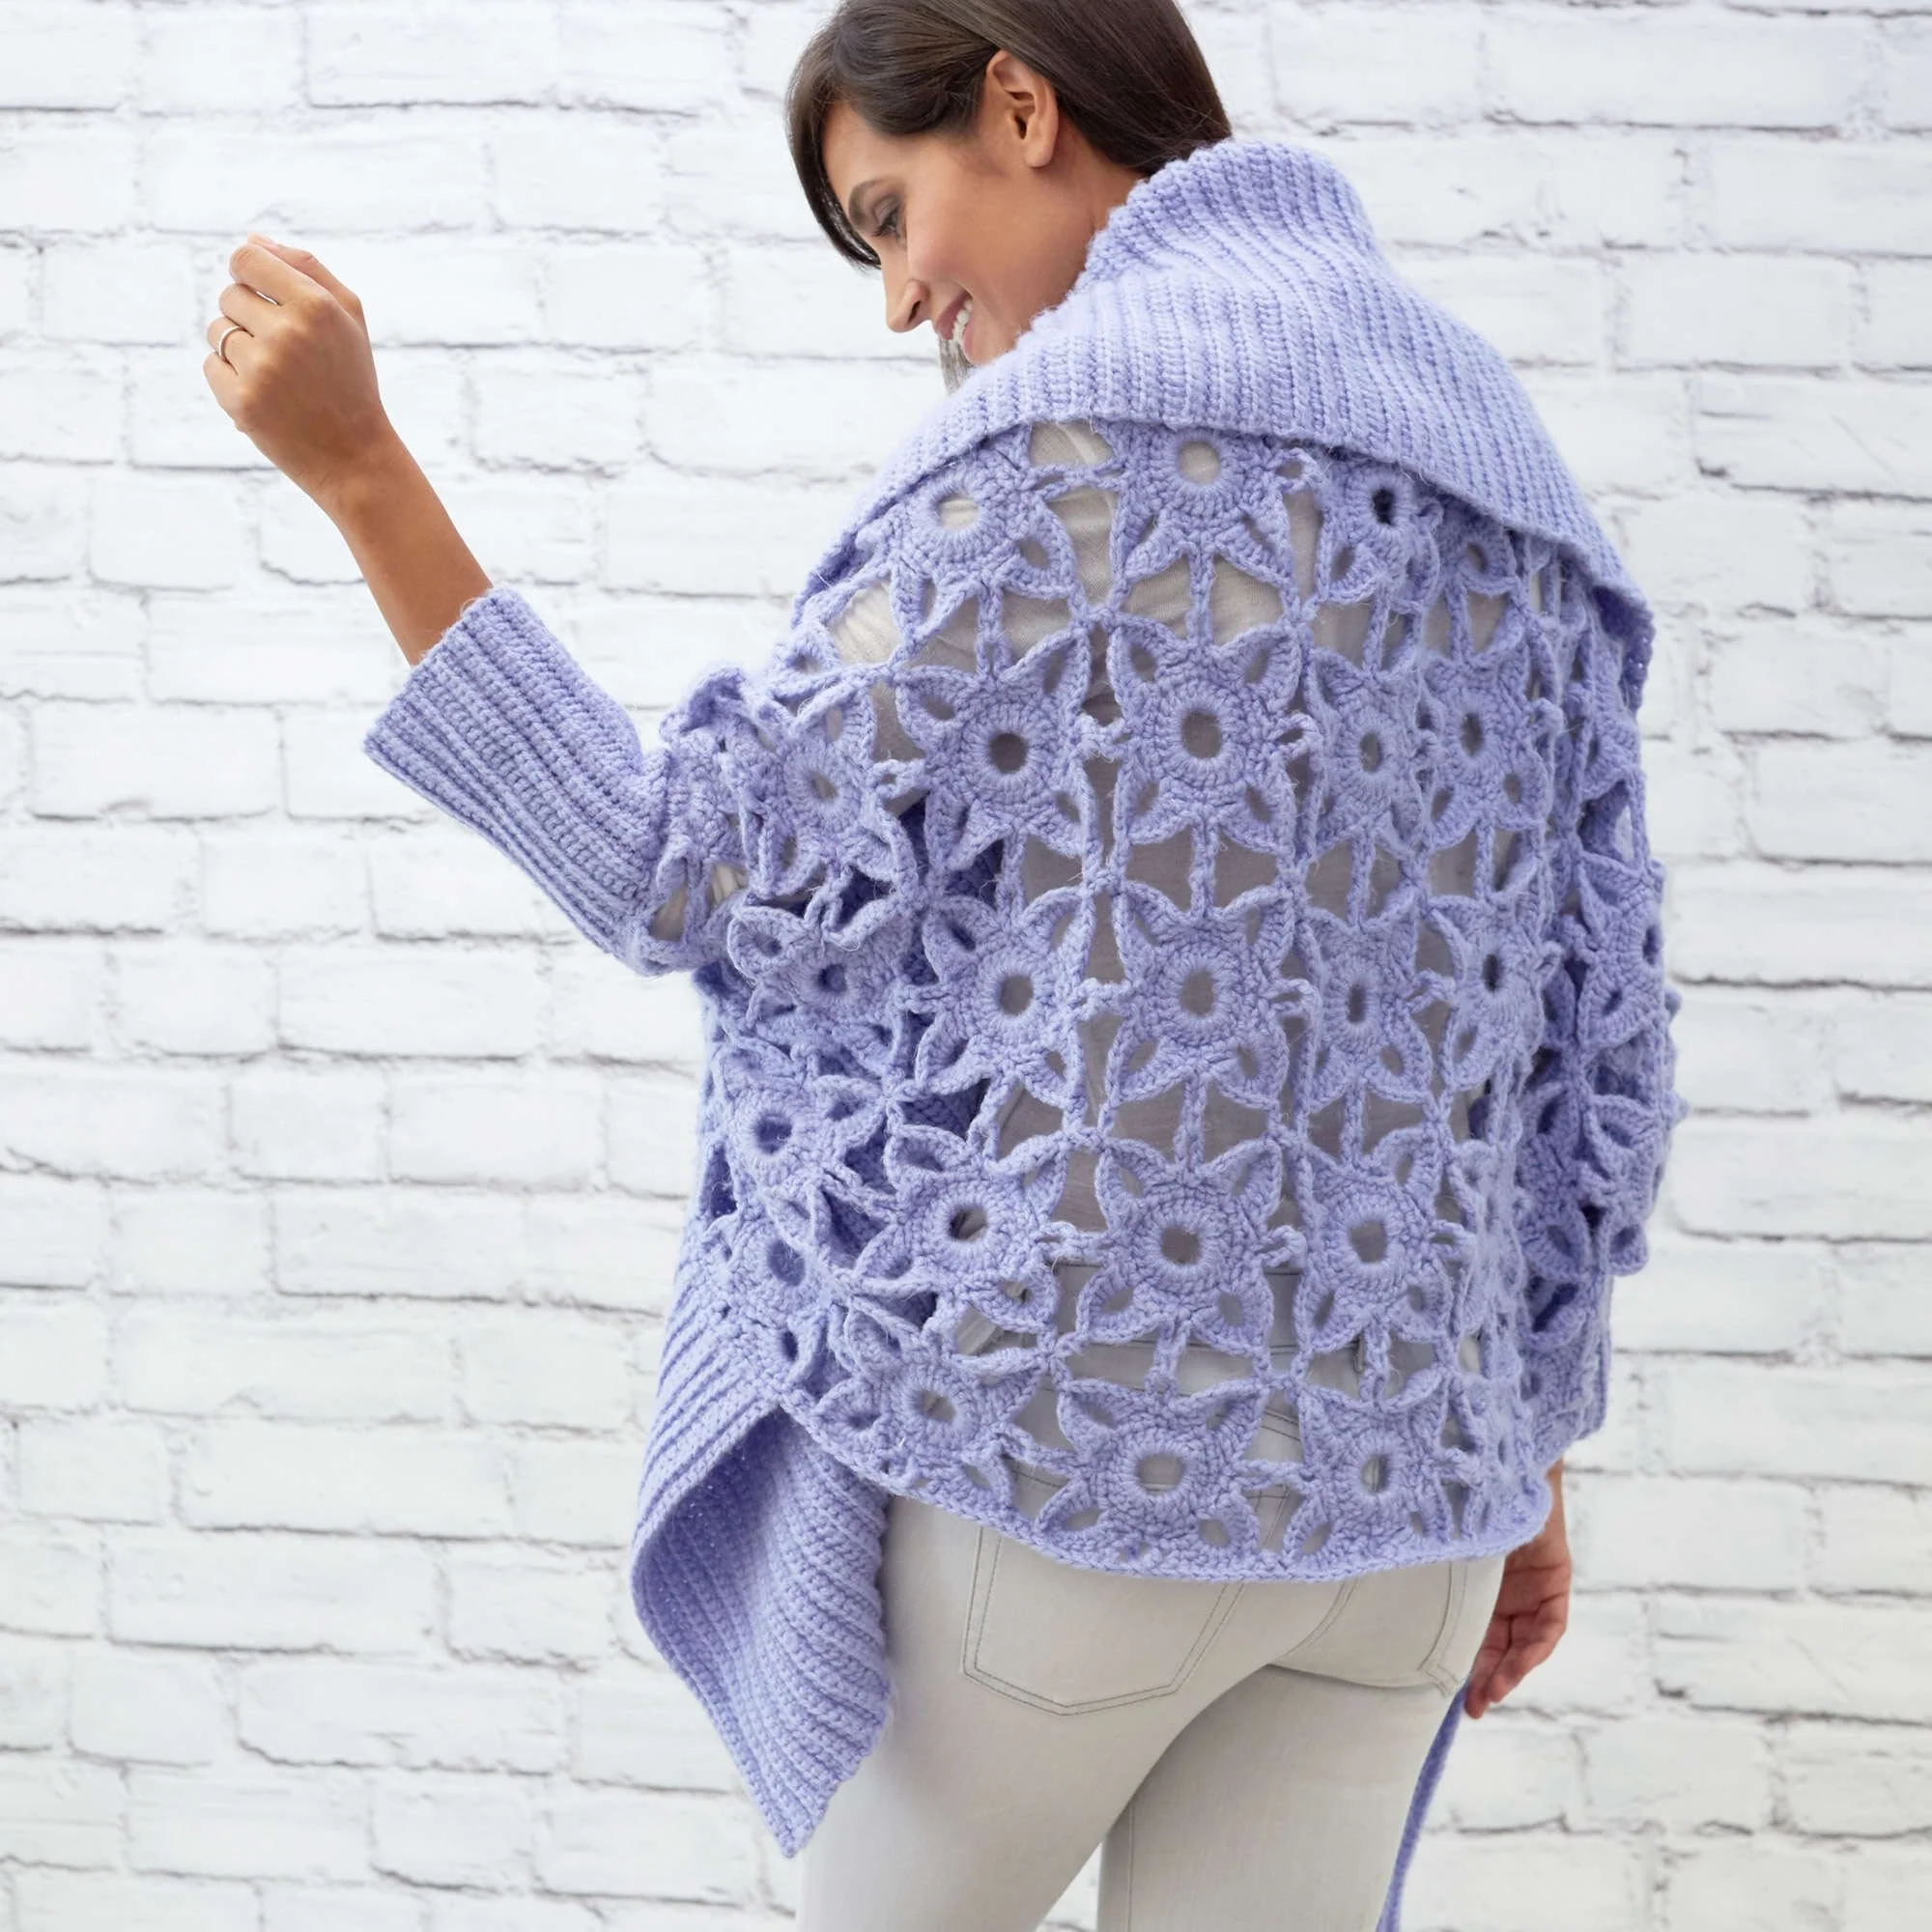
The Granny Lace Crochet Cardigan is made from openwork motifs joined into a soft cocoon shape, then finished with ribbed cuffs and a collar. Its lace pattern gives the fabric a light, decorative look, while the construction keeps shaping straightforward. It’s a satisfying project for crocheters who enjoy joining motifs and want to make a wearable layer for cool evenings, relaxed weekends, or a thoughtful handmade gift.
Why you’ll love this pattern
This cardigan combines two enjoyable parts of crochet: making small lace motifs and watching them come together into a garment. Each motif is worked in rounds, so you can focus on one repeat at a time rather than managing a large piece of fabric from the start. Joining motifs as you go also helps the cardigan take shape gradually.
The pattern is a good skill-builder for crocheters who know basic stitches and want to practise chain spaces, picots, joining rounds, and working into lace openings. The finished cocoon-style construction avoids complicated sleeve shaping, although careful motif placement and assembly are important for an even result.
Because it is made from separate motifs, the project is easy to pick up between other tasks. The lace texture also makes it a lovely choice for a handmade gift, especially for someone who likes a relaxed, draped cardigan.
“I enjoyed making the motifs one at a time, and seeing them join into a wearable piece kept me motivated. The open lace gives the cardigan a lovely light feel.”
How this crochet pattern comes together
The cardigan begins with individual circular motifs. Each one starts with a small chain ring, followed by a round of double crochet stitches and a round of single crochet stitches that create chain-7 spaces. In the final motif round, clusters of double crochet and a picot form the decorative lace sections.
You’ll make the remaining motifs in the same way and join them as you go. The pattern does not specify the total number of motifs or a finished measurement, so use the original layout or size guidance that came with the pattern if available. Avoid guessing the layout from the yarn quantity alone.
Once the motifs are joined, work an edging around the garment’s outer edge using single crochet, half double crochet, and double crochet. The ribbed cuffs and collar are then made with chain-started rows of single crochet and slip stitch. Finally, fold the cocoon and sew the sides from the cuff edge to the corners.
The main skills are working in the round, making chain spaces and picots, joining motifs, and sewing the garment together. A crocheter comfortable with chain, single crochet, double crochet, slip stitch, and basic motif work should be able to follow the steps. Allow several sessions for the motifs, joining, edging, ribbing, and finishing; the total time depends on your pace and the size you’re making.
Materials you’ll need
- Yarn: RED HEART® Dreamy™ — 3 (5, 6) balls for the pattern’s listed size options.
- Crochet hook: Susan Bates® 4 mm [US G-6].
- Stitch markers: Susan Bates® split lock stitch markers.
- Finishing tool: Yarn needle.
The yarn quantity is listed in three size options, but the source instructions do not identify which number corresponds to each size. Check the original pattern’s size information before buying yarn. If you choose a different yarn, select a similar thickness and check your gauge or motif size: a heavier yarn or larger hook can make the fabric bigger and thicker, while a finer yarn can produce a smaller, lighter garment. A substitution may also change how much yarn you need and how the cardigan drapes.
Step-by-step instructions
Abbreviations
- ch: chain
- sc: single crochet
- hdc: half double crochet
- dc: double crochet
- sl st: slip stitch
- picot: a small decorative loop; the source lists a picot but does not give its exact stitch method. Use the picot method specified in the original pattern, if provided.
- st/sts: stitch/stitches
Make a motif
-
Form the center ring. Chain 10. Insert the hook into the first chain and slip stitch to join, forming a ring. Check that the chain is not twisted before joining.
-
Round 1: Chain 3; this counts as the first double crochet. Work 23 double crochet stitches into the ring. Join with a slip stitch into the third chain of the beginning chain-3.
-
Round 2: Chain 1. Work a single crochet in the same stitch as the joining slip stitch, then work 1 single crochet in each of the next 2 double crochet stitches. In the next double crochet, work (single crochet, chain 7, single crochet). Repeat this sequence around, placing each pair of single crochets and chain-7 space as directed, then join the round. The source does not specify the exact joining stitch for this round, so follow the original pattern’s joining placement if it gives one.
-
Round 3: Chain 1. In the first single crochet, work (single crochet, chain 7, single crochet). Skip 3 single crochet stitches. In the next chain-7 space, work 7 double crochet, a picot, and 6 double crochet. Repeat the lace sequence around and join as directed by the original pattern.
-
Fasten off. Make the remaining motifs using the same steps, joining each new motif to the existing work as you go. Refer to the original motif layout for the placement and joining points; those details are not included in the supplied instructions.
Add the edging
- Join the yarn with a slip stitch in the first picot. Work along the outer edge using single crochet, half double crochet, and double crochet, joining each motif as you go. The source does not provide the stitch-by-stitch edging repeat, so follow any edging layout included with the original pattern. Keep your stitches even and avoid pulling the edge tight, which can make the lace buckle.
Make the ribbed cuffs
- Mark the center point as directed for the cuff placement. Chain 23 (24, 25) for the selected size option. Work the ribbing in rows of single crochet and slip stitch, then fasten off. The source does not specify the row sequence, turning directions, or number of rows; use the original pattern’s cuff details if available. Check that both cuffs match in width and length.
Make the collar
- Mark the center on the long edge. Chain 45, then work the ribbing and fasten off. The source does not give the row sequence or number of rows for the collar, so refer to the original pattern for those details. Keep the ribbing relaxed enough to sit comfortably without drawing in the lace edge.
Assemble and finish
-
Fold the cocoon into its cardigan shape. Sew the sides together from each cuff edge to the corners. Make both side seams equal, and leave the openings as indicated by the original layout.
-
Weave in all loose ends securely with a yarn needle. For a neat finish, weave each end through several stitches on the wrong side without pulling the lace out of shape.
Styling ideas for your finished cardigan
Wear the open lace cardigan over a simple top or dress when you want a light extra layer. Its relaxed cocoon shape works well with outfits that leave the lace pattern visible, while the ribbed cuffs and collar give the edges a more finished appearance.
It can also make a thoughtful handmade gift for someone who enjoys comfortable layers. If you’re gifting the cardigan, include a small care note and any information you have about the yarn. Since the supplied instructions do not give finished measurements, it’s wise to compare the garment with a similar cardigan before gifting it if fit is important.
For a more dressed-up look, pair it with a plain, close-fitting top so the motif texture stands out. For everyday wear, try it over a T-shirt or long-sleeved shirt. The openwork makes it most useful as a light layer rather than a warm, windproof outer garment.
How to care for your crochet cardigan
Check the RED HEART® Dreamy™ yarn label for the correct washing and drying instructions before caring for the finished cardigan. If you use another yarn, follow that yarn’s care guidance instead. Fiber content and finishing can affect whether machine washing, tumble drying, or ironing is suitable, so don’t assume all yarns can be treated the same way.
For gentle handling, wash the cardigan in cool water with a mild detergent if the label allows. Avoid wringing or twisting the lace, which may stretch the chain spaces and distort the motif joins. Press out excess water with a clean towel, then reshape the garment and dry it flat. Keep it away from direct heat unless the yarn label specifically permits it.
If the lace motifs look uneven after washing, gently arrange them while the cardigan is damp. Blocking may help even the fabric, but test the method on a swatch first and follow the yarn label. Do not stretch the cardigan aggressively: the openwork can lengthen under tension.
Store it folded rather than hanging it for long periods, because the weight of the garment may pull down on the lace and seams. Keep it clean and dry, and avoid storing it tightly compressed.
Helpful tips for success
- Use markers while joining. Split lock markers can hold motif corners or help you keep the garment layout aligned while you work. They are especially useful if the openwork makes a joining point hard to see.
- Check the motif before moving on. After each round, confirm that the chain spaces and lace sections are in the intended positions. A missed chain-7 space can throw off the next round.
- Keep the center ring untwisted. Before joining the first 10 chains, lay them flat and check that they form a smooth loop.
- Join rounds carefully. Place the joining slip stitch into the specified chain or stitch, rather than into the top of a nearby double crochet by mistake. If the round’s joining point is unclear in the supplied directions, consult the original pattern before repeating the motif.
- Watch the chain spaces. Chain-7 spaces create much of the motif’s open appearance. Keep them consistent and avoid tightening the chains.
- Test the picot method. The source instructions name a picot but do not define its construction. Use the original designer’s specified method so each motif has matching points for joining and edging.
- Keep motif tension consistent. If later motifs are noticeably larger or smaller than the first, adjust your hand tension before joining them. Even slight differences can affect the overall layout.
- Check the garment as you go. Lay the joined motifs flat from time to time and compare the shape with the intended layout. This is easier than correcting several joined motifs at once.
- Avoid tight edging. Single crochet, half double crochet, and double crochet have different heights. Work the edging evenly along the lace edge so it lies smoothly instead of gathering or flaring.
- Match the ribbing. Use the same tension for both cuffs. If the original pattern includes row counts, track them so the cuffs are consistent.
- Secure seams and ends. Use a yarn needle to sew the sides neatly and weave in ends on the wrong side. Avoid pulling the seam so tight that the garment puckers.
- Try on or compare before finishing. The instructions do not provide finished measurements, so check the drape and placement before completing all seams where possible.
Creative ways to customize it
A new color can change the mood of the cardigan without changing the lace design. A single color gives the motifs a unified look, while alternating colors between motifs can make the layout more graphic. If you use several shades, plan the arrangement before joining so the colors are balanced across the garment.
You could also use a contrasting color for the edging, collar, or cuffs. This makes the finishing details stand out, but a different yarn for those areas may affect their thickness and stretch. Keep the yarn weight and fiber similar to the main yarn if you want the ribbing and edges to sit smoothly.
For a subtle seasonal variation, try muted shades for a soft everyday layer or deeper colors for autumn and winter outfits. A yarn with a different texture may also change the result: fuzzy or highly textured yarn can soften the appearance of the lace openings and make the picots less distinct. Test a motif before committing to a full garment.
To adjust the overall size, use the size options and motif layout from the original pattern rather than simply adding rows to one section. Changing the number or size of motifs can affect the cardigan’s proportions, drape, and yarn requirement. A larger hook or thicker yarn will generally produce larger, heavier fabric; a smaller hook or finer yarn will usually make a smaller, lighter piece. Check the finished motif dimensions and fabric feel before making all the motifs.
Frequently asked questions
Is this Granny Lace Crochet Cardigan suitable for beginners?
It is most suitable for a confident beginner or intermediate crocheter who knows basic stitches and can work in the round. The motifs use familiar stitches, but joining motifs, making picots, edging, and assembling the cocoon require care. If you’re new to lace, practise one motif first.
What yarn is recommended?
The listed yarn is RED HEART® Dreamy™ in 3 (5, 6) balls for the pattern’s size options. Check the original size information to confirm which quantity applies to your size. If substituting, choose a similar thickness and test a motif, since yarn choice affects size, texture, drape, and yardage.
Can I use a different crochet hook?
The specified hook is 4 mm [US G-6]. You can change hook size if your motif or fabric is too tight or too loose, but a different hook can change the finished dimensions and drape. Make a test motif first and compare it with the original pattern’s gauge or measurements, if available.
How do I know how many motifs to make?
The supplied instructions say to repeat the motif and join as you go, but they do not state the total number of motifs or give a layout. Check the original pattern’s size and assembly diagram before starting the full set. The yarn quantity alone is not enough to determine the motif count reliably.
How can I make the cardigan larger or smaller?
Use the original pattern’s size options and motif layout as your guide. Changing the motif count or dimensions can alter the cocoon shape, sleeve openings, and overall drape. A different yarn or hook may also change the size, so test a motif and confirm its measurements before continuing.
Why is my lace motif curling or pulling out of shape?
Uneven tension, tight chain-7 spaces, or a tight joining round can make the motif pucker. Check that you have not missed a chain space or placed stitches incorrectly, and keep the chains loose enough to form open loops. Blocking may help even the fabric, but test the method on a swatch and follow the yarn label.
How do I keep the cardigan edges even?
Work the edging at a steady tension and distribute the single crochet, half double crochet, and double crochet stitches smoothly along the edge. Avoid crowding stitches into one spot or stretching the lace as you work. Stitch markers can help divide a long edge into manageable sections.
Can I wash the finished cardigan in a washing machine?
Use the care instructions on the yarn label. If machine washing is permitted, follow the recommended cycle and temperature, and consider placing the cardigan in a mesh laundry bag to protect the lace. If the label is unclear, hand washing gently and drying flat is a cautious option.
How much yarn will I need?
The listed quantity is 3 (5, 6) balls of RED HEART® Dreamy™ for the pattern’s size options. The source does not identify which quantity matches each size in the supplied information, so confirm that detail in the original pattern. A substitute yarn, different hook, or size adjustment may change the amount needed.
Can I sell a cardigan made from this pattern?
The supplied pattern information does not state whether finished items may be sold. Check the original designer’s usage terms before selling a cardigan or listing it for sale.
Print
Granny Lace Crochet Cardigan
Description
The Granny Lace Crochet Cardigan is a soft cocoon-shaped garment made from individual openwork motifs. It’s a wearable piece perfect for cool evenings, relaxed weekends, or as a thoughtful handmade gift.
Materials
- Yarn: RED HEART® Dreamy™ — 3 (5, 6) balls for the pattern’s listed size options.
- Crochet hook: Susan Bates® 4 mm [US G-6].
- Stitch markers: Susan Bates® split lock stitch markers.
- Finishing tool: Yarn needle.
Instructions
- Form the center ring. Chain 10. Insert the hook into the first chain and slip stitch to join, forming a ring. Check that the chain is not twisted before joining.
- Round 1: Chain 3; this counts as the first double crochet. Work 23 double crochet stitches into the ring. Join with a slip stitch into the third chain of the beginning chain-3.
- Round 2: Chain 1. Work a single crochet in the same stitch as the joining slip stitch, then work 1 single crochet in each of the next 2 double crochet stitches. In the next double crochet, work (single crochet, chain 7, single crochet). Repeat this sequence around, placing each pair of single crochets and chain-7 space as directed, then join the round.
- Round 3: Chain 1. In the first single crochet, work (single crochet, chain 7, single crochet). Skip 3 single crochet stitches. In the next chain-7 space, work 7 double crochet, a picot, and 6 double crochet. Repeat the lace sequence around and join as directed.
- Fasten off. Make the remaining motifs using the same steps, joining each new motif to the existing work as you go.
- Join the yarn with a slip stitch in the first picot. Work along the outer edge using single crochet, half double crochet, and double crochet, joining each motif as you go.
- Mark the center point for the cuff placement. Chain 23 (24, 25) for the selected size option. Work the ribbing in rows of single crochet and slip stitch, then fasten off.
- Mark the center on the long edge. Chain 45, then work the ribbing and fasten off.
- Fold the cocoon into its cardigan shape. Sew the sides together from each cuff edge to the corners.
- Weave in all loose ends securely with a yarn needle.
Notes
The yarn quantity is listed in three size options, but the source instructions do not identify which number corresponds to each size. Check the original pattern’s size information before buying yarn.