

This post contains Amazon affiliate links. As an Amazon Associate I earn from qualifying purchases.
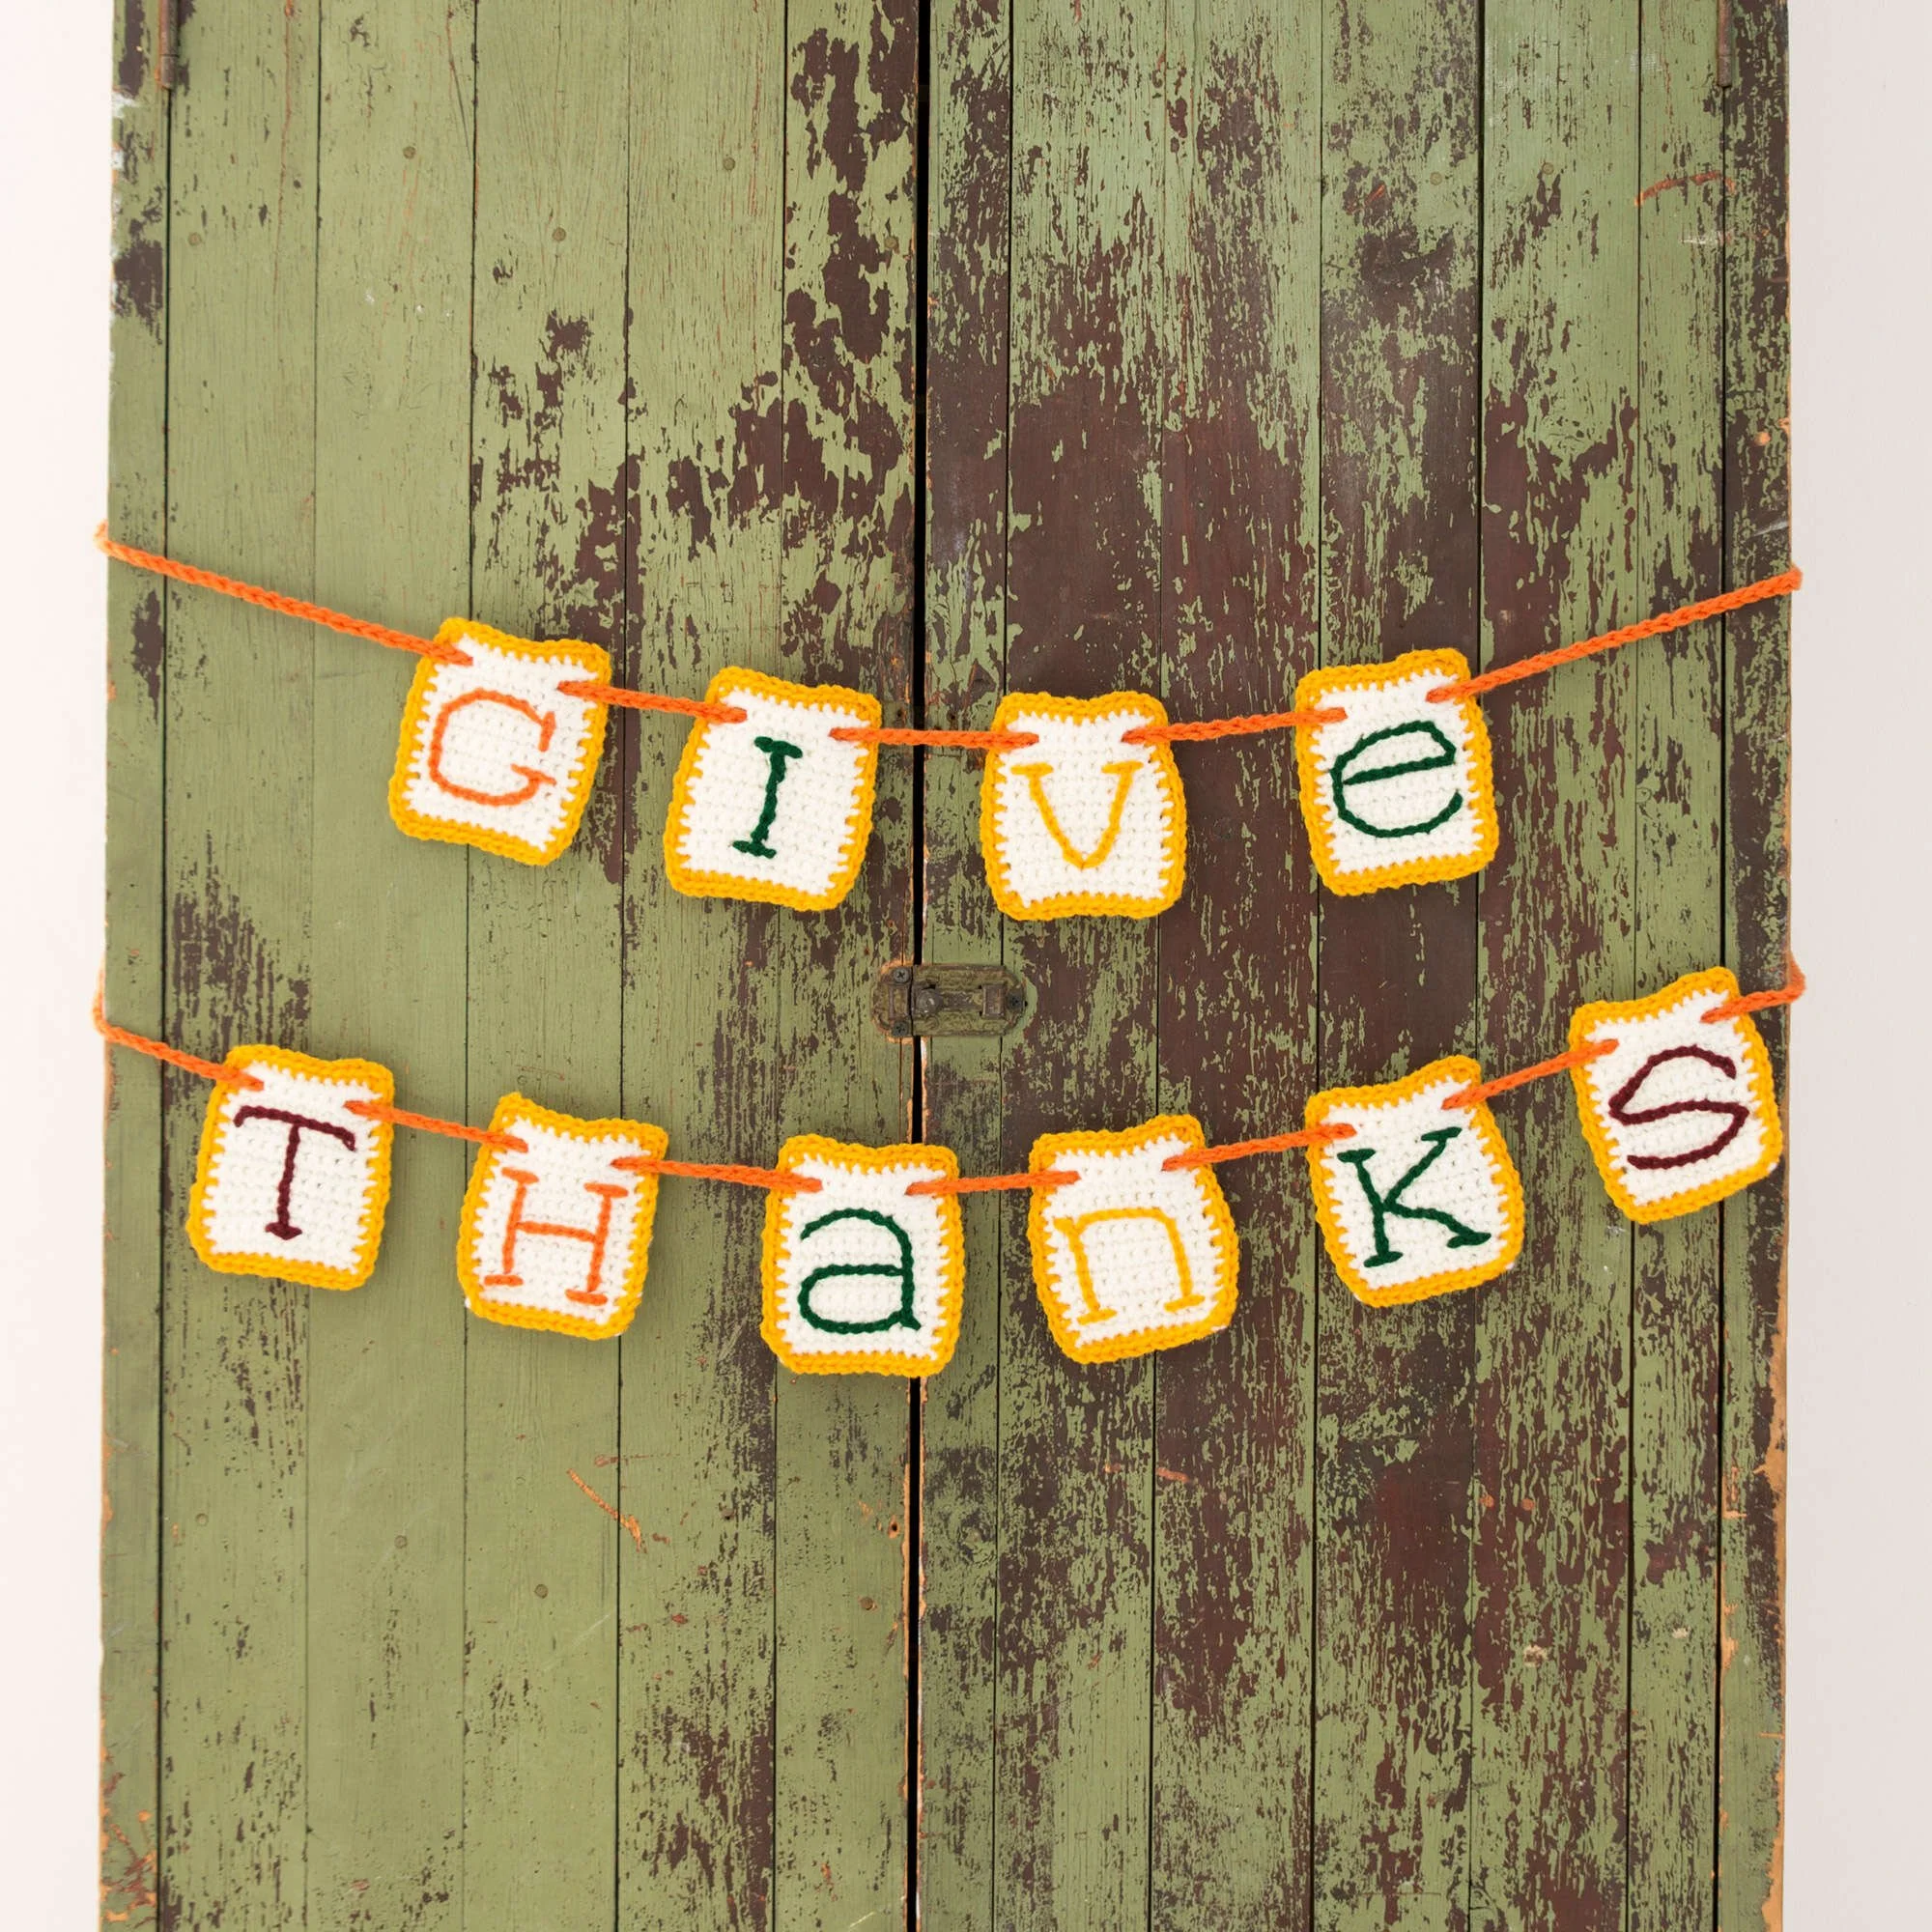
This Crochet Give Thanks Banner is a warm, handmade decoration for autumn gatherings, Thanksgiving displays, or a welcoming seasonal entryway. It is made from small cream-colored crochet squares, colorful surface-slip-stitch lettering, and two crocheted ropes. The modular construction makes it enjoyable to work on a little at a time, whether you are an experienced crocheter or building confidence with basic square construction and surface embroidery.
Why You’ll Love This Pattern
This banner has several practical advantages:
- Beginner-friendly construction: The project is divided into individual squares rather than one large, complicated piece.
- Useful skill building: You can practice consistent tension, joining, surface slip stitches, and neat finishing.
- Handmade seasonal décor: The finished “Give Thanks” message adds a personal touch to a mantel, wall, doorway, or Thanksgiving table.
- Portable project: The squares are easy to carry and work on separately.
- Colorful without being difficult: The Soft White background allows the Gold, Carrot, Claret, and Hunter Green accents to stand out clearly.
- Gift potential: A completed banner makes a thoughtful hostess gift or seasonal present.
“The squares were relaxing to crochet, and the lettering gave the banner such a special handmade look. Taking time to keep the surface stitches even made a big difference.”
How This Crochet Banner Comes Together
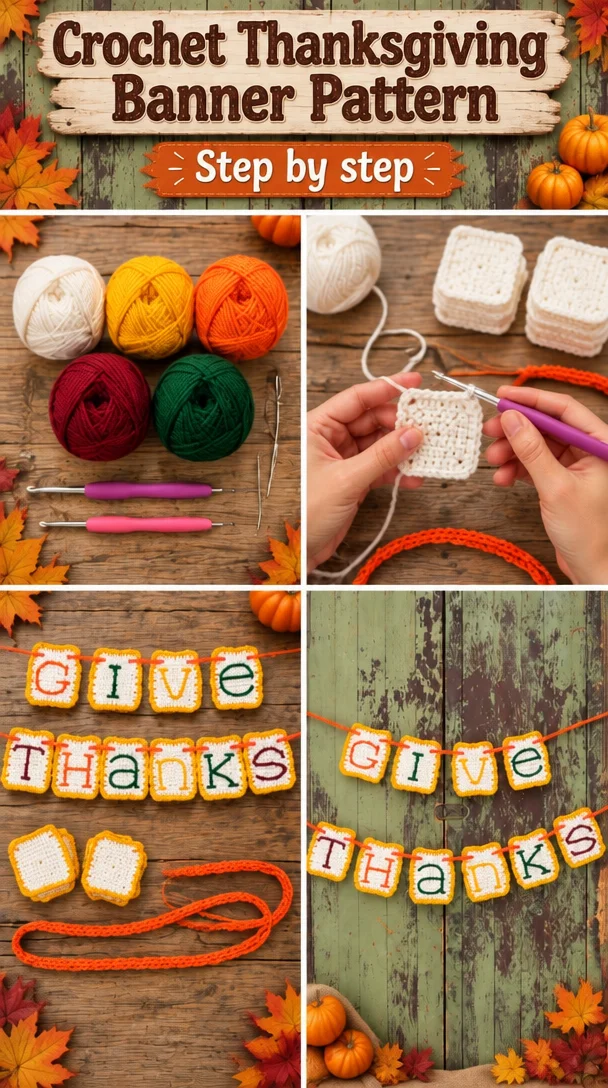
You will make 20 crochet squares in Soft White using the larger 5.5 mm hook. Ten squares remain blank, while surface slip stitches create lettering on the other ten.
Next, crochet Rope #1 and Rope #2 in Carrot yarn according to the required chain lengths. The squares are then joined and edged in pairs before the lettered and blank sections are arranged on the ropes to form the banner.
The main techniques are square construction, joining, edging, weaving in ends, and surface slip stitch, which is worked over the completed fabric to create the letters. The pattern is suitable for confident beginners who are comfortable following row instructions and maintaining even tension. The total working time depends on your crochet speed and how carefully you form the lettering.
Supplies List
- RED HEART® Super Saver® yarn in:
- Soft White
- Gold
- Carrot
- Claret
- Hunter Green
- Susan Bates® Crochet Hook, 5.5 mm
- Susan Bates® Crochet Hook, 3.75 mm
- Yarn needle
RED HEART® Super Saver® is a durable worsted-weight acrylic yarn, making it well suited to a decorative banner that may be stored and reused each year. Keep your tension consistent when selecting a substitute. A different yarn weight or fiber can change the square size, drape, and amount of yarn required.
Step-by-Step Instructions
-
Crochet the squares.
Using the 5.5 mm hook and Soft White yarn, make 20 squares. Follow the provided instructions for each row, checking your stitch count and keeping the edges straight as you work. -
Make the banner ropes.
Use Carrot yarn to create Rope #1 and Rope #2. Follow the specified chain lengths for each rope. Keep the chain stitches relaxed and even so the ropes do not tighten or distort when the squares are attached. -
Prepare the square pieces.
Weave in the yarn ends securely with the yarn needle. Use the surface slip stitch technique to add the lettering to 10 squares. Leave the remaining 10 squares blank. -
Join and edge the squares.
Join the squares in pairs according to the pattern instructions. Add the specified edging around the pairs, taking care to maintain even tension along every side. -
Assemble the banner.
Arrange the lettered squares in the correct order, with the blank squares positioned as instructed. Attach the completed pieces to Rope #1 and Rope #2 to form the banner. -
Finish the project.
Weave in any remaining ends. Check the joins, lettering, and rope attachments, then gently shape the squares so the banner hangs neatly.
Ways to Use Your Finished Project
- Hang the banner above a fireplace mantel for Thanksgiving.
- Display it across a dining room wall or buffet table.
- Use it as a welcoming decoration near an entryway.
- Add it to a seasonal dessert table, craft room, or family gathering space.
- Give it as a handmade hostess gift.
- Package it with coordinating autumn décor for a thoughtful holiday present.
- Photograph it as part of a craft-fair or handmade shop display.
For storage, keep the banner flat or loosely folded rather than tightly compressed. Avoid hanging it where moisture or direct sunlight could cause fading.
How to Care for Your Crochet Project
RED HEART® Super Saver® acrylic yarn is generally durable and easy to maintain, but always check the yarn label for the exact care recommendations.
- Wash gently according to the label instructions.
- Use cool or lukewarm water to help reduce color transfer between the darker shades and Soft White.
- Avoid harsh bleach unless the yarn label specifically permits it.
- Reshape the squares and edges while damp.
- Lay the banner flat to dry rather than hanging it wet, since moisture can stretch the ropes and joined squares.
- If needed, lightly block the pieces before final assembly or reshape the finished banner after washing.
- Store it clean and completely dry in a breathable container.
- Keep it away from prolonged direct sunlight to help preserve the colors.
Tips for Success
- Check your tension early. Make sure the first squares are consistent in size before crocheting all 20.
- Count every row carefully. Uneven stitch counts can make the squares skew or create wavy edges.
- Keep square corners square. Avoid accidentally adding stitches at the edges or missing stitches near the turning chain.
- Do not pull the surface slip stitches too tightly. Tight embroidery can pucker the fabric. Let the stitches rest naturally on the surface.
- Mark the lettering path if needed. A removable fabric marker can help you position letters evenly before working the surface stitches.
- Use a yarn needle with a blunt tip. It will help you weave in ends without splitting the yarn.
- Join with consistent tension. Tight joins can pull the squares together, while loose joins may leave gaps.
- Arrange all pieces before attaching them. Lay out the lettered and blank squares so the message and color placement are correct.
- Secure the rope attachments well. The banner will hang from these points, so weave in the ends firmly.
- Block or gently reshape before display. This helps the squares lie flat and gives the finished banner a cleaner appearance.
Customize Your Project
You can personalize the banner while keeping its basic construction intact:
- Replace the listed colors with a different seasonal palette, such as rust, brown, cream, and mustard.
- Use a darker background yarn for stronger contrast with the lettering.
- Add a contrasting edge around each square for a more defined patchwork effect.
- Create a shorter banner by making fewer lettered and blank sections, but this may change the wording and rope arrangement.
- Make a longer decorative banner by adding coordinating blank squares; additional squares will require more yarn and may require longer ropes.
- Add small crocheted leaves, pumpkins, or acorns near the ends.
- Use embroidered accents around the lettering for extra texture.
- Coordinate the banner with crochet coasters, table runners, or other autumn decorations.
Changing yarn weight or hook size will affect the finished square dimensions. If you make larger squares, you will also need to account for longer ropes and potentially more yarn.
Frequently Asked Questions
Is this crochet banner beginner-friendly?
Yes. The project is approachable for beginners who understand basic crochet rows and can follow stitch instructions. Surface slip-stitch lettering and joining require patience, but the separate-square construction makes the work manageable.
What yarn works best for the banner?
The specified RED HEART® Super Saver® yarn is a practical choice because it is durable, washable, and available in the needed colors. A substitute should be similar in weight and fiber to help preserve the square size and structure.
Can I use a different hook size?
You can, but the squares may become larger or smaller, and the yarn usage will change. A smaller hook usually creates a denser fabric, while a larger hook produces a looser fabric. Test one square first before making all 20.
How many squares are used for the lettering?
Ten squares receive the surface slip-stitch lettering. The other ten squares remain blank, creating the complete alternating banner arrangement.
How do I keep the lettering from puckering?
Work the surface slip stitches loosely enough to rest on top of the square. Avoid pulling the yarn tightly between stitches, and gently smooth or block the square after the lettering is complete.
Why are my squares curling?
Mild curling can result from uneven tension, tight turning chains, or missed and added stitches. Check the row instructions and stitch count. Blocking or gentle reshaping can also help once the square is finished.
Can I make the banner larger or smaller?
You can adjust the number of squares, but changing the layout may affect the wording and rope lengths. Using a different hook or yarn weight will also change the size of every square, so make a test square first.
How should I wash the finished banner?
Follow the yarn-label instructions. Use gentle washing, avoid excessive agitation, reshape the squares while damp, and dry the banner flat to prevent stretching.
Can I sell banners made from this pattern?
The source instructions do not specify selling permissions. Check the original designer’s usage terms before selling finished items, and credit the designer when required.
Print
Crochet Give Thanks Banner
Description
A warm, handmade decoration for autumn gatherings, Thanksgiving displays, or a welcoming seasonal entryway.
Materials
- RED HEART® Super Saver® yarn in Soft White (quantities unspecified)
- RED HEART® Super Saver® yarn in Gold (quantities unspecified)
- RED HEART® Super Saver® yarn in Carrot (quantities unspecified)
- RED HEART® Super Saver® yarn in Claret (quantities unspecified)
- RED HEART® Super Saver® yarn in Hunter Green (quantities unspecified)
- Susan Bates® Crochet Hook, 5.5 mm (1)
- Susan Bates® Crochet Hook, 3.75 mm (1)
- Yarn needle (1)
Instructions
- Crochet the squares. Using the 5.5 mm hook and Soft White yarn, make 20 squares. Follow the provided instructions for each row, checking your stitch count and keeping the edges straight as you work.
- Make the banner ropes. Use Carrot yarn to create Rope #1 and Rope #2. Follow the specified chain lengths for each rope. Keep the chain stitches relaxed and even so the ropes do not tighten or distort when the squares are attached.
- Prepare the square pieces. Weave in the yarn ends securely with the yarn needle. Use the surface slip stitch technique to add the lettering to 10 squares. Leave the remaining 10 squares blank.
- Join and edge the squares. Join the squares in pairs according to the pattern instructions. Add the specified edging around the pairs, taking care to maintain even tension along every side.
- Assemble the banner. Arrange the lettered squares in the correct order, with the blank squares positioned as instructed. Attach the completed pieces to Rope #1 and Rope #2 to form the banner.
- Finish the project. Weave in any remaining ends. Check the joins, lettering, and rope attachments, then gently shape the squares so the banner hangs neatly.
Notes
Keep your tension consistent when selecting a substitute yarn. A different yarn weight or fiber can change the square size, drape, and amount of yarn required.