

This post contains Amazon affiliate links. As an Amazon Associate I earn from qualifying purchases.
Why 19 Quick Halloween Crochet Projects Designed For One-Weekend Makes Is So Soothing to Crochet
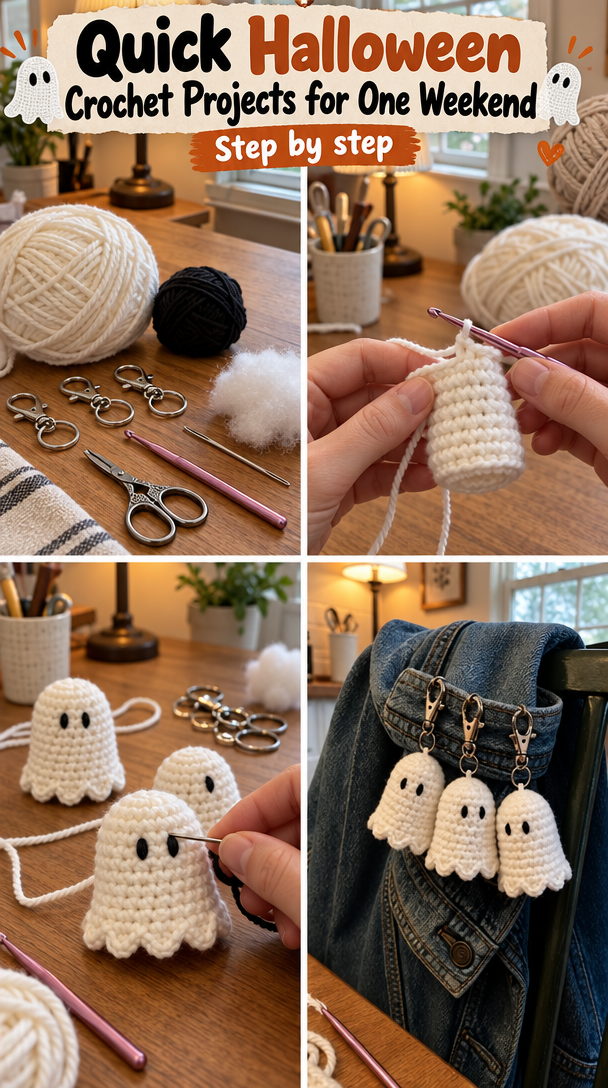
Late afternoon light settles across the yarn while the small pull of the hook draws each loop into place. This Halloween crochet project grows quietly beside your coffee mug, one steady stitch at a time, and it fits beautifully among 19 Quick Halloween Crochet Projects Designed For One-Weekend Makes. The finished piece is a small, stuffed pumpkin with a ridged surface, a simple shape, and just enough seasonal charm for a porch basket or living room shelf. It takes several calm evenings, not a heroic stretch of weekend energy, and the repeated rounds give your hands a gentle rhythm to follow.
The Rhythm of This Crochet Project
This little pumpkin comes together from one flat strip worked in half double crochet, then joined and gathered at both ends. Half double crochet, abbreviated hdc, sits between single crochet and double crochet in height, so it creates a fabric that feels substantial without becoming stiff. The back loop only, or BLO, means you work through the loop farthest from you, leaving a raised ridge on the front of the fabric.
The ridges catch the light as you turn the work. The first few rows may curl slightly, but the strip relaxes once it grows longer and you can feel its weight settle across your lap. You will make a rectangle, sew its short edges together, gather one opening, add polyester fiberfill, and close the second opening. A small stem finishes the top.
This pattern uses US crochet terms. UK readers often find these posts too, and the same word can mean a different stitch there, especially “double crochet,” so please use the abbreviations and explanations given here. The pattern is easy, with one fiddly moment when you gather the openings, and most crocheters can finish it in about 2 to 4 hours of active work spread across one or two evenings.
Pattern at a Glance
Keep this short version nearby when you settle into your chair.
- Skill level: Easy
- Finished size: 6 inches tall by 7 inches wide (15 cm by 18 cm)
- Gauge: 14 half double crochet stitches and 10 rows measure 4 inches (10 cm)
- Yarn: Worsted weight (weight 4, medium), about 170 yards per 100 g skein, 110 yards total
- Hook size: H-8 (5.0 mm)
- Other supplies: Yarn needle, scissors, stitch marker, tape measure, polyester fiberfill, and a 3-inch wooden stem or crocheted stem
- Stitch multiple: Any number of stitches, with 28 foundation-chain stitches used here
- Estimated time: 2 to 4 hours
Materials for 19 Quick Halloween Crochet Projects Designed For One-Weekend Makes
- About 110 yards of worsted weight yarn, weight 4, medium, in cotton or cotton-blend fabric, from a skein that contains about 170 yards per 100 g; you will use about 65 g (2.3 oz), or less than one skein (easy to find)
- H-8 (5.0 mm) crochet hook; half a size up or down is fine depending on your tension
- Yarn needle with a rounded tip for sewing and weaving in the ends
- Scissors
- One stitch marker, optional, for marking the first round when you join the body
- Tape measure
- Small amount of polyester fiberfill, about 1.5 oz (43 g), for stuffing
- One 3-inch wooden stem, optional, or a small crocheted stem made from leftover brown yarn
- One strong sewing needle and matching thread, optional, if you use a wooden stem
I recommend cotton or a cotton blend because the fibers hold the ridges clearly and give the pumpkin enough body to sit upright. A worsted weight cotton yarn also handles gentle washing well, which matters when a seasonal decoration spends a year in a storage box. The yarn should feel smooth enough for your hook to slide through without snagging.
Make a small swatch before you begin if your tension tends to vary. Twenty minutes spent checking gauge can save you from a squat pumpkin or a loose fabric that lets stuffing show through. Work 14 half double crochet stitches and 10 rows, then measure the center 4 inches (10 cm), not the edge. As a substitution, choose another worsted weight cotton or cotton blend with a similar yardage per skein. A different fiber may change the drape and finished size, so use your measurements rather than the label alone.
Step by Step
- Difficulty and repeat: This is an easy project worked in US crochet terms. The body uses any number of stitches, and this version begins with 28 chain stitches, abbreviated ch, which form the foundation chain, or the starting row of loops.
- Chain 28. In the second chain from the hook, work one half double crochet, or hdc, by yarning over, inserting the hook, yarning over again, pulling up a loop, and then pulling through all three loops on the hook. Work one hdc in each remaining chain. You have 27 hdc.
- Chain 1 for the turning chain, which lifts your hook to the height of the next row. Turn your work, then make one hdc in the back loop only, or BLO, of each stitch across. The unused front loop creates the raised ridge. You still have 27 hdc.
- Repeat the second row until you have 28 rows total. Count the little ridges as you go, and keep the strip flat on the table every few rows so you can see its shape. The completed rectangle should measure about 7 inches wide by 8 inches tall (18 cm by 20 cm).
- Do not worry if the first rows curl or the edges look uneven. The easiest way to spot a missed stitch is to count the small V shapes along the top edge; if you see only 26 instead of 27, pull back the last few stitches calmly and replace the missing hdc.
- Fasten off, leaving a yarn tail about 18 inches long (46 cm). Bring the two short edges together so the ridges run vertically. Use the yarn needle and the tail to sew the edges together with a whip stitch, working through both layers.
- Turn the tube so the seam rests inside. Thread a fresh yarn tail onto the needle and make long running stitches around one open edge, about 1/4 inch (6 mm) from the edge. A running stitch moves in and out through the fabric in an even line.
- Pull the yarn tail gently to gather the opening. Leave a small hole, add a pinch of fiberfill, then continue adding stuffing in small amounts. The pumpkin should feel full but springy, not hard, because firm stuffing can flatten the ridges.
- Pull the gathering yarn closed and make several secure stitches across the opening. Knot the yarn, then pass the needle through the pumpkin and out a few inches away before trimming the tail. This buries the end inside instead of leaving a visible knot.
- Gather the second opening in the same way. Before closing it fully, check the shape from the side and adjust the stuffing with your fingertips. A little extra fiberfill near the middle helps the pumpkin stand, while too much near the ends can make it look narrow.
- For a wooden stem, place it in the small opening at the top and secure it with a few stitches through the crocheted fabric and around the stem. If you prefer yarn, chain 6, slip stitch, or sl st, in each chain back toward the beginning to make a narrow cord, then sew it firmly in place.
- Weave in the ends by threading each tail through several stitches on the inside, changing direction once before trimming. This is called weaving in the ends, and it keeps your work from loosening during handling. Shape the pumpkin with your hands and leave it unblocked, since the stuffed form gives it enough structure.
Where This Piece Finds Its Place
The finished pumpkin feels at home in a shallow basket beside the armchair, on a stack of cookbooks, or at the center of a fall table with a few pinecones. Its ridged surface catches dust easily, so I like to keep it where I can lift it and give it a gentle shake rather than tuck it behind other decorations.
It also makes a thoughtful small gift when you place it in a kraft box with a handwritten note. Make three in slightly different orange, cream, and muted green shades for a simple porch grouping, or add one to a host gift with tea and a small candle. If you sell finished items, my policy is simple: I sell only pieces I make myself and always credit the pattern designer when the pattern is not mine.
Washing, Drying, Storing
For a cotton or cotton-blend pumpkin, spot clean first with a damp cloth. When it needs a fuller wash, place it in a mesh bag and use a gentle cycle with cold or warm water and mild detergent. Press out excess water in a towel, reshape the pumpkin with your hands, and dry it flat. Never hang it wet, because the stuffing can pull the crocheted fabric out of shape.
This project does not need wet blocking because the stuffing creates its form. If you make it from acrylic yarn instead, block cold or use steam from a distance, since acrylic can melt under a hot iron. Do not press a hot iron directly against acrylic fabric.
Store the pumpkin folded only if you can remove the stuffing, but for this finished shape, place it upright in a breathable box with tissue paper around it. Avoid sealed plastic when the piece may hold moisture. Cotton does not need moth protection, though cedar or lavender sachets can keep a storage box pleasant. Keep leftover yarn with its label so you still have the fiber content and dye lot if you make a matching piece later.
Small Ways to Make It Your Own
Try a thicker yarn if you want a larger pumpkin with deeper ridges. A bulky yarn will increase the finished size and make the fabric softer and more prominent, but you will need more stuffing and a hook suited to that yarn. A thinner yarn creates a smaller ornament and may need a smaller hook to keep the stuffing from showing through.
Choose a quiet color palette. Burnt orange gives the familiar autumn feeling, while cream, charcoal, olive, or dusty rose works well in homes that use softer seasonal colors. You can also change colors every 4 rows for simple color blocking, carrying the unused yarn loosely inside the seam area.
For a firmer, less stretchy pumpkin, substitute single crochet, or sc, for the half double crochet. Single crochet makes a shorter, denser stitch, so the finished piece will feel more compact and may need additional rows to reach the same height.
Resize the body by changing the starting chain and keeping the number of stitches consistent across every row. Add or remove rows to change the height, but keep the shape balanced by aiming for a rectangle whose width is close to its height. A simple round of single crochet around either opening can also give the edges a cleaner look before you gather them.
For gifting, make a tiny version with 16 foundation-chain stitches and fewer rows, then tie it to a wrapped present. For a larger centerpiece, use two pumpkins in related shades and add a short crocheted leaf. Keep any small stem firmly attached, especially if the decoration may reach children under three.
Frequently Asked Questions About 19 Quick Halloween Crochet Projects Designed For One-Weekend Makes
Can I use a different hook size for this crochet pumpkin?
Yes, you can use a different hook size, but it will change the fabric and finished size. A smaller hook creates denser stitches and helps keep the polyester fiberfill from peeking through. A larger hook makes a softer, looser fabric and may create a wider pumpkin. H-8 (5.0 mm) gives the stated gauge, but your tension matters more than the letter on the hook.
What yarn can I substitute for the recommended worsted weight yarn?
Choose another worsted weight yarn, listed as weight 4, medium, with a similar yardage per skein. Cotton or a cotton blend will keep the ridges clear and tolerate gentle washing. Acrylic also works, though it can feel softer and may stretch differently. Check your swatch for gaps before stuffing, and remember that superwash wool tolerates machine washing better than untreated wool, which can felt.
What should I do if I find a mistake several rows later?
Stop before pulling anything apart and look at the fabric from the right side, or RS, where the ridges show clearly. If a missed stitch changes the edge count, pull back to that row and redo it. If the mistake sits inside the fabric and does not affect the shape, you can often leave it. Place a marker in the active loop before unraveling so it cannot slip away.
Is this pumpkin a good project for a beginner?
Yes, this pumpkin suits a beginner who feels comfortable making a chain and working half double crochet. The repeated rows are simple, and the main new skill is sewing and gathering the openings. Take your time when you join the short edges, because a neat seam makes the finished shape much easier to control. You can practice the gathering on a scrap of yarn before closing the pumpkin.
How long does this Halloween crochet project take?
Plan on 2 to 4 hours of active crochet and finishing time. Your first attempt may take closer to four hours because counting the rows and gathering the openings can feel fiddly. Once your hands settle into the half double crochet rhythm, the strip grows steadily. The work may take one long afternoon or two shorter evenings with a break between them.
Does this pattern use US or UK crochet terms?
This pattern uses US crochet terms throughout. The main stitch is half double crochet, abbreviated hdc, and the instructions also use chain, slip stitch, single crochet, back loop only, and turning chain in the US sense. UK readers should check a conversion chart before beginning, because a UK double crochet is the same height as a US single crochet, not a US double crochet.
Take the Time You Need
Let the pumpkin grow at the pace your hands choose. You can pause after a few rows, leave the hook in the working loop, and return when the room feels quiet again. The small ridges do not ask for perfection, only your attention, and the finished piece will carry the gentle evidence of an evening spent making something with care.
Print
Easy Halloween Crochet Pumpkin Pattern
- Total Time: 240 minutes
Description
Create a small, stuffed pumpkin with a ridged surface, perfect for autumn decorations.
Materials
- About 110 yards of worsted weight yarn, weight 4, medium, in cotton or cotton-blend fabric
- H-8 (5.0 mm) crochet hook
- Yarn needle with a rounded tip
- Scissors
- One stitch marker (optional)
- Tape measure
- Small amount of polyester fiberfill (about 1.5 oz)
- One 3-inch wooden stem (optional) or a small crocheted stem made from leftover brown yarn
- One strong sewing needle and matching thread (optional)
Instructions
- Chain 28.
- In the second chain from the hook, work one half double crochet (hdc). Work one hdc in each remaining chain. You have 27 hdc.
- Chain 1 for the turning chain. Turn your work, then make one hdc in the back loop only (BLO) of each stitch across. You still have 27 hdc.
- Repeat the second row until you have 28 rows total.
- Fasten off, leaving a yarn tail about 18 inches long.
- Bring the two short edges together so the ridges run vertically. Use the yarn needle and the tail to sew the edges together with a whip stitch.
- Turn the tube so the seam rests inside. Thread a fresh yarn tail onto the needle and make long running stitches around one open edge, about 1/4 inch from the edge.
- Pull the yarn tail gently to gather the opening. Leave a small hole, add a pinch of fiberfill, then continue adding stuffing in small amounts.
- Pull the gathering yarn closed and make several secure stitches across the opening. Knot the yarn and bury the end inside.
- Gather the second opening in the same way, adjusting the stuffing before closing fully.
- For a wooden stem, place it in the small opening at the top and secure it with a few stitches or use a yarn stem made by chaining 6 and slip stitching back.
- Weave in the ends by threading each tail through several stitches on the inside before trimming.
- Shape the pumpkin with your hands.
Notes
A cotton or cotton blend is recommended for clear ridges and durability. Use non-stretchy yarn if desired for a firmer pumpkin.
- Active Time: 240 minutes